GETTING STARTED
ON THE EVERSENSE® E3 CGM SYSTEM

Welcome and congratulations on getting started with
the Eversense E3 CGM System, the only long-term CGM
that lasts 6 months with a single sensor.
The Eversense® E3 Continuous Glucose Monitoring (CGM) System is indicated for continually measuring glucose levels for up to 180 days in persons with diabetes age 18 and older. The system is indicated for use to replace fingerstick blood glucose (BG) measurements for diabetes treatment decisions. Fingerstick BG measurements are still required for calibration primarily one time a day after day 21, and when symptoms do not match CGM information or when taking medications of the tetracycline class. The sensor insertion and removal procedures are performed by a health care provider. The Eversense E3 CGM System is a prescription device; patients should talk to their health care provider to learn more.
For important safety information, see https://www.ascensiadiabetes.com/eversense/safety-info/
Eversense, Eversense E3 Continuous Glucose Monitoring, and the Eversense logo are trademarks of Senseonics, Incorporated. Other brands and their products are trademarks or registered trademarks of their respective holders and are used solely for informative purposes. No relationship or endorsement should be inferred or implied.
DISCLAIMER
System set-up
In this tutorial , we briefly discuss the system 24-hour Warm Up Phase, and demonstrate how to enter your personalized glucose settings into the Eversense App.

But first, if you’ve not yet paired your Eversense E3 Smart Transmitter with the Eversense App, and linked the Smart Transmitter with your Eversense E3 sensor,
you should do that before continuing on.


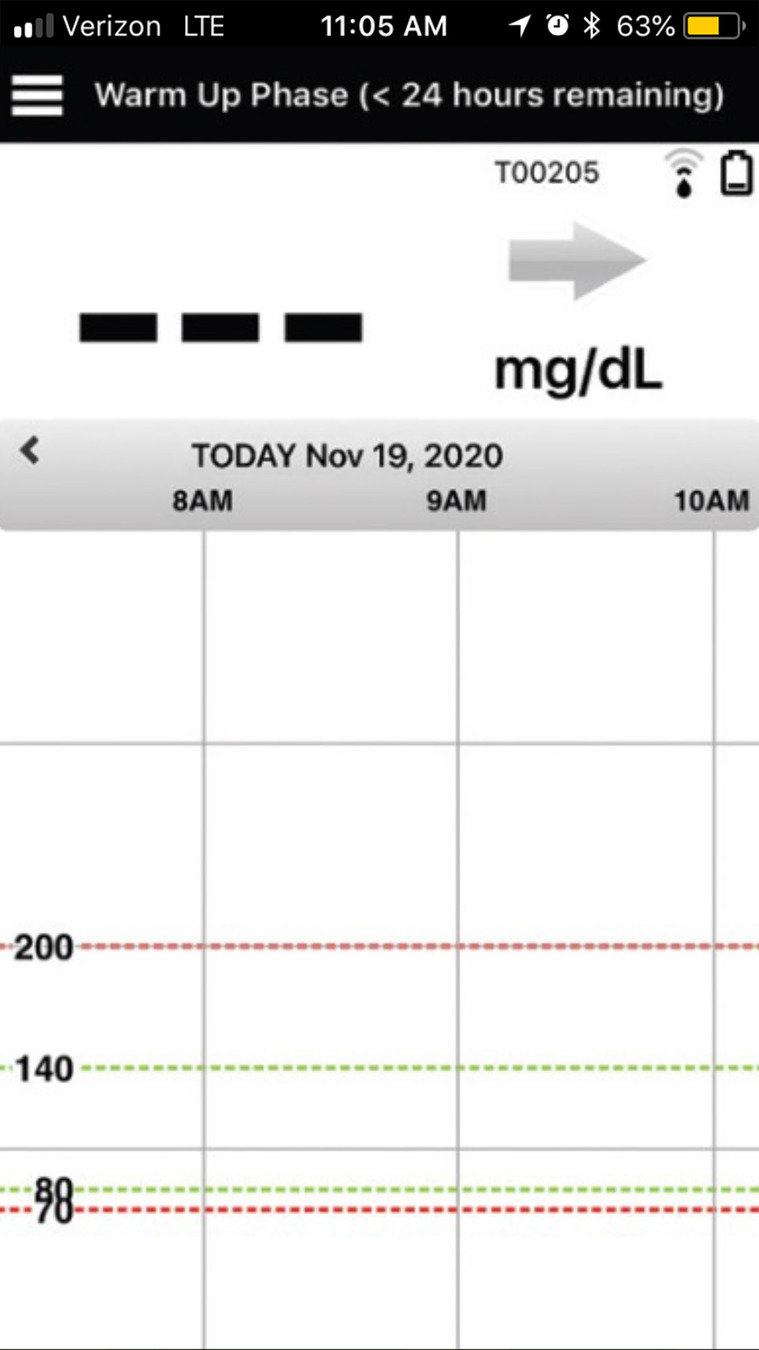
24-HOUR WARM UP PHASE

Refer to the available System Set-Up Videos or your Eversense E3 CGM System Quick Reference Guide to assist you.
24-HOUR WARM UP PHASE
When you recently linked your E3 Smart Transmitter with the Eversense E3 sensor, the 24-hour Warm Up Phase countdown began, so we refer to this 24-hour time period as Day 1.
24-HOUR WARM UP PHASE
24-HOUR WARM UP PHASE
You won’t be getting any glucose data during Day 1, and it’s not necessary to wear your Smart Transmitter over your sensor.
But, it’s a great time to program your personalized glucose settings into your Eversense E3 CGM system.
To do this, your Eversense E3 Smart Transmitter and Eversense Mobile app must be communicating.
When you open your Eversense app, the Eversense E3 Smart Transmitter should connect automatically.
SET UP THE EVERSENSE MOBILE APP
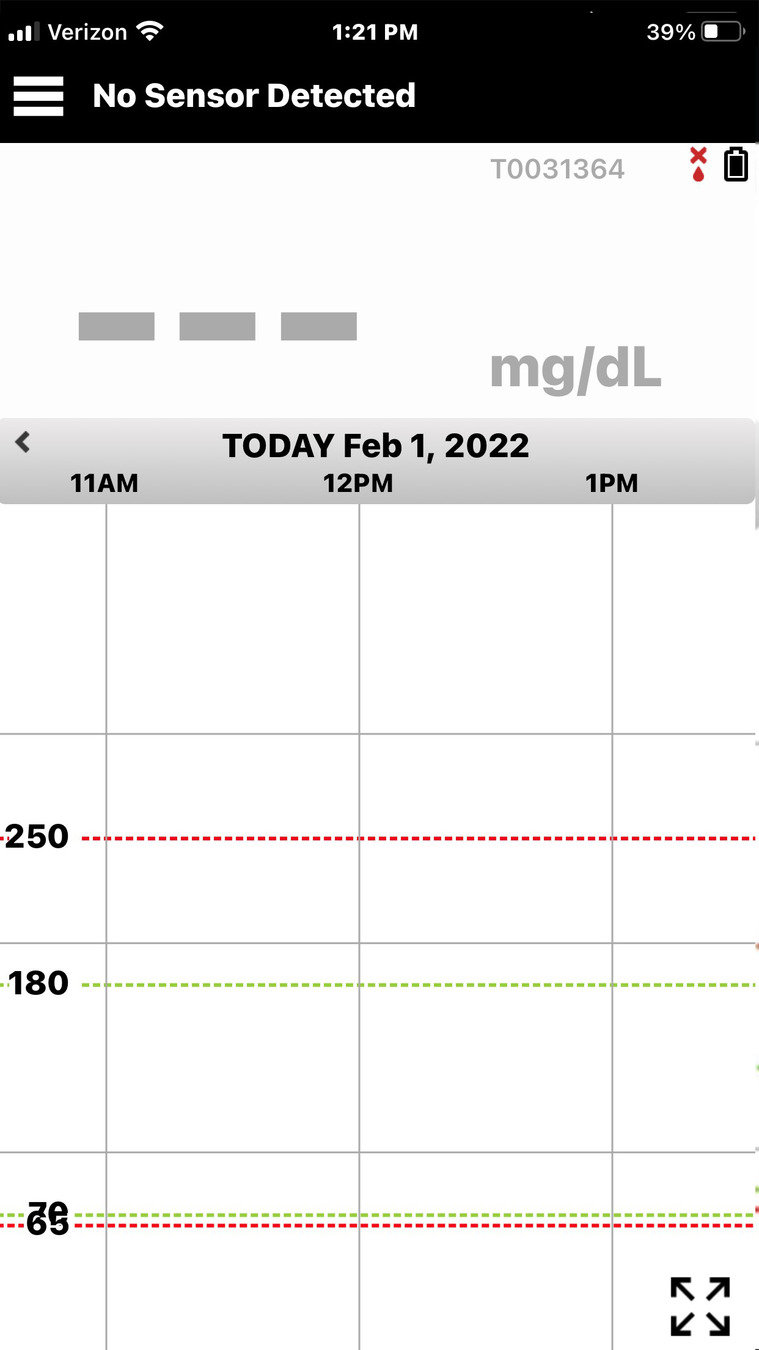

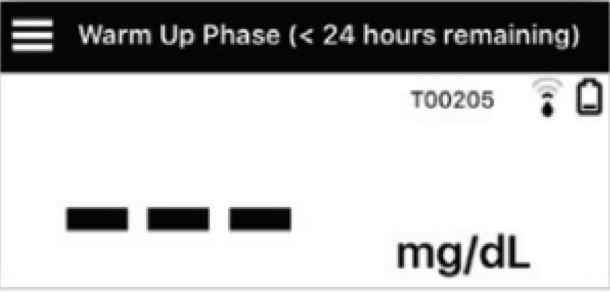
Looking at the My Glucose Home screen, you’ll notice the transmitter battery icon on the top right is black.
The app status bar will say either Warm-Up Phase, or No Sensor Detected.
SET UP THE EVERSENSE MOBILE APP
If they are not connected, the icon will be grey and the app status bar will say No Transmitter Connected.

|
If No Transmitter Connected is displayed in the app status bar, jump to the Optional Connection Tips section of Day 1 in the menu. |
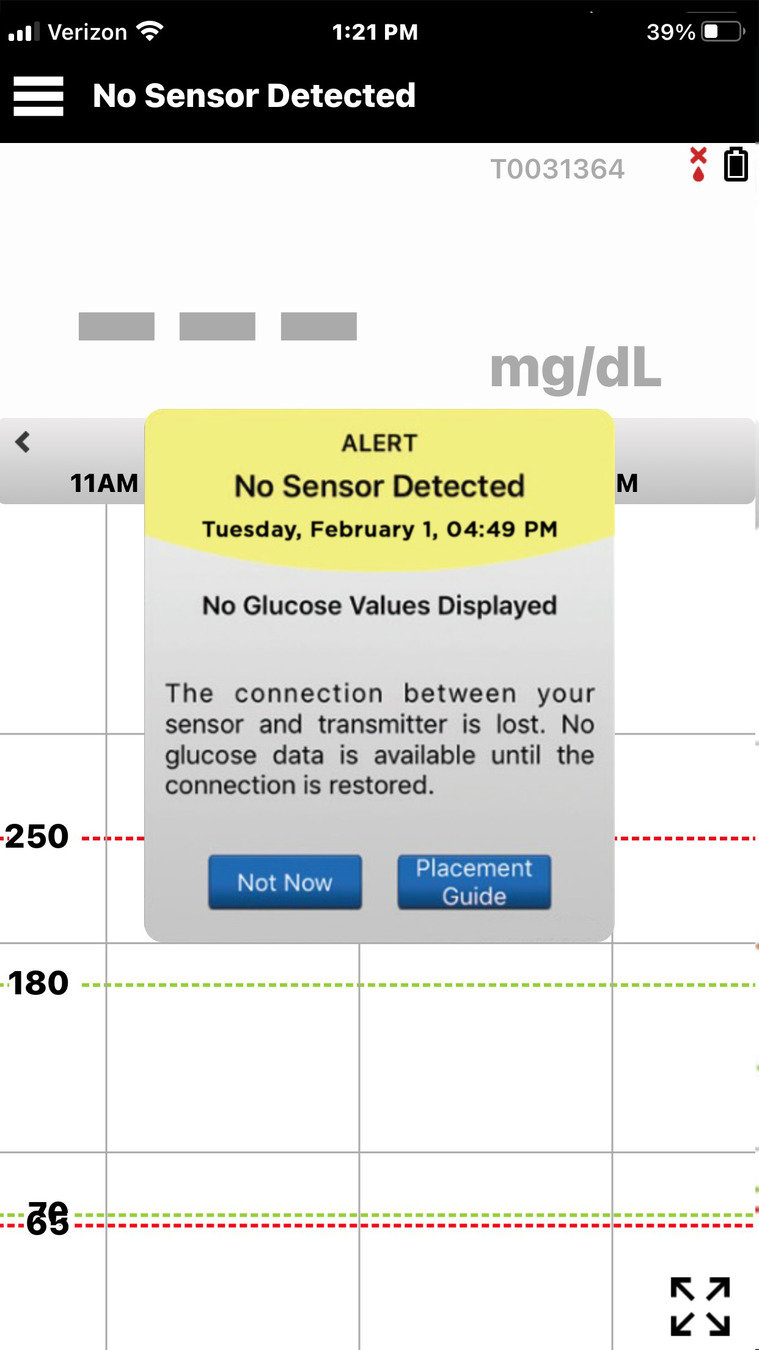
SET UP THE EVERSENSE MOBILE APP
As you begin programming your personalized settings into your mobile app, you may see a No Sensor Detected alert pop-up. You can just tap “Not Now”.
Alerts and Notifications will be covered in the Day 2 and Day 3 chapters.
PERSONALIZED SETTINGS
To personalize your Eversense E3 CGM system, you’ll need your CGM settings for your glucose alerts levels and glucose target levels.
|
If you’re not sure of what personalized settings you should enter, consult with your health care provider and then come back to this training. |

ENTER PERSONALIZED SETTINGS
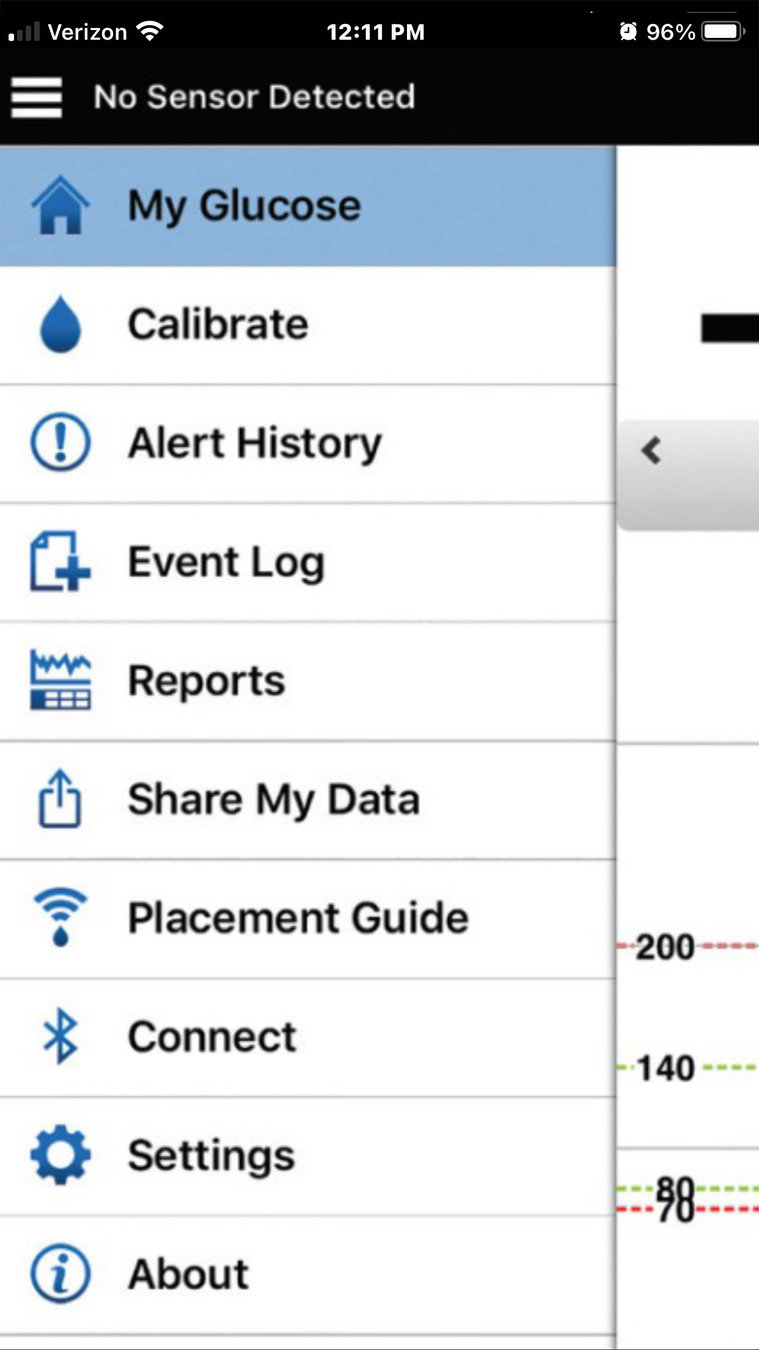
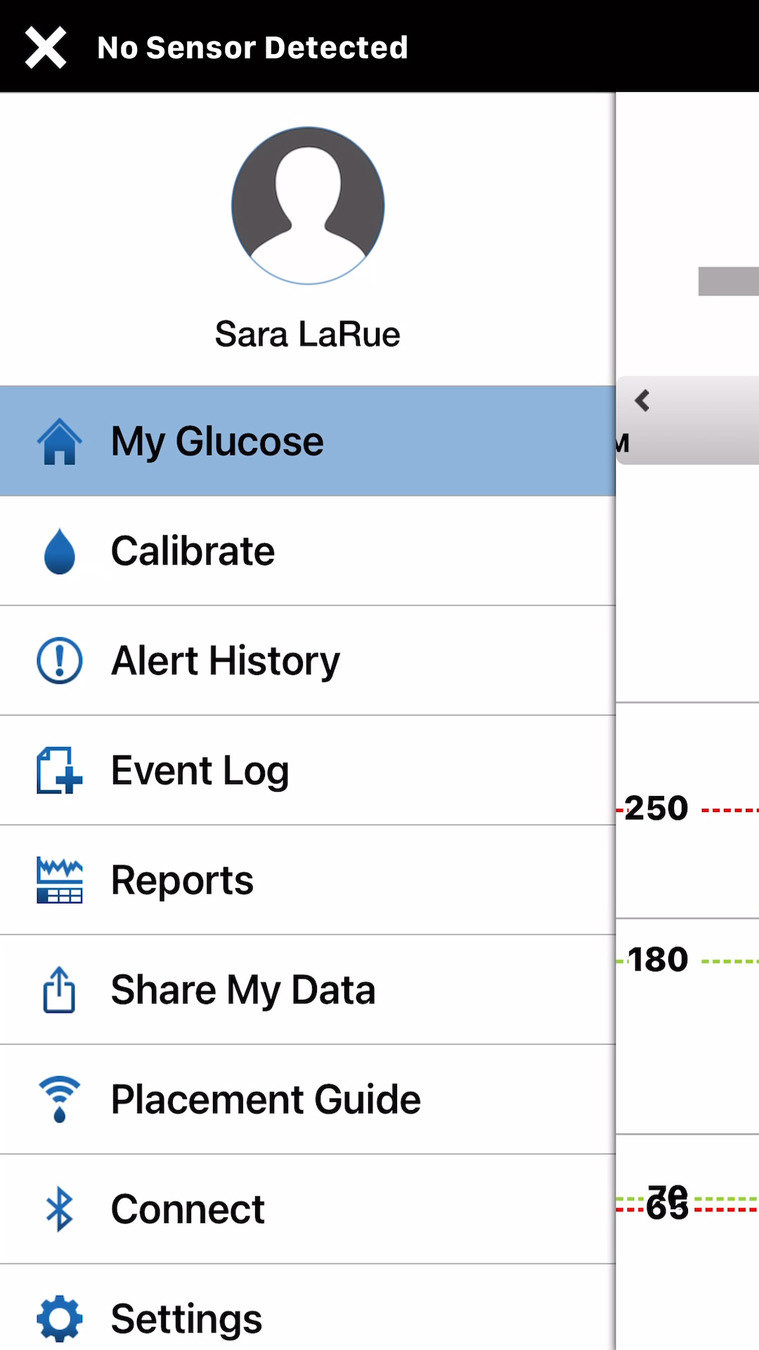
To get to your personalized settings, tap on the menu icon to open the Main Menu.
ACCESS PERSONAL SETTINGS
Scroll down to tap Settings.
ACCESS PERSONAL SETTINGS
To get to your personalized settings, tap on the menu icon to open the Main Menu.
Then Tap Glucose.
ACCESS PERSONAL SETTINGS
Scroll down to tap Settings.
To get to your personalized settings, tap on the menu icon to open the Main Menu.
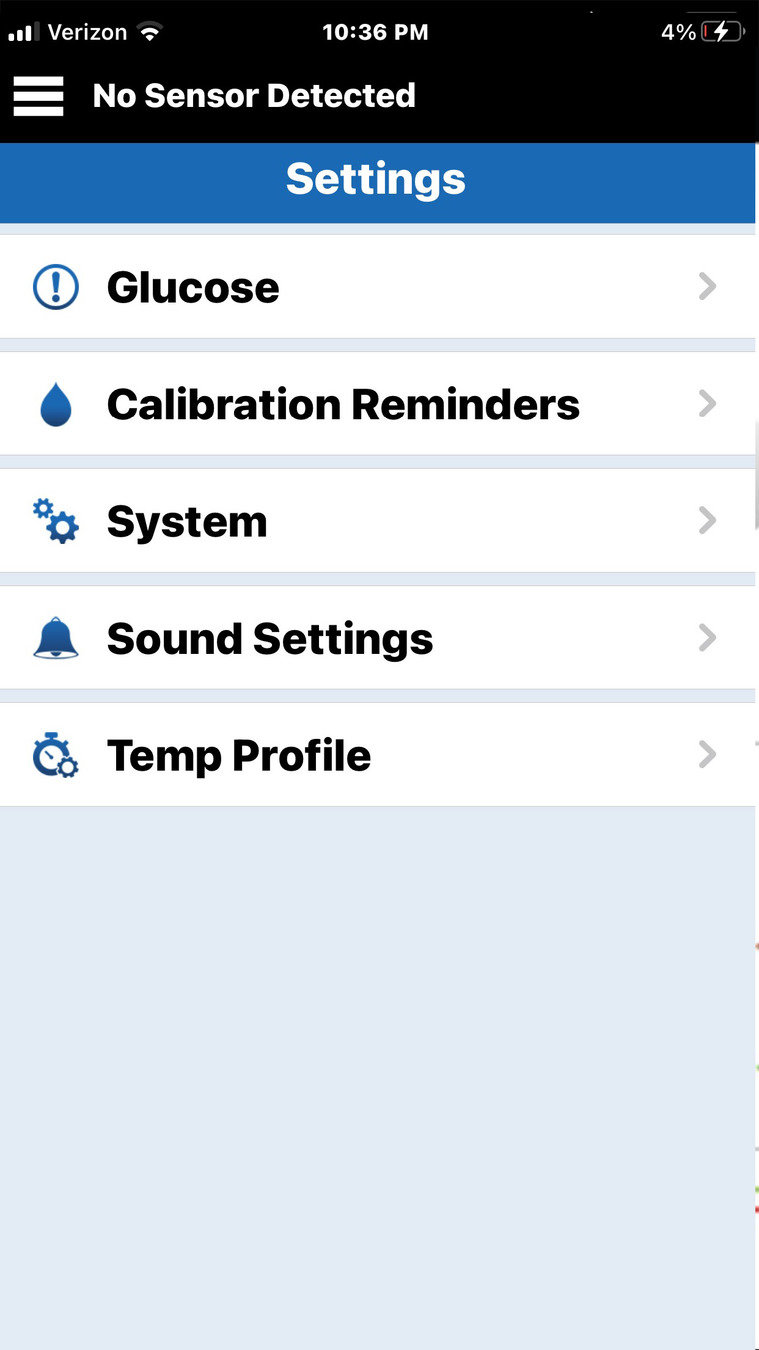
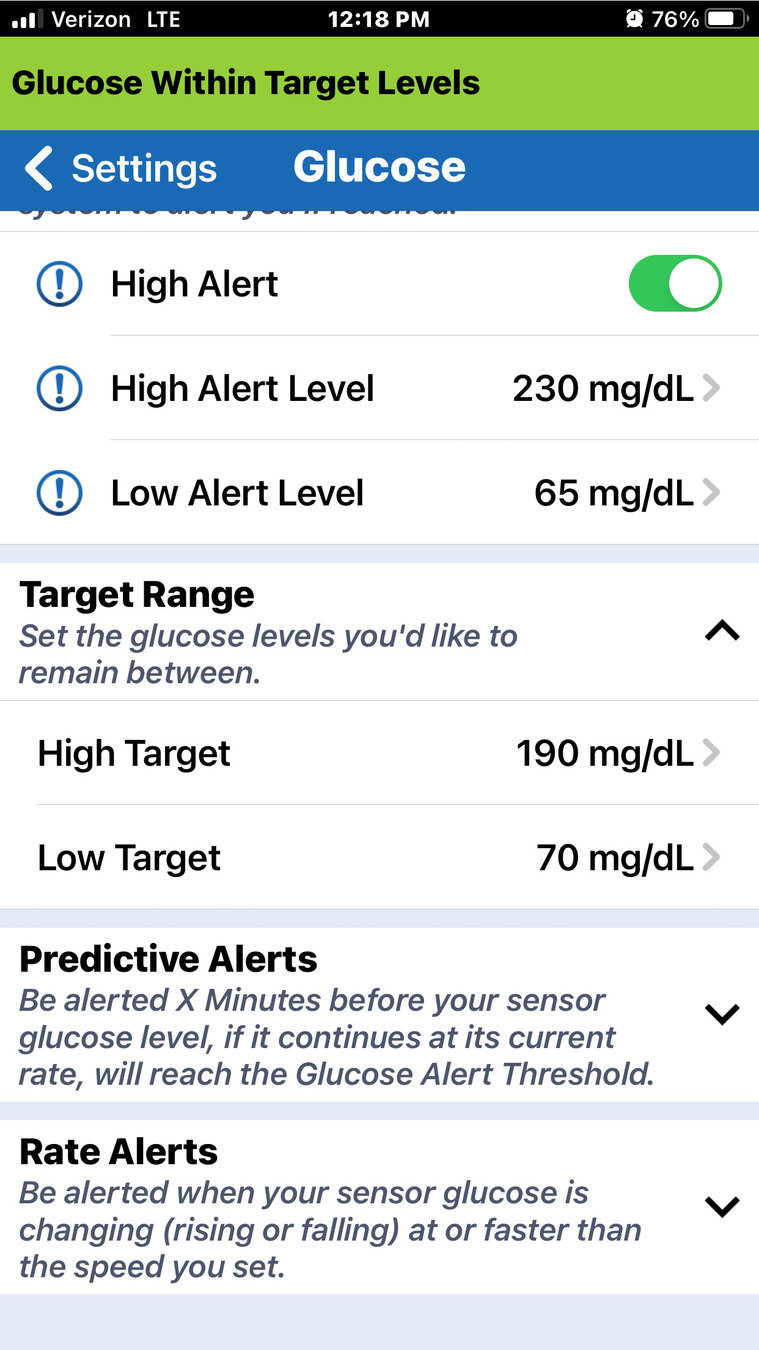
As you go into the glucose settings, you’ll see the Glucose Alerts section at the top.
Your glucose alerts will let you know when your glucose level has passed a critical high or low glucose threshold, as determined by your health care provider.
PERSONALIZE GLUCOSE ALETRS
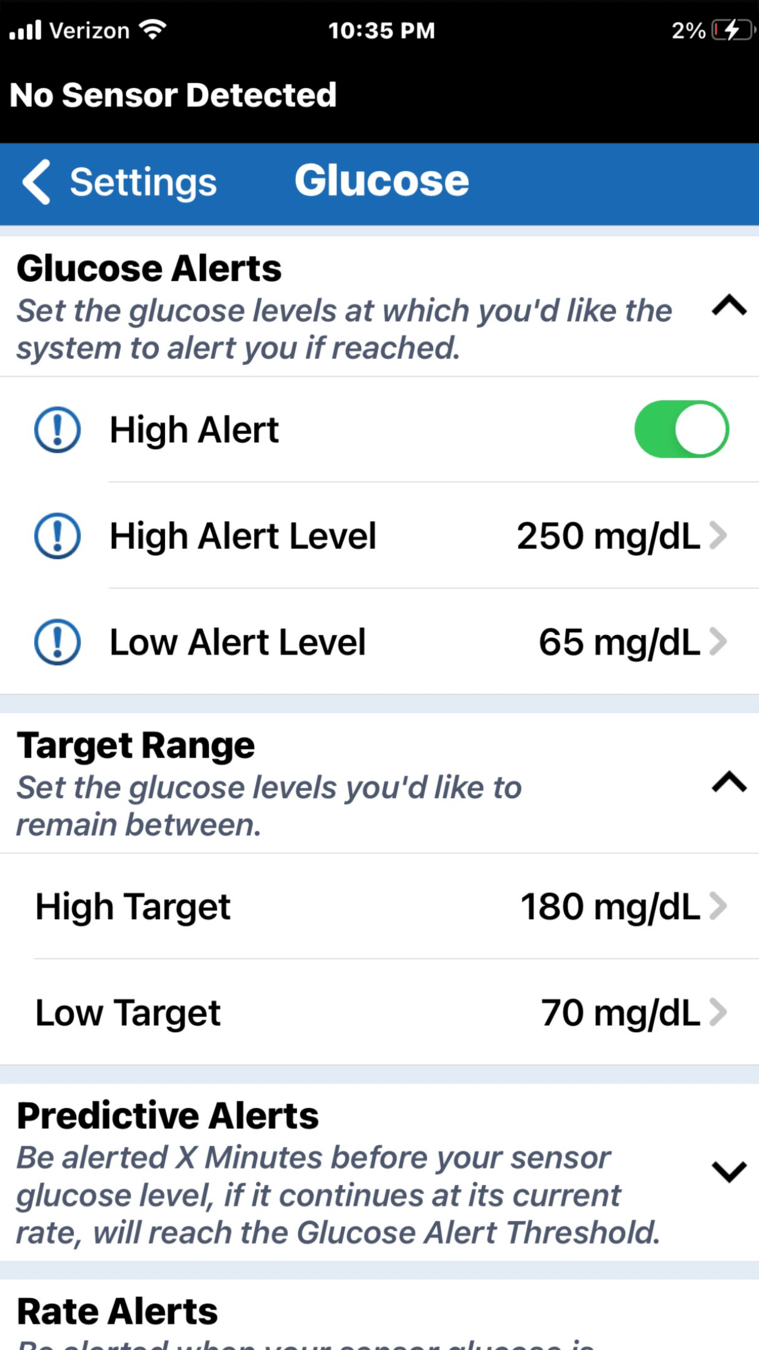
Note that the default settings
are 250 mg/dL for a high glucose alert
and 65 mg/dL for a low glucose alert.
PERSONALIZE GLUCOSE ALETRS
As you go into the glucose settings, you’ll see the Glucose Alerts section at the top.
Your glucose alerts will let you know when your glucose level has passed a critical high or low glucose threshold, as determined by your health care provider.
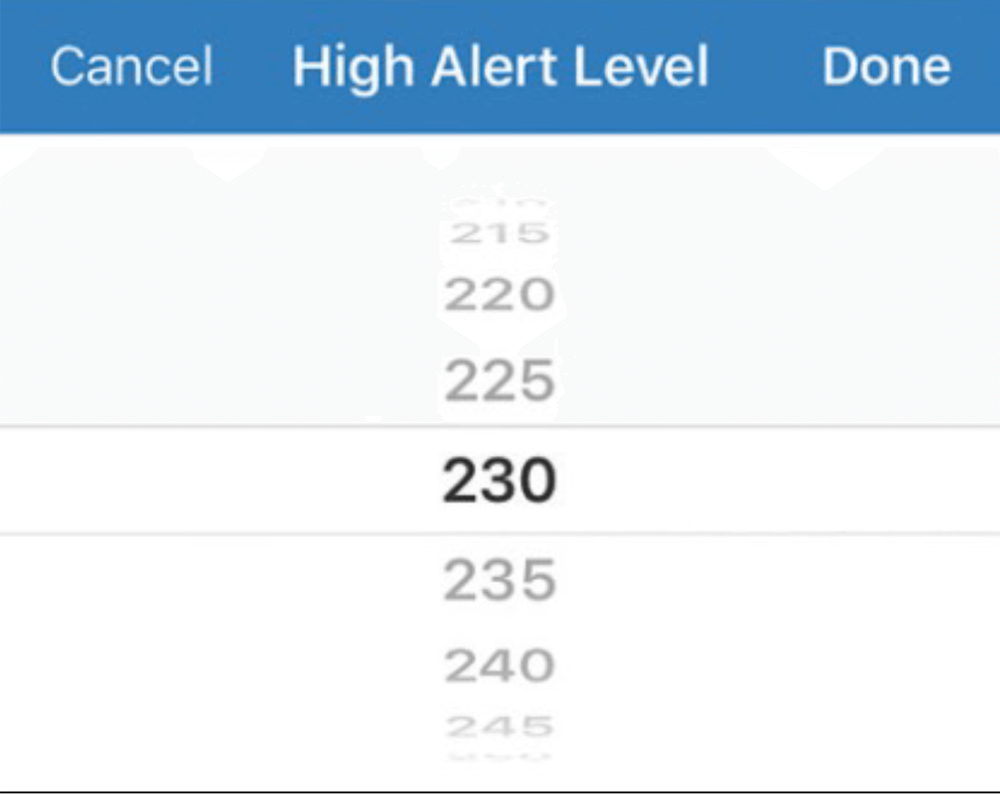
When you want to personalize a glucose alert setting, simply tap on the setting you would like to change,
PERSONALIZE GLUCOSE ALETRS
Scroll to the desired value.
Then tap Done.
PERSONALIZE GLUCOSE ALETRS
When you want to personalize a glucose alert setting, simply tap on the setting you would like to change,
Always discuss the right alert settings for you with your healthcare provider.
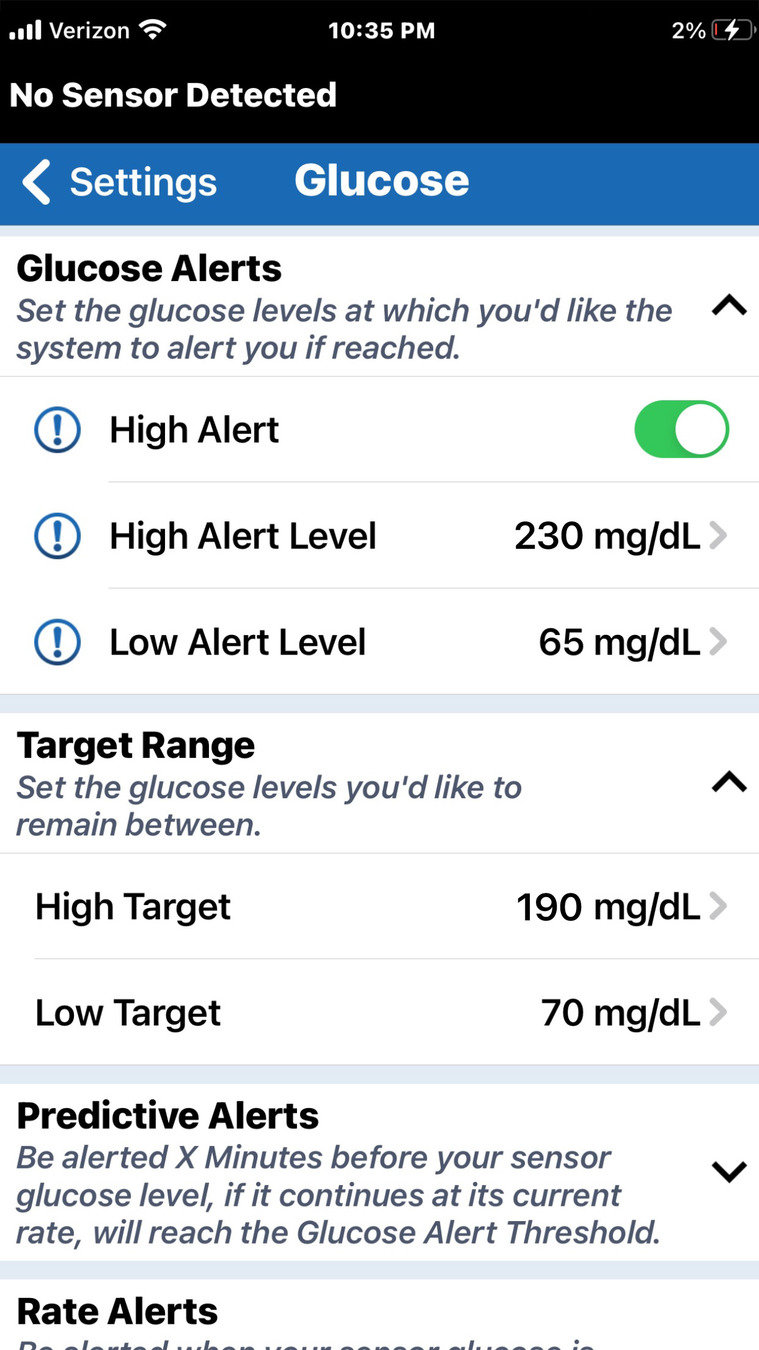
Below Glucose Alerts is where
you set your glucose Target Range.
Your glucose target range is the area where you and your health care provider agree your glucose levels should be most of the time.
PERSONALIZE GLUCOSE TARGETS

PERSONALIZE GLUCOSE TARGETS
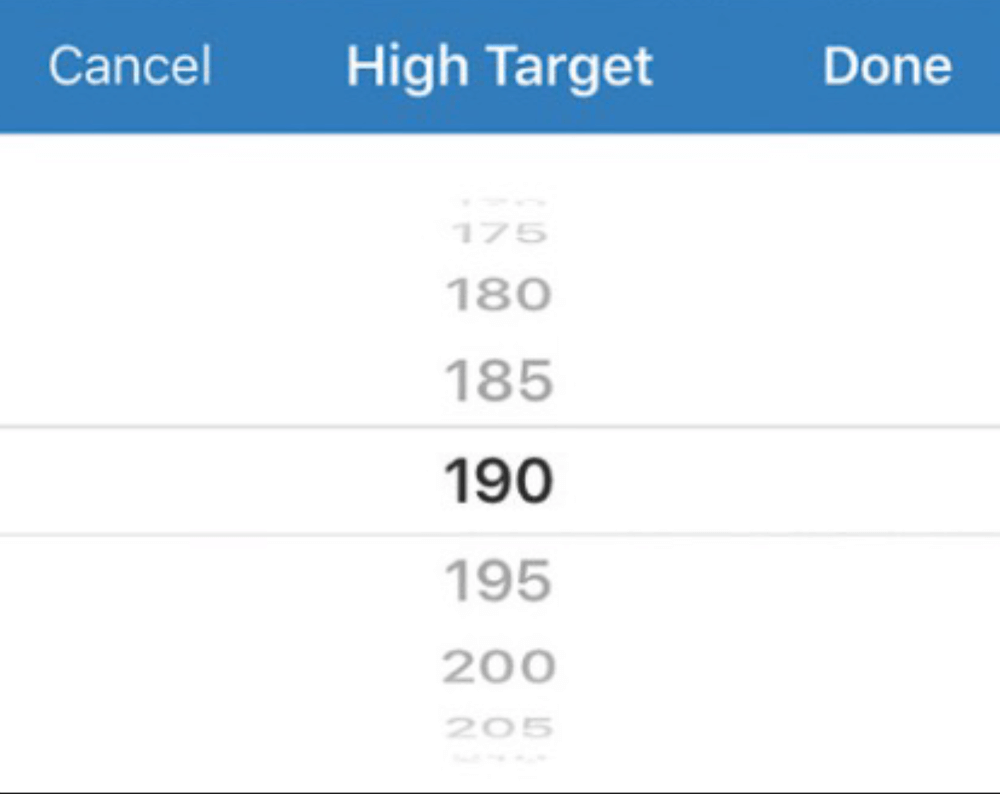
Again, simply tap on the setting
you would like to change, scroll to the desired value, and then tap Done.
Below Glucose Alerts is where
you set your glucose Target Range.
Your glucose target range is the area where you and your health care provider agree your glucose levels should be most of the time.
Note that your glucose target levels can only be programmed within the glucose alert levels you have set.
PERSONALIZE GLUCOSE TARGETS
Again, simply tap on the setting
you would like to change, scroll to the desired value, and then tap Done.
Below Glucose Alerts is where
you set your glucose Target Range.
Your glucose target range is the area where you and your health care provider agree your glucose levels should be most of the time.
You can also set Predictive and Rate of Change Alerts on this screen.
Predictive alerts can be especially helpful to CGM users.
However, if you are new to CGM, it might be best to wait to set either of these optional alerts until you discuss these settings with your healthcare provider.
See your User Guide for more information.
OPTIONAL PREDICTIVE & RATE ALERTS
Another important way that you can personalize your Eversense E3 CGM System is by customizing how your alerts sound, and how often alerts repeat.
PERSONALIZED SOUND SETTINGS


PERSONALIZED SOUND SETTINGS
From the My Glucose home screen, tap the Main Menu icon,
PERSONALIZED SOUND SETTINGS
From the My Glucose home screen, tap the Main Menu icon,
Then Settings on the Main Menu.
From the My Glucose home screen, tap the Main Menu icon,
Then Settings on the Main Menu.
Then choose Sound Settings.
PERSONALIZED SOUND SETTINGS
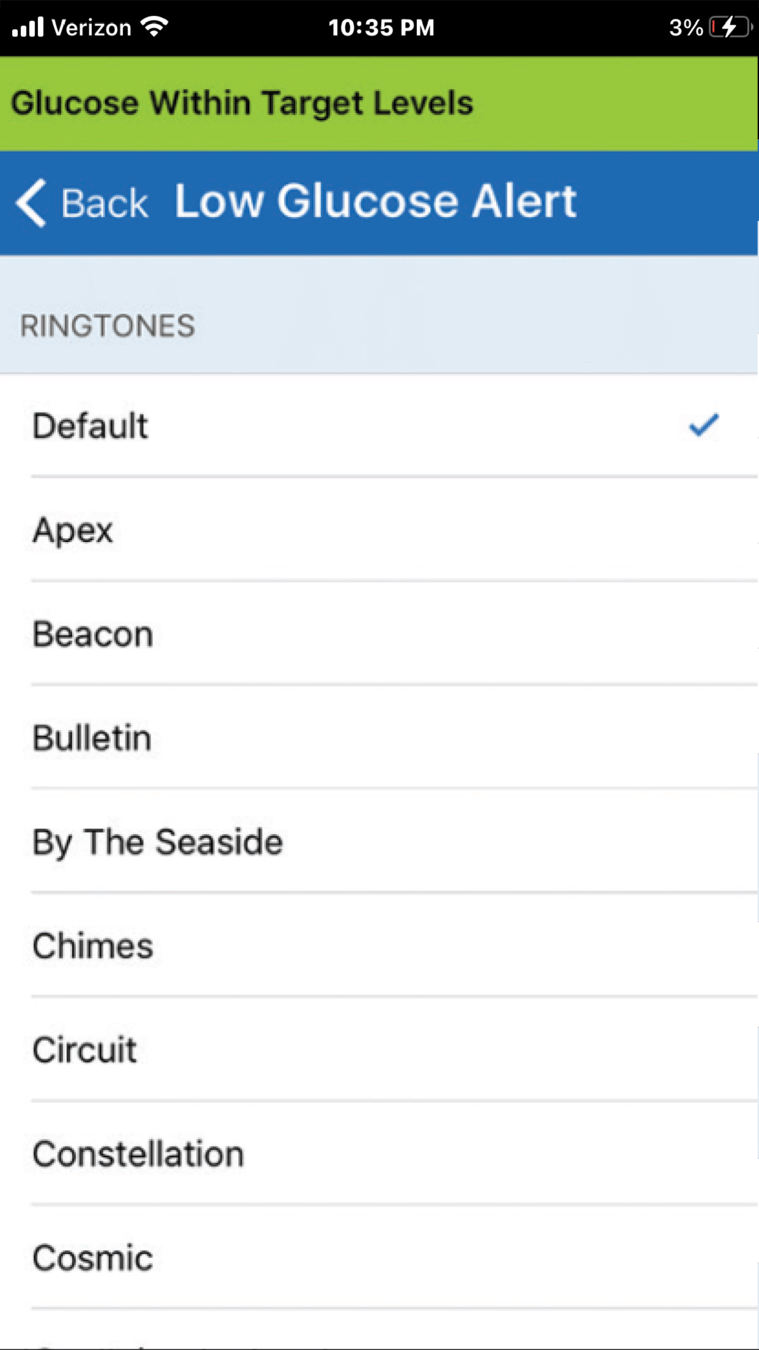
On the Sound Settings screen, you can tap on the alert name to open a ringtone menu that allows you to set a unique sound for that particular alert.
PERSONALIZED SOUND SETTINGS
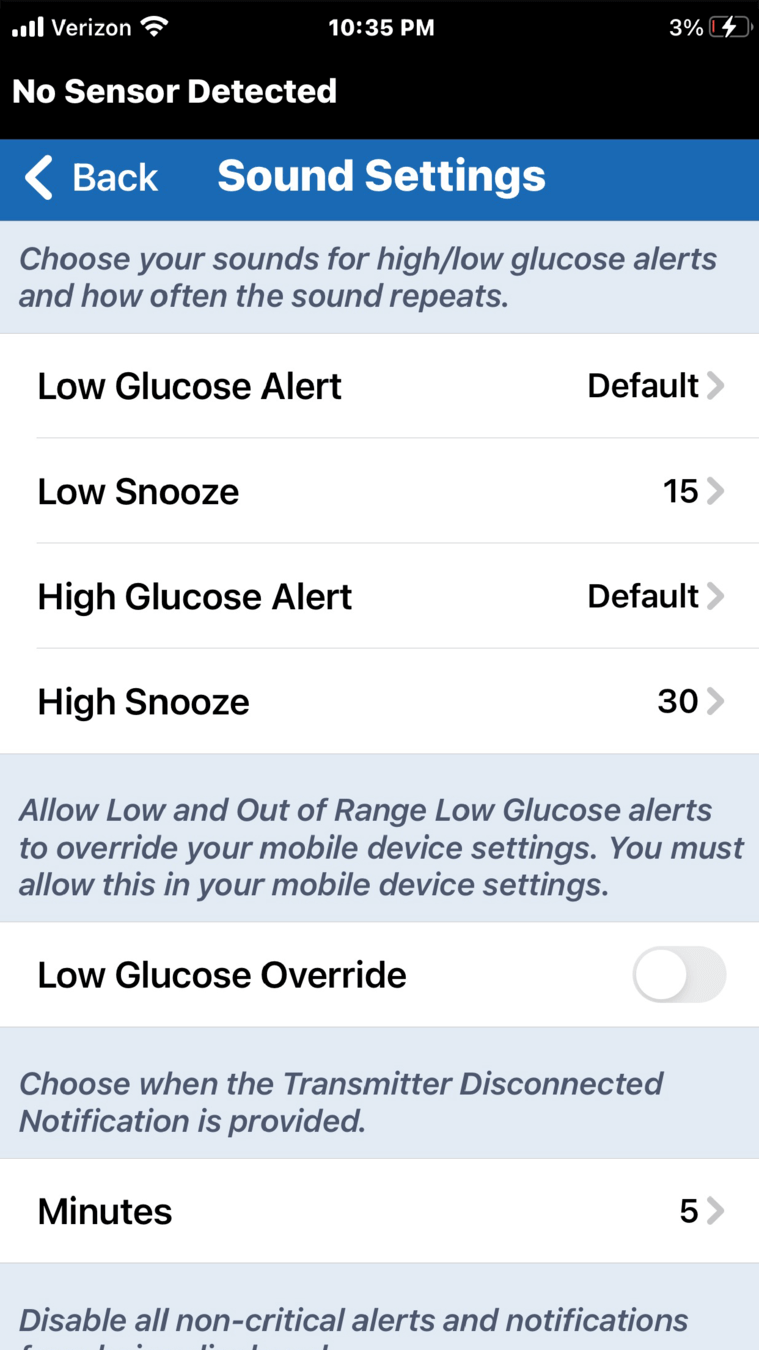
On the Sound Settings screen, you can tap on the alert name to open a ringtone menu that allows you to set a unique sound for that particular alert.
For example, to change your low glucose alert sound, tap on the ringtone name to hear the sound and make your choice.
PERSONALIZED SOUND SETTINGS
On the Sound Settings screen, you can tap on the alert name to open a ringtone menu that allows you to set a unique sound for that particular alert.
For example, to change your low glucose alert sound, tap on the ringtone name to hear the sound and make your choice.
PERSONALIZED SOUND SETTINGS
You can change your choice by tapping on another ringtone name.
SNOOZE FEATURE
The Snooze feature allows you to set how often you would like your alert to repeat.
Simple tap on the snooze choice.
SNOOZE FEATURE
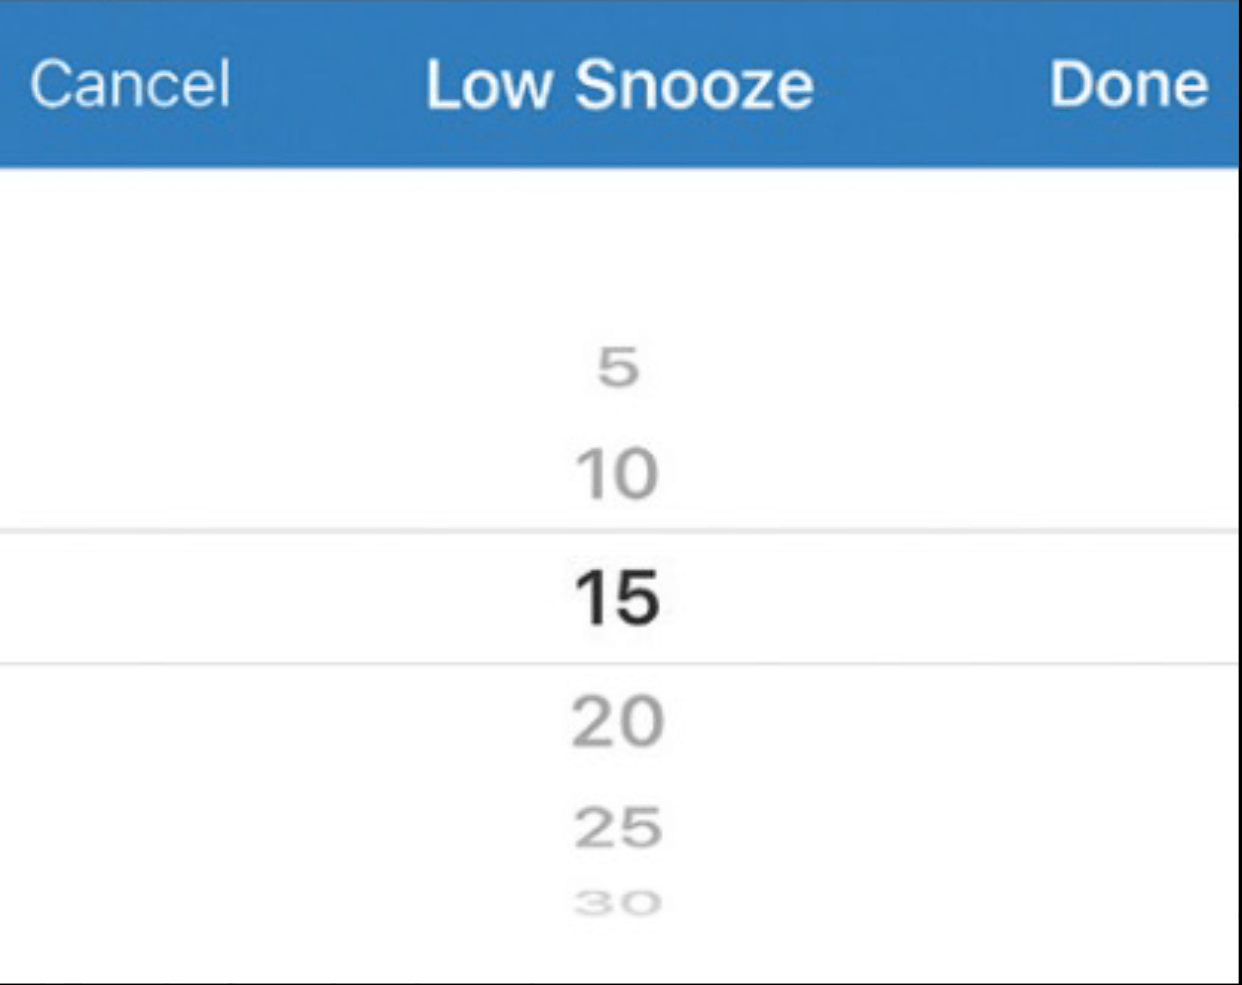
Scroll to set the time. Then tap Done.
The Snooze feature allows you to set how often you would like your alert to repeat.
Simple tap on the snooze choice.
SNOOZE FEATURE
In this example, where the low glucose alert snooze setting is set for 15 minutes, the user would receive a low glucose alert every 15 minutes as long as their glucose level remained below the user low glucose alert threshold.
Snooze is an important feature to understand if you feel that the frequency with which you receive alerts needs to be adjusted.
SNOOZE FEATURE
In this example, where the low glucose alert snooze setting is set for 15 minutes, the user would receive a low glucose alert every 15 minutes as long as their glucose level remained below their low glucose alert threshold.
If your Eversense E3 Smart Transmitter is not connecting automatically with the Eversense App, it is either because the smart transmitter is
- Out of range of the mobile app,
- Is out of charge,
- Is not turned on, or
- Needs to be re-paired to your mobile device.
Here are the steps to restore the connection.
OPTIONAL CONNECTION TIPS
Make sure your Eversense E3 Smart Transmitter is within 25 feet of the mobile app.
OPTIONAL CONNECTION TIPS
If your Eversense E3 Smart Transmiter hasn’t been charged in the last 24 hours, charge it now until the LED shows solid green. Note that when you remove the smart transmitter from the cradle after charging, it’s automatically turned on.
OPTIONAL CONNECTION TIPS
The steps for turning your Eversense E3 Smart Transmitter on, or off, are the same.
Press and hold the power button for about 5 seconds, until the smart transmitter vibrates. Then release the power button and watch the LED.
If it flashes green, it’s on.
If it flashes orange, it’s off.
OPTIONAL CONNECTION TIPS
If you need to re-pair your E3 Smart Transmitter with the Eversense mobile app, make sure your device Bluetooth is on, open your app,
OPTIONAL CONNECTION TIPS
and put the smart transmitter in the discoverable mode by pressing the power button firmly three times until the LED alternates blinking green and orange.
You’ll see “Connecting” appear in the app status bar.
OPTIONAL CONNECTION TIPS

You have now completed the most important parts of personalizing your Eversense E3 CGM system.
If you’re still in the 24-hour warm-up phase and not wearing your Eversense E3 Smart Transmitter, it’s a good idea to turn it off.
To do this, press and hold the power button for about 5 seconds until the smart transmitter vibrates. This time, when you release the button, the LED will flash orange.
TURN OFF THE SMART TRANSMITTER
You’ve now completed Day 1 training. Once the 24-hour warm up phase is complete, you’re ready to move on to the Day 2 training presentation on System Initialization, and begin to receive glucose data.
DAY 1 TRAINING COMPLETE
Please contact your health care provider if you have a medical question or concerns about your diabetes treatment plan.
And contact Eversense Customer Care
if you have technical questions about
the Eversense E3 CGM System
Eversense Customer Care
1-844-SENSE4U (7367348)
Support@eversensediabetes.com
Once the 24-hour Warm Up Phase is complete, you’re ready to get your system started so that you can begin to receive glucose data.

SYSTEM INITIALIZATION
System INITIALIZATION
First - if possible, it’s always best to wait to start System Initialization early in the day.
This will allow you to complete all four required initialization calibrations before going to bed.
This presentation will walk you through the steps, and you can also refer to your Eversense E3 CGM System Quick Reference Guide.
SYSTEM INITIALIZATION
System INITIALIZATION
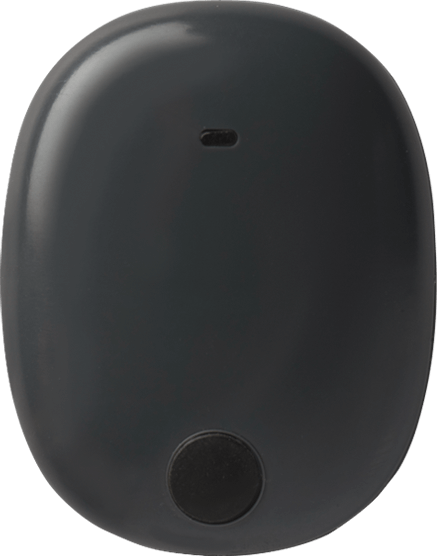
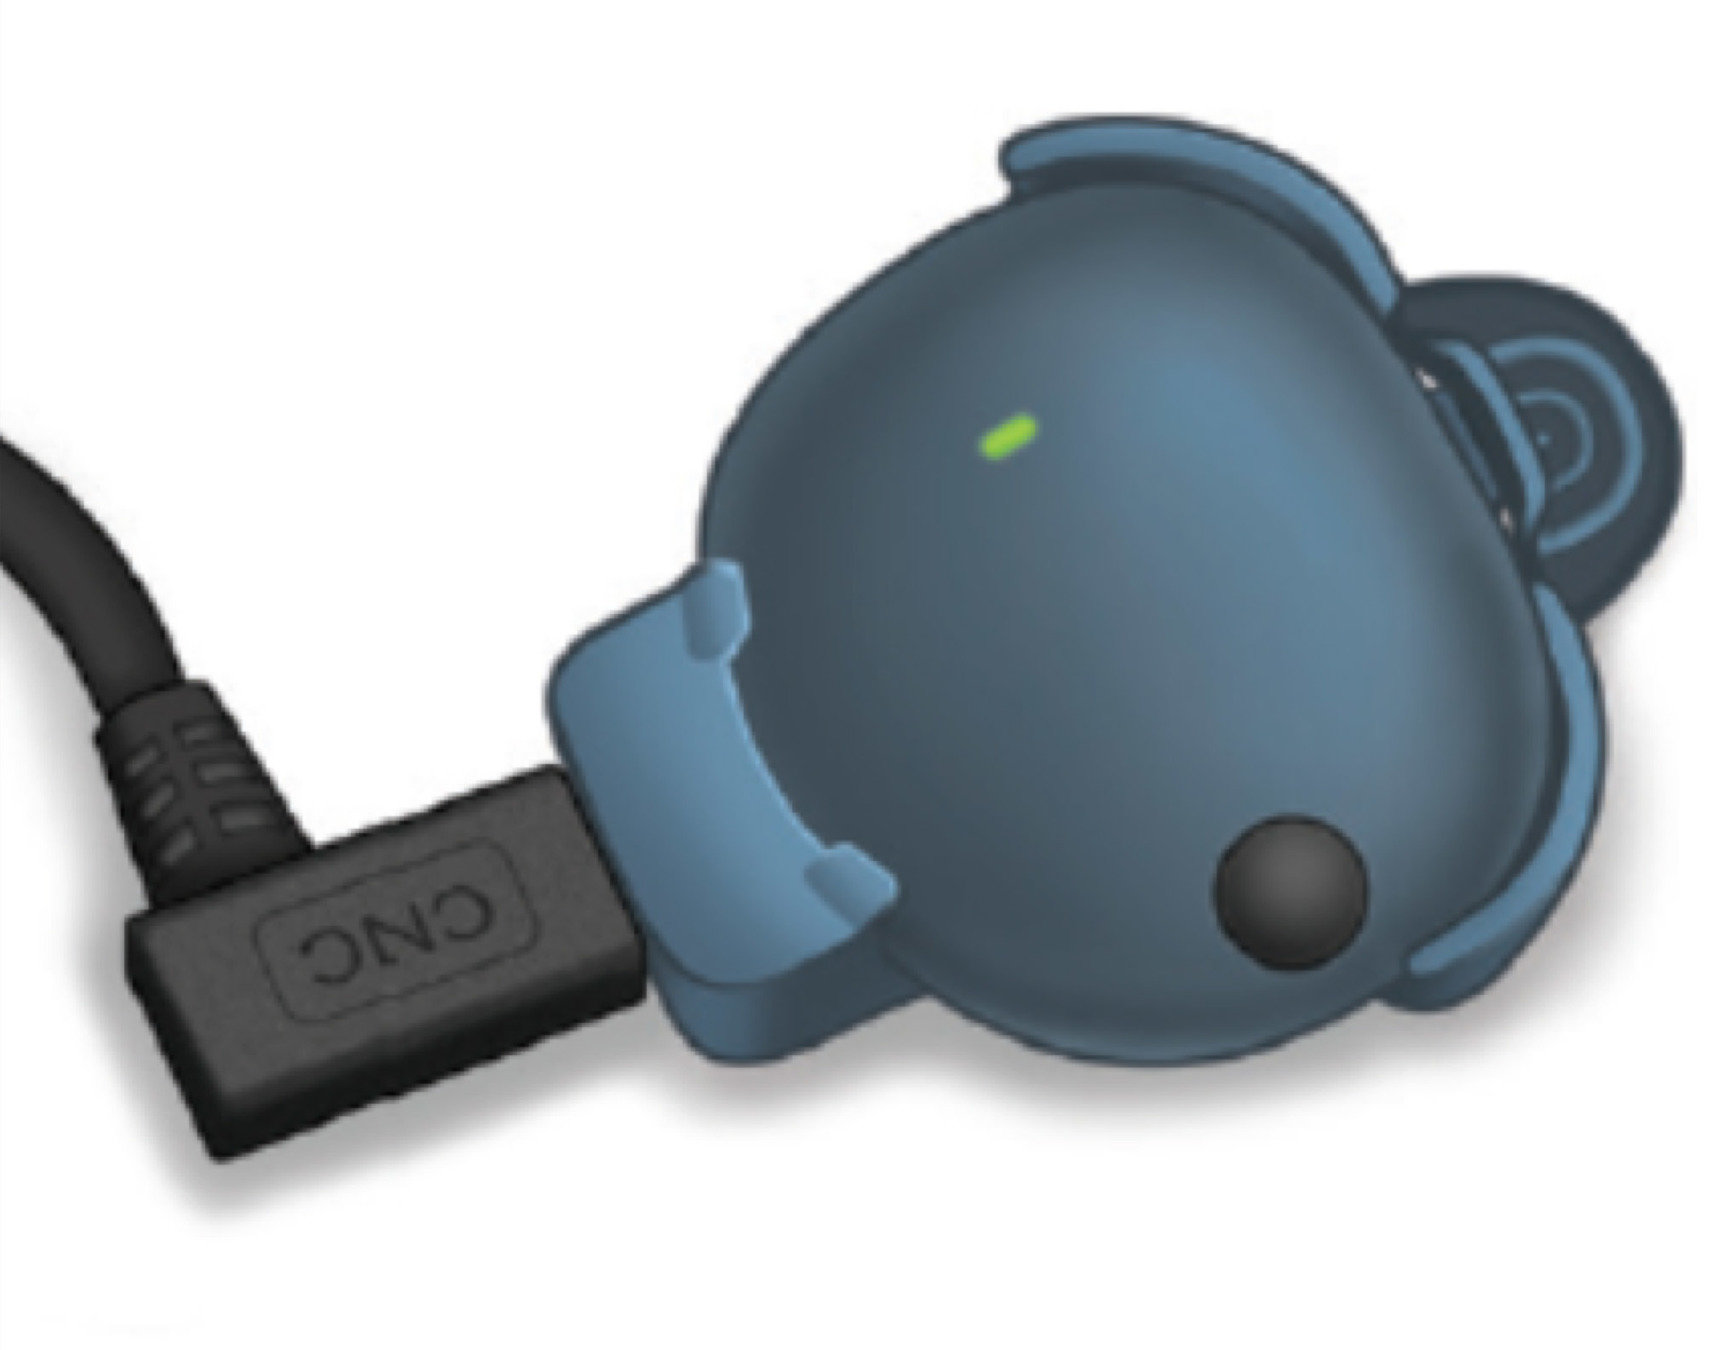
When you’re ready, start
by making sure that your
Eversense E3 Smart Transmitter
is fully charged.
SYSTEM INITIALIZATION
CHARGE SMART TRANSMITTER
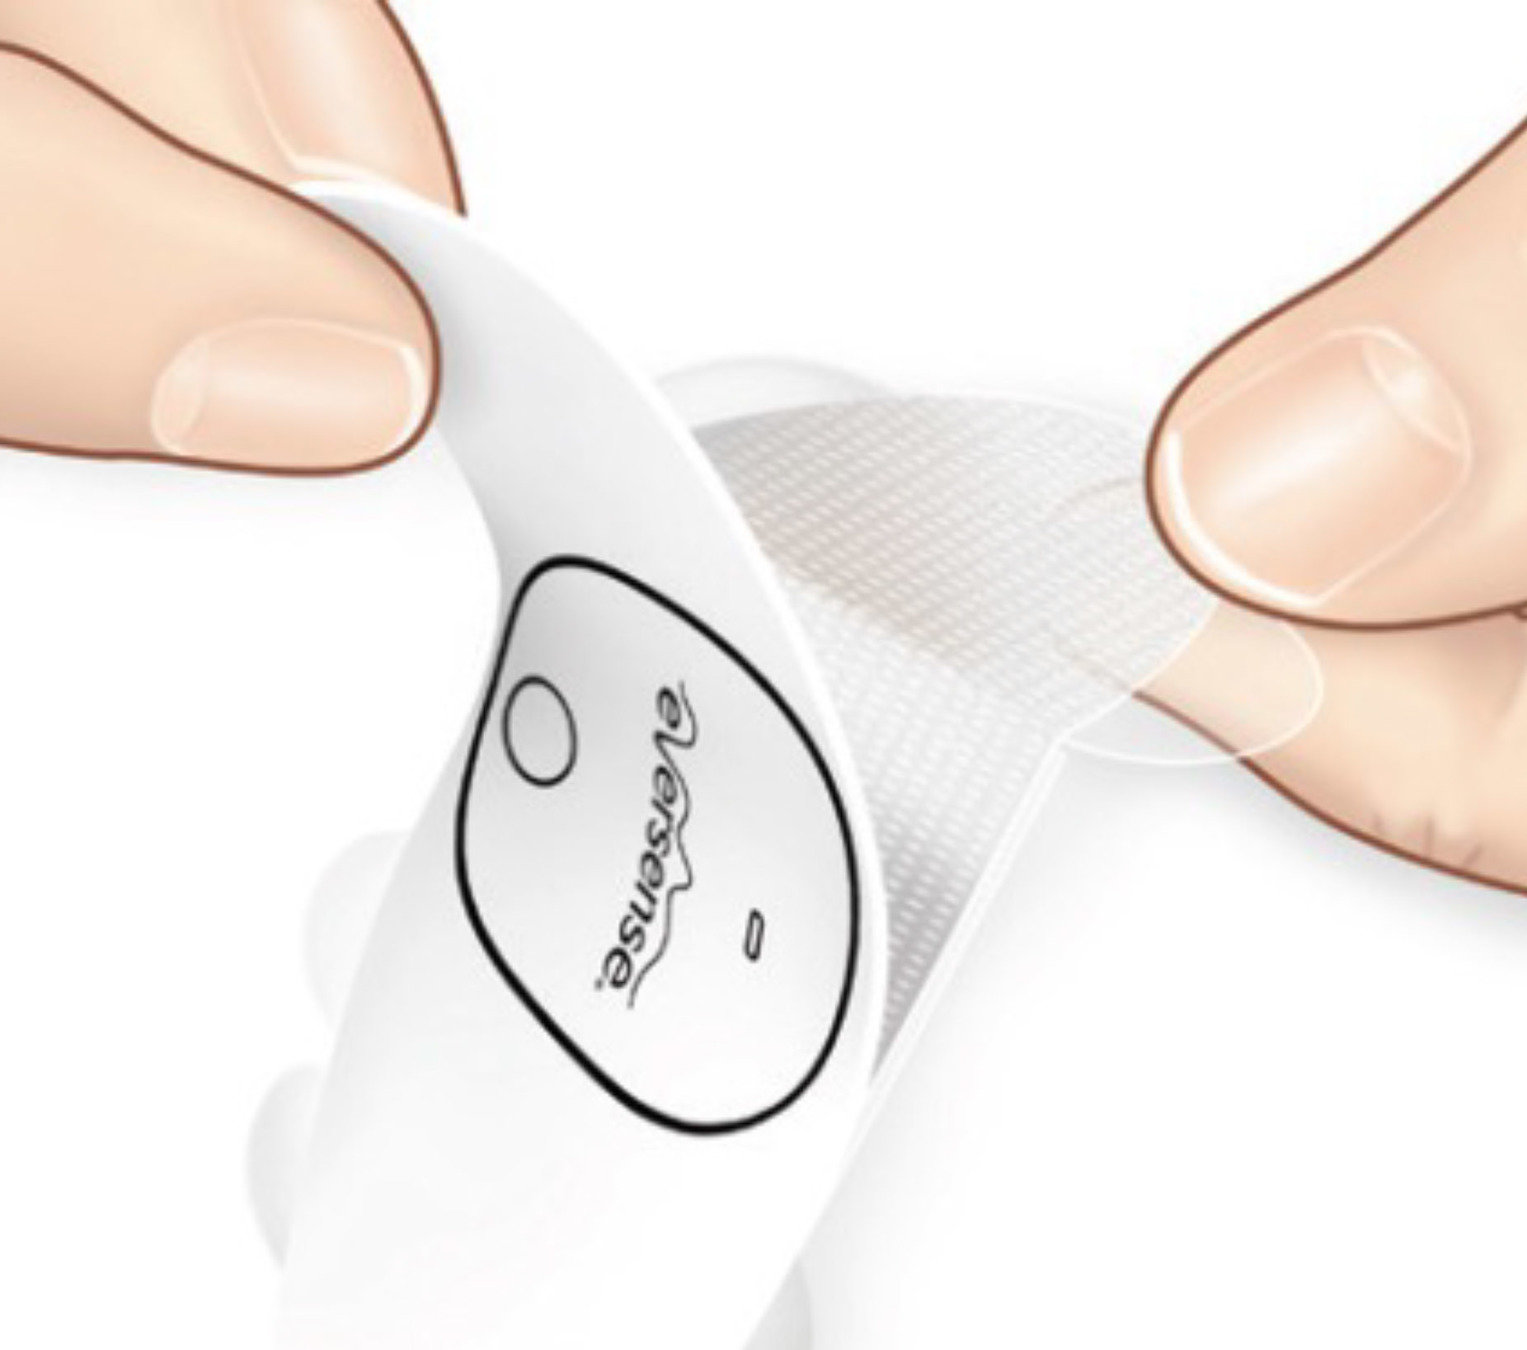
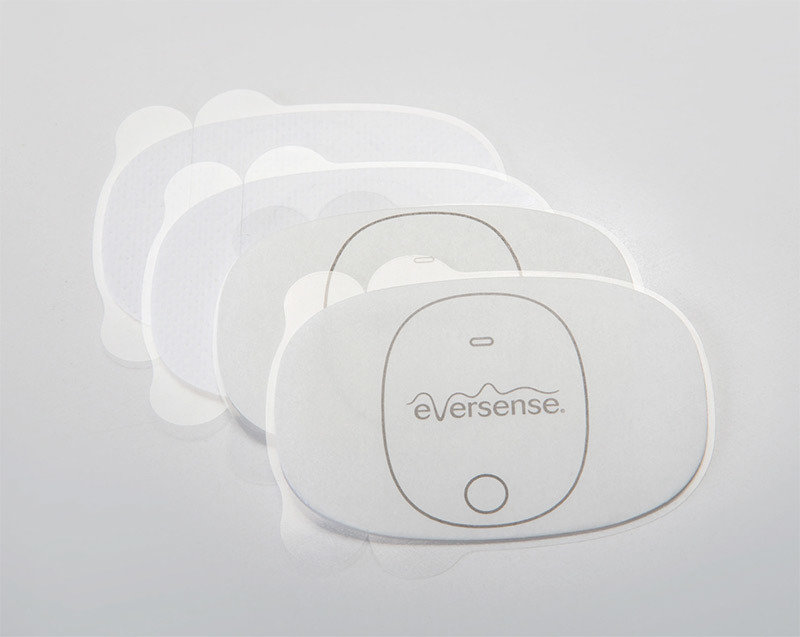
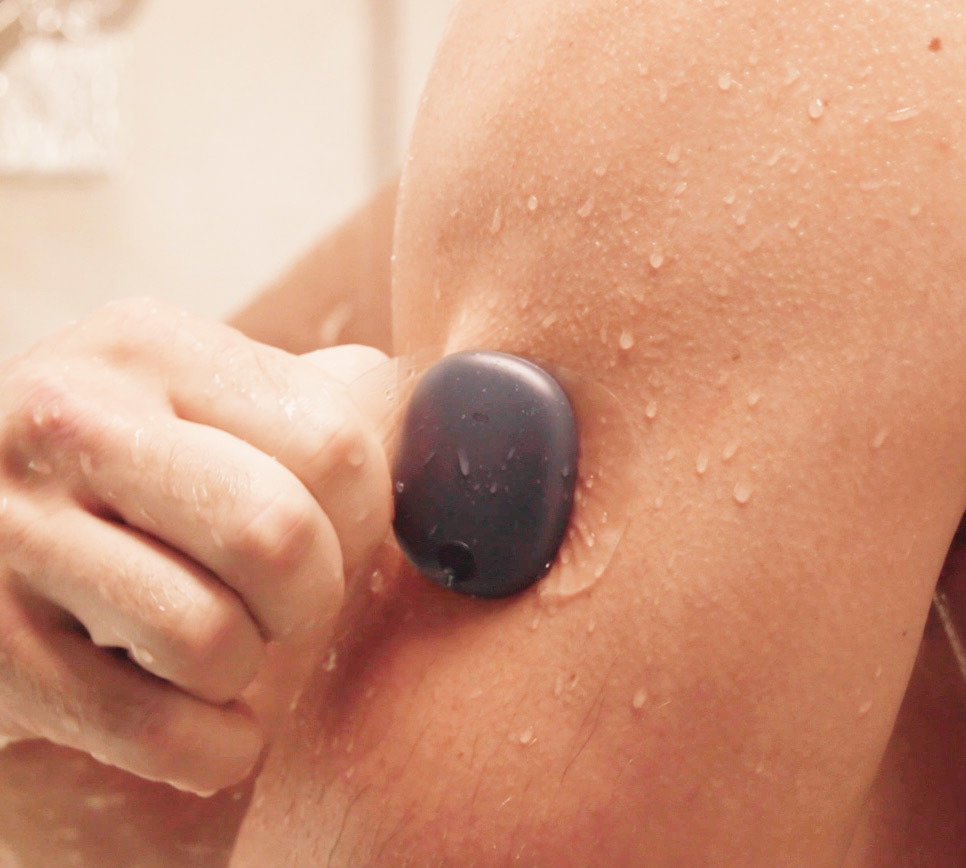
Step 2 is to place your smart transmitter onto the adhesive patch.
Get an adhesive patch and peel off the paper backing with the Eversense logo.
SYSTEM INITIALIZATION
PLACE SMART TRANSMITTER ON ADHESIVE
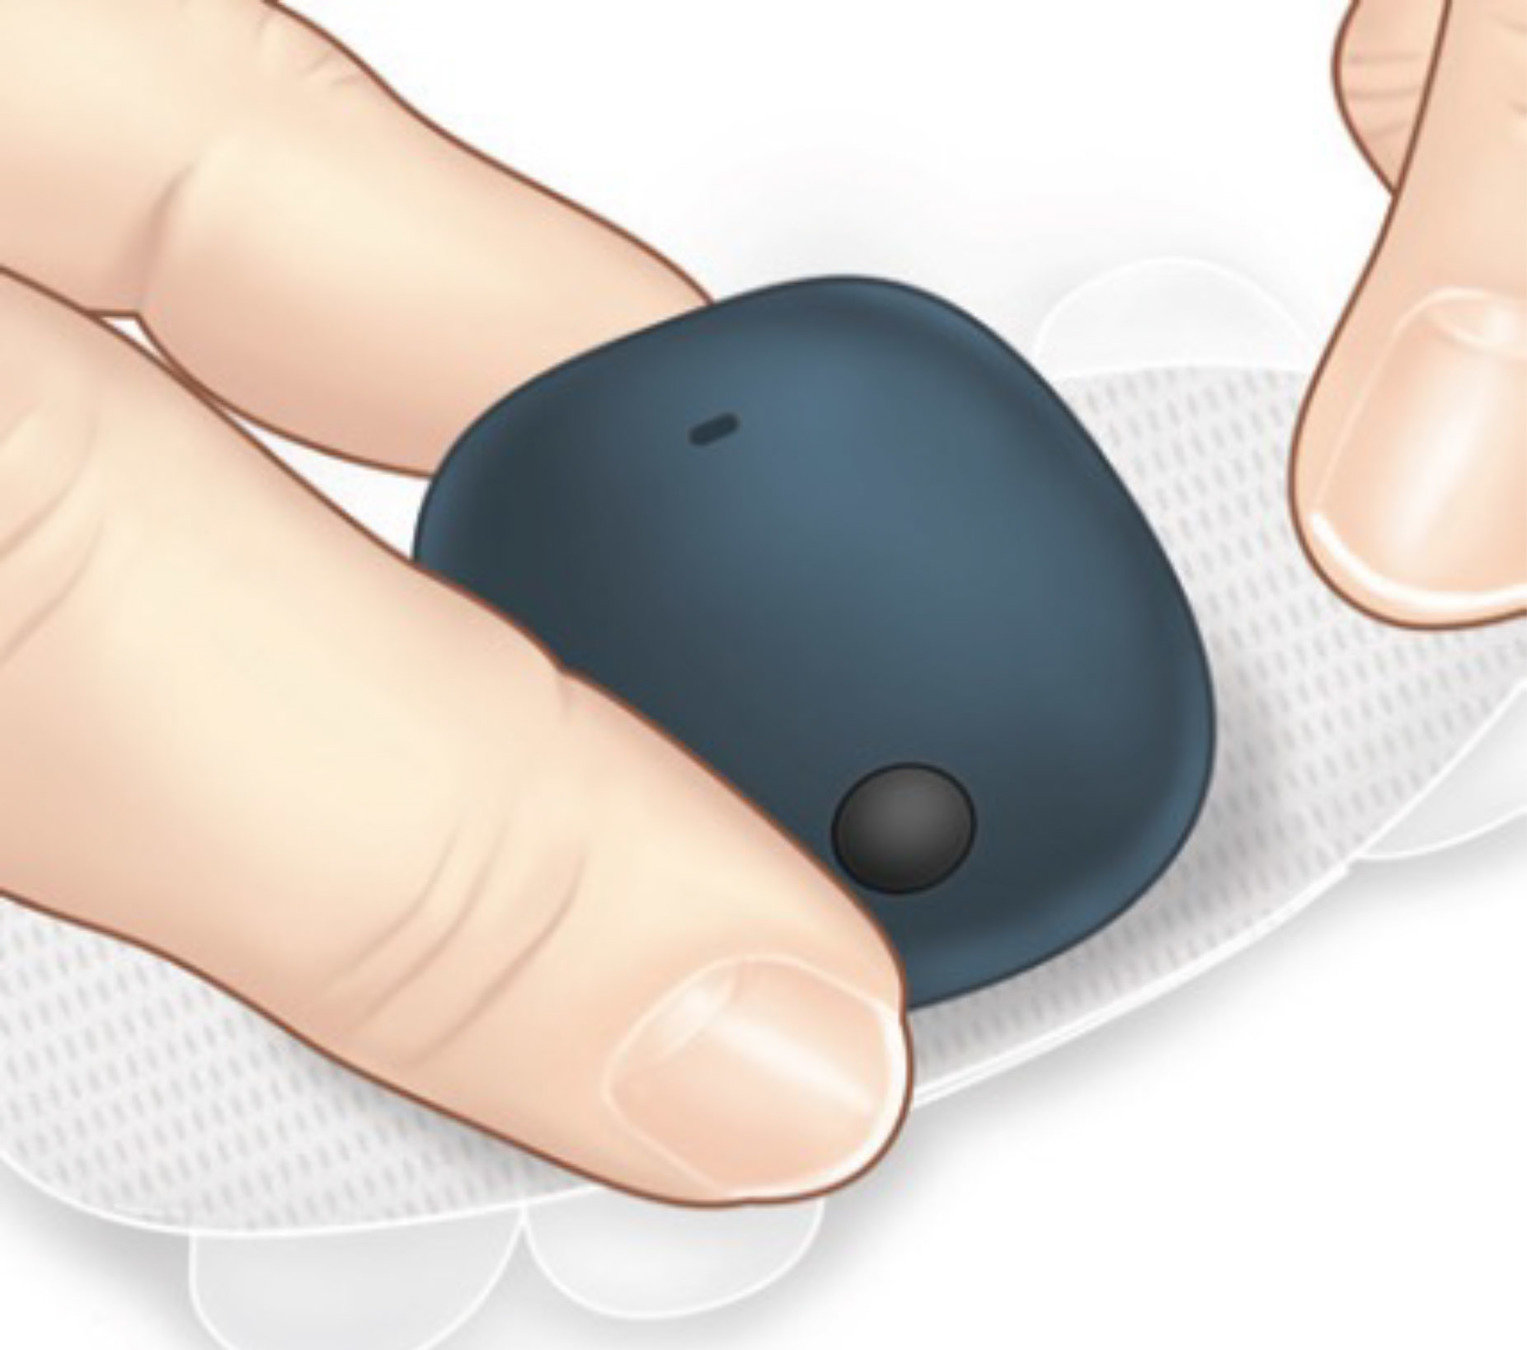
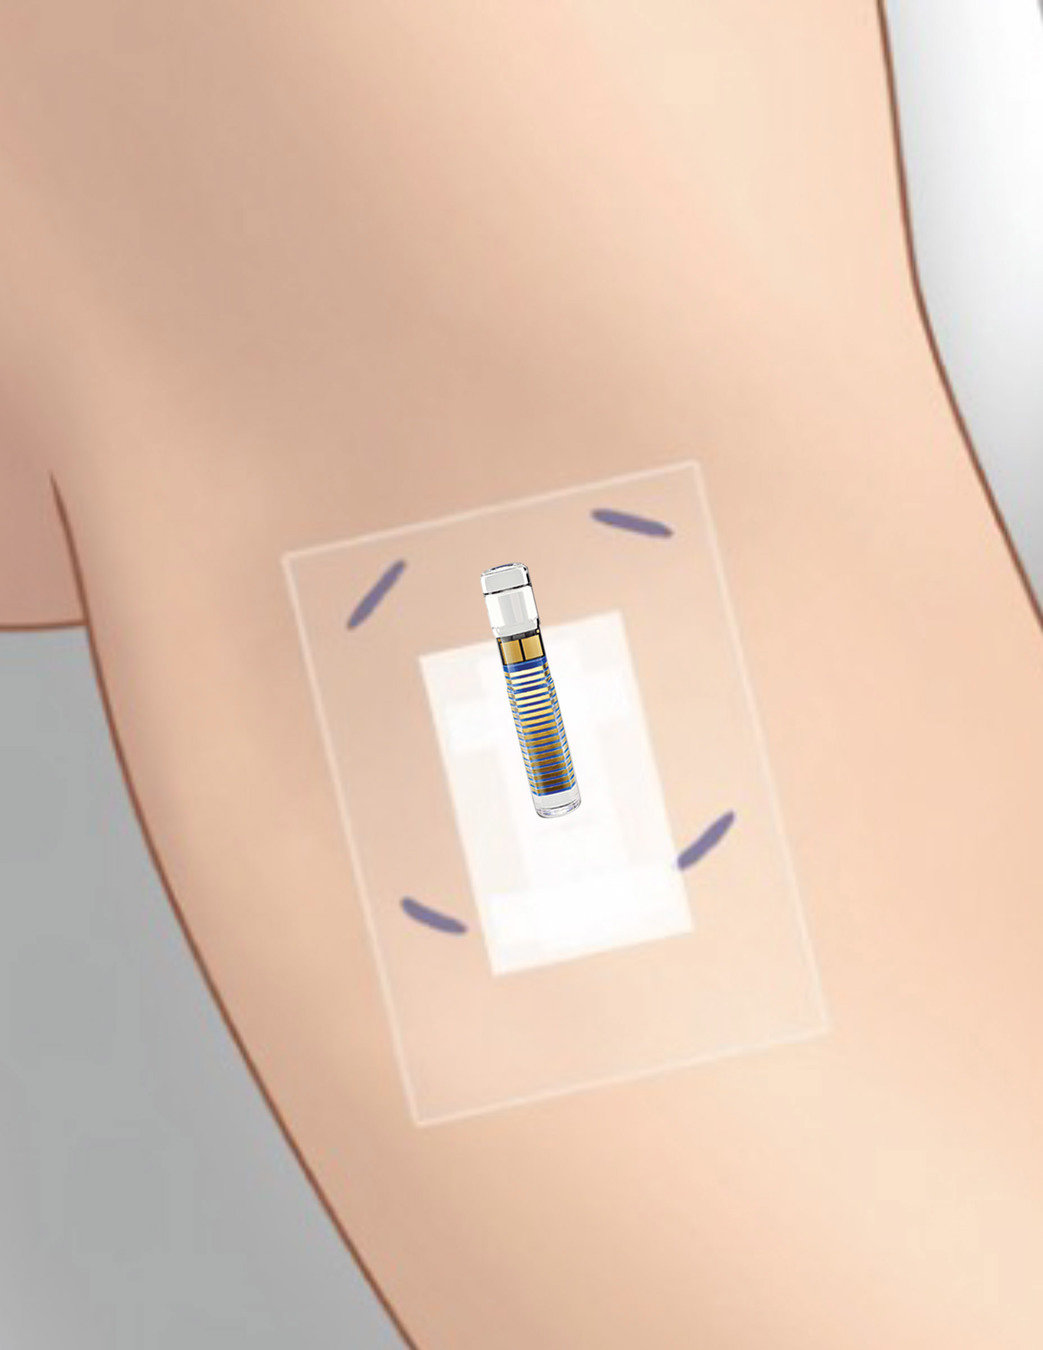
The center of the patch is sticky, and this is where you should place your smart transmitter, as shown.
Press the smart transmitter firmly onto the adhesive.
SYSTEM INITIALIZATION
PLACE SMART TRANSMITTER ON ADHESIVE
SYSTEM INITIALIZATION
PLACE SMART TRANSMITTER ON ADHESIVE
The center of the patch is sticky, and this is where you should place your smart transmitter, as shown.
Press the smart transmitter firmly onto the adhesive.
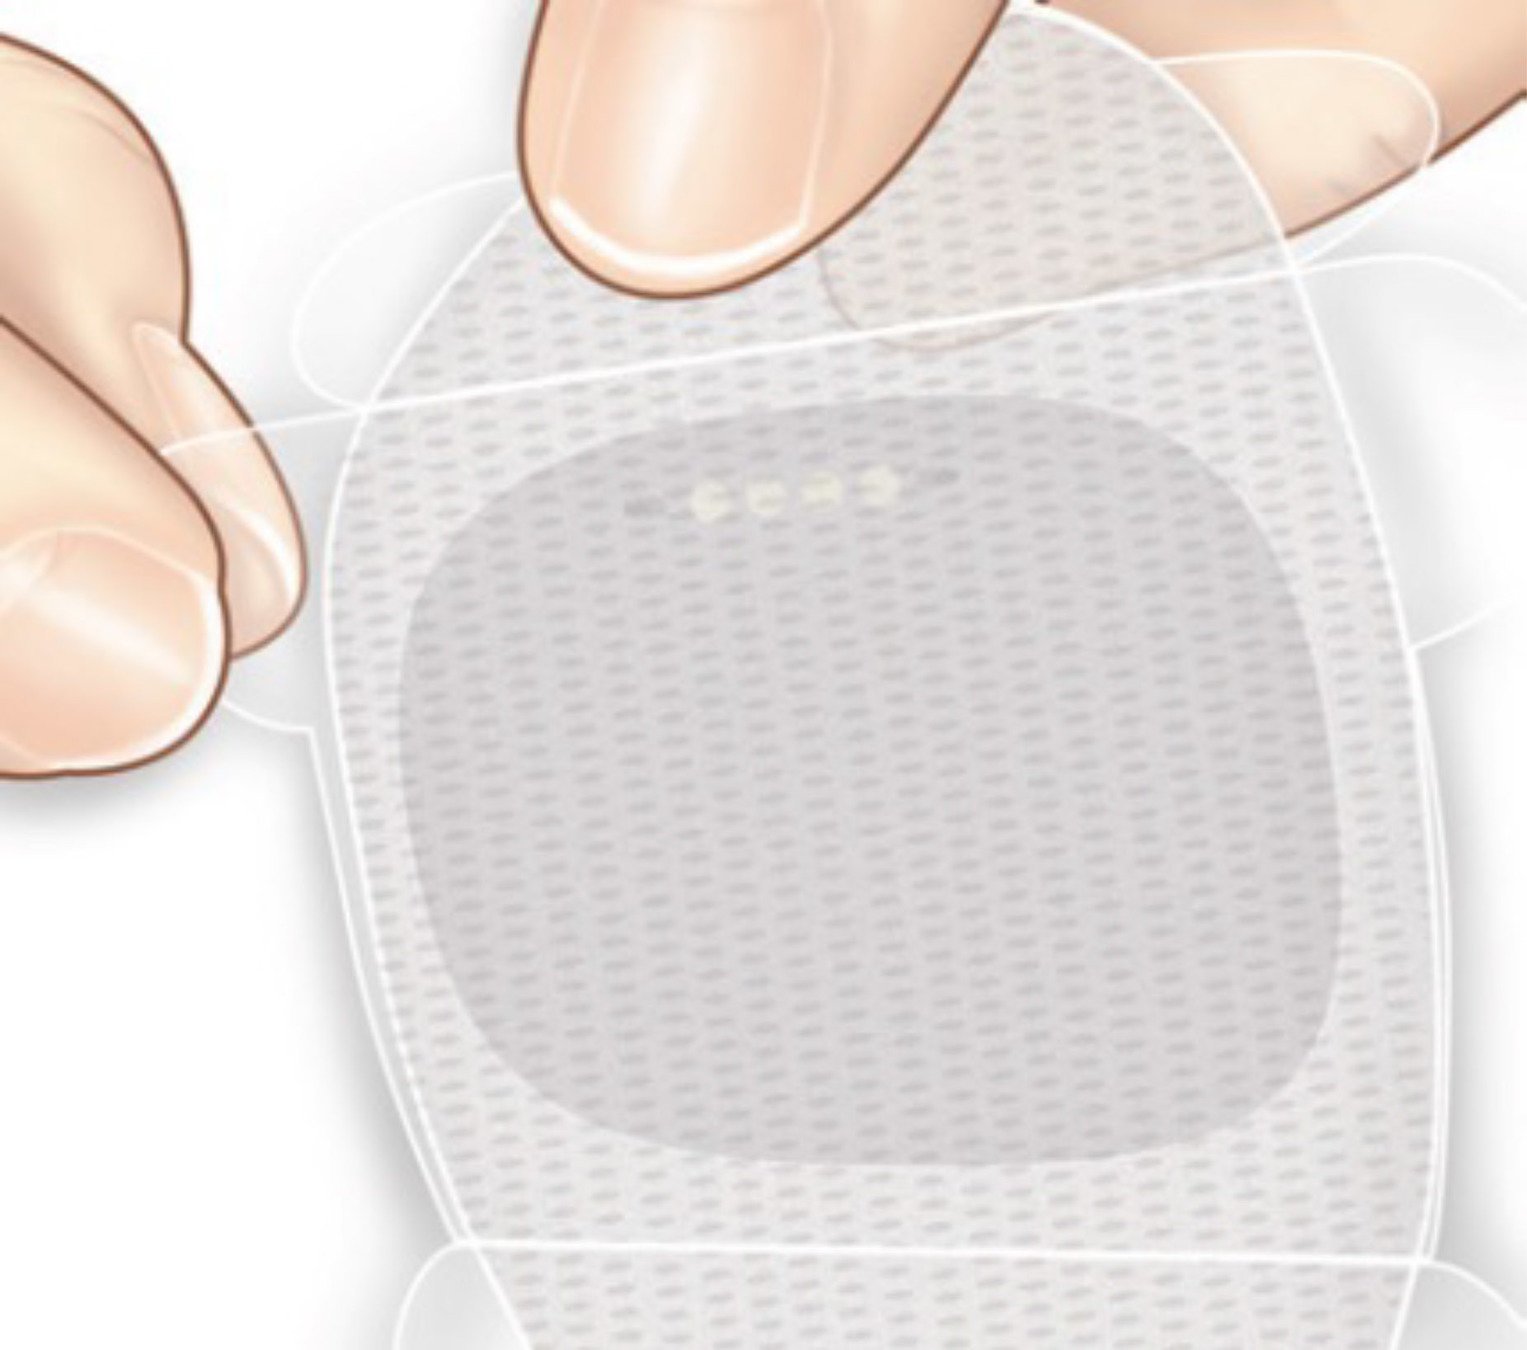
Then, remove the larger piece
of the remaining clear backing
on the adhesive patch.
Now you are ready for step 3 – positioning the Eversense
E3 Smart Transmitter over
the Eversense E3 sensor.
If you have an over wrap on your arm, you will need to remove it so that
you can see the Tegaderm bandage.
SYSTEM INITIALIZATION
POSITION SMART TRANSMITTER OVER SENSOR
It’s helpful to understand where your sensor is located. Your health care provider inserted the sensor above the incision, as illustrated here.
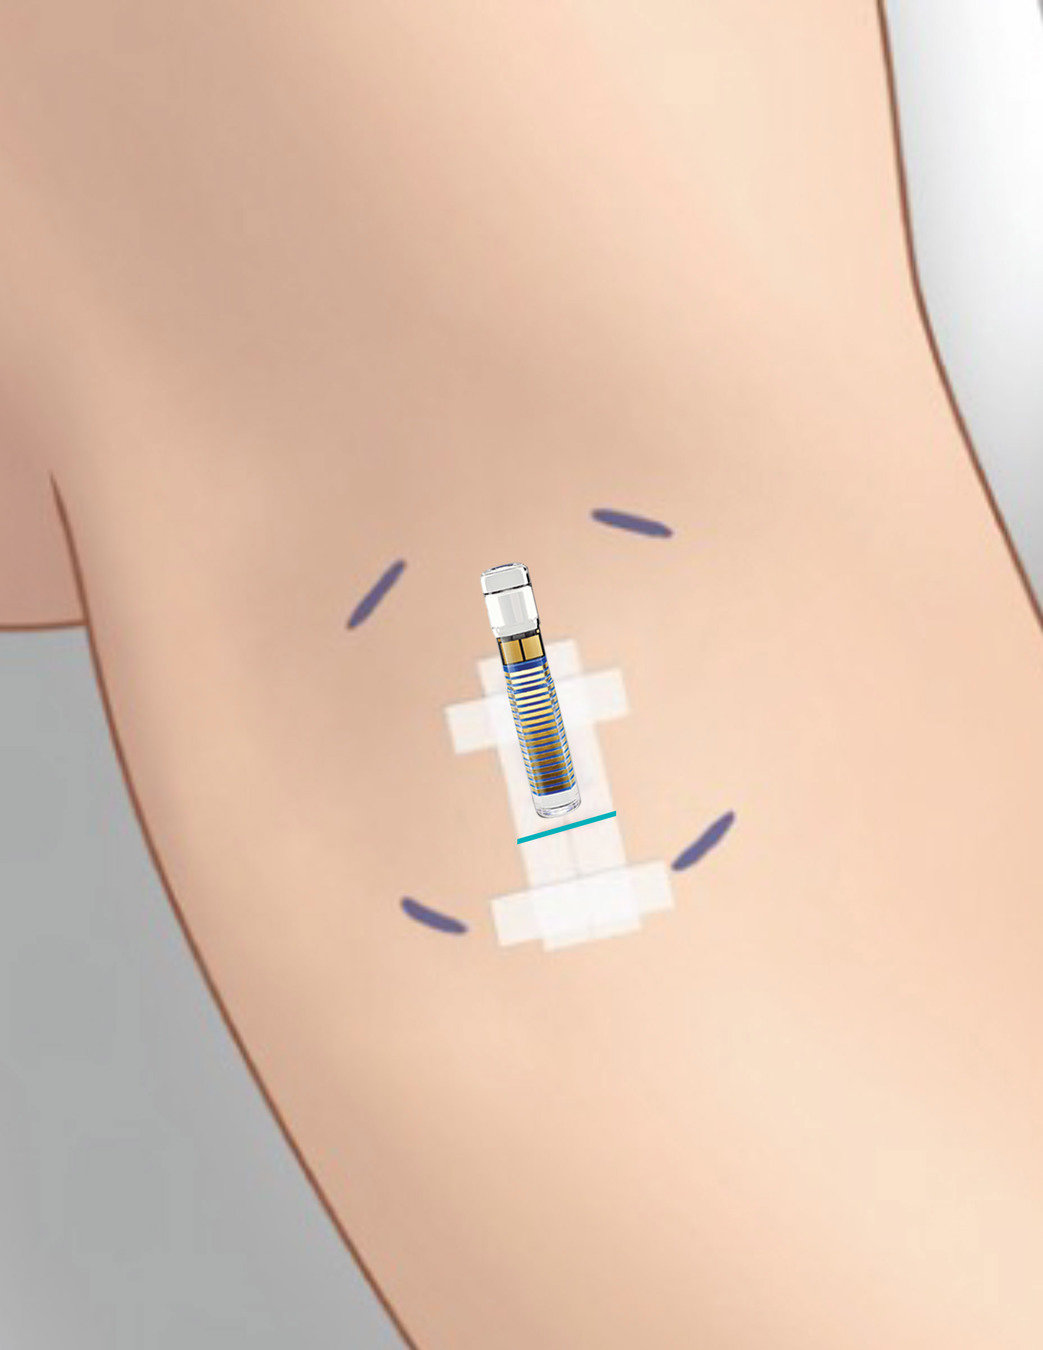
This means that the sensor is likely above the center of your Tegaderm bandage.
Hide bandage
Show bandage
SYSTEM INITIALIZATION
POSITION SMART TRANSMITTER OVER SENSOR
There may also be visible marks where your health care provider marked the corners of the smart transmitter before placing your sensor. Aligning the smart transmitter in this location helps to place it appropriately over the sensor.
Go to a mirror, if needed, in order to clearly see your Tegaderm bandage.
SYSTEM INITIALIZATION
POSITION SMART TRANSMITTER OVER SENSOR
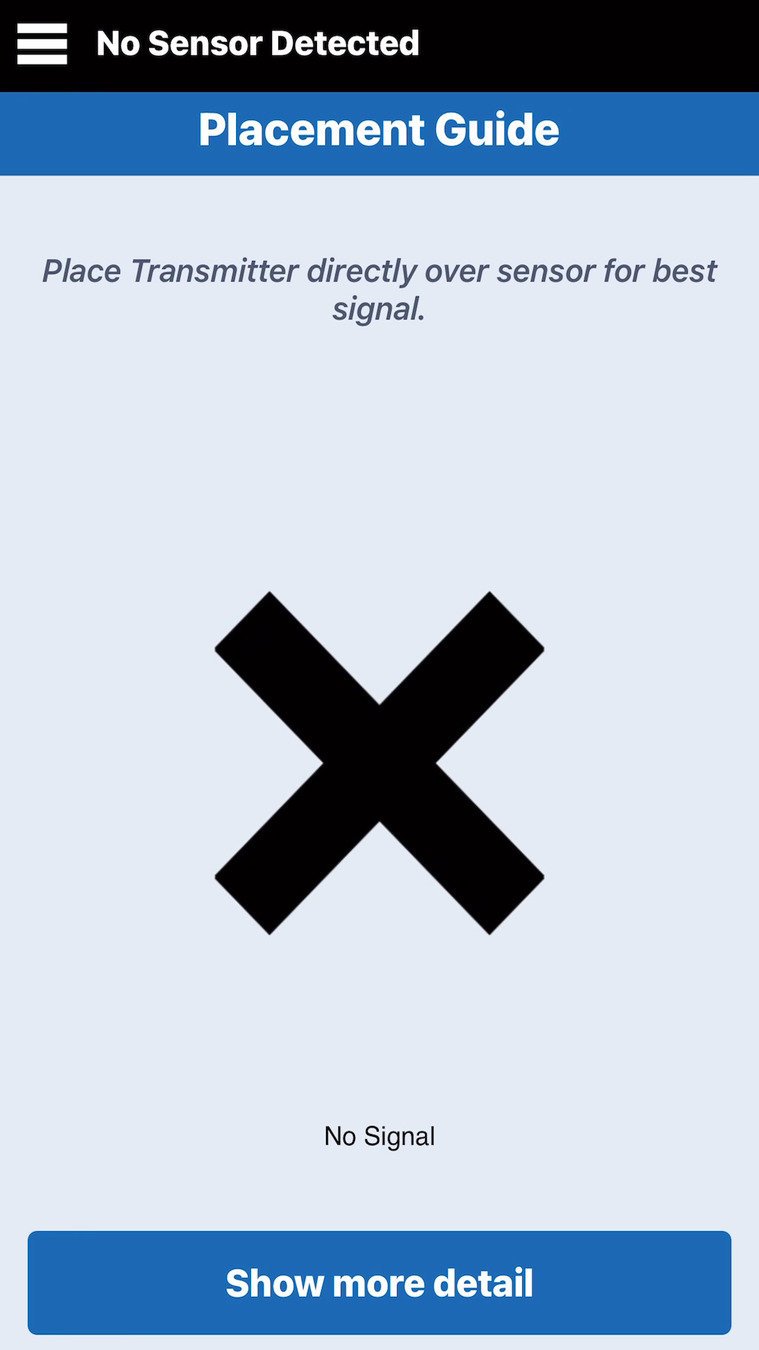
Then, open the Placement Guide in your app by going to Main Menu
SYSTEM INITIALIZATION
POSITION SMART TRANSMITTER OVER SENSOR
– Placement Guide.
SYSTEM INITIALIZATION
POSITION SMART TRANSMITTER OVER SENSOR
Then, open the Placement Guide in your app by going to Main Menu
You’ll see a black X at first.
SYSTEM INITIALIZATION
POSITION SMART TRANSMITTER OVER SENSOR
Hold the smart transmitter with adhesive as shown – with the sides of the adhesive patch pulled back. If visible, use the smart transmitter corner marks on your skin to position the smart transmitter – toward the top half of the Tegaderm bandage.
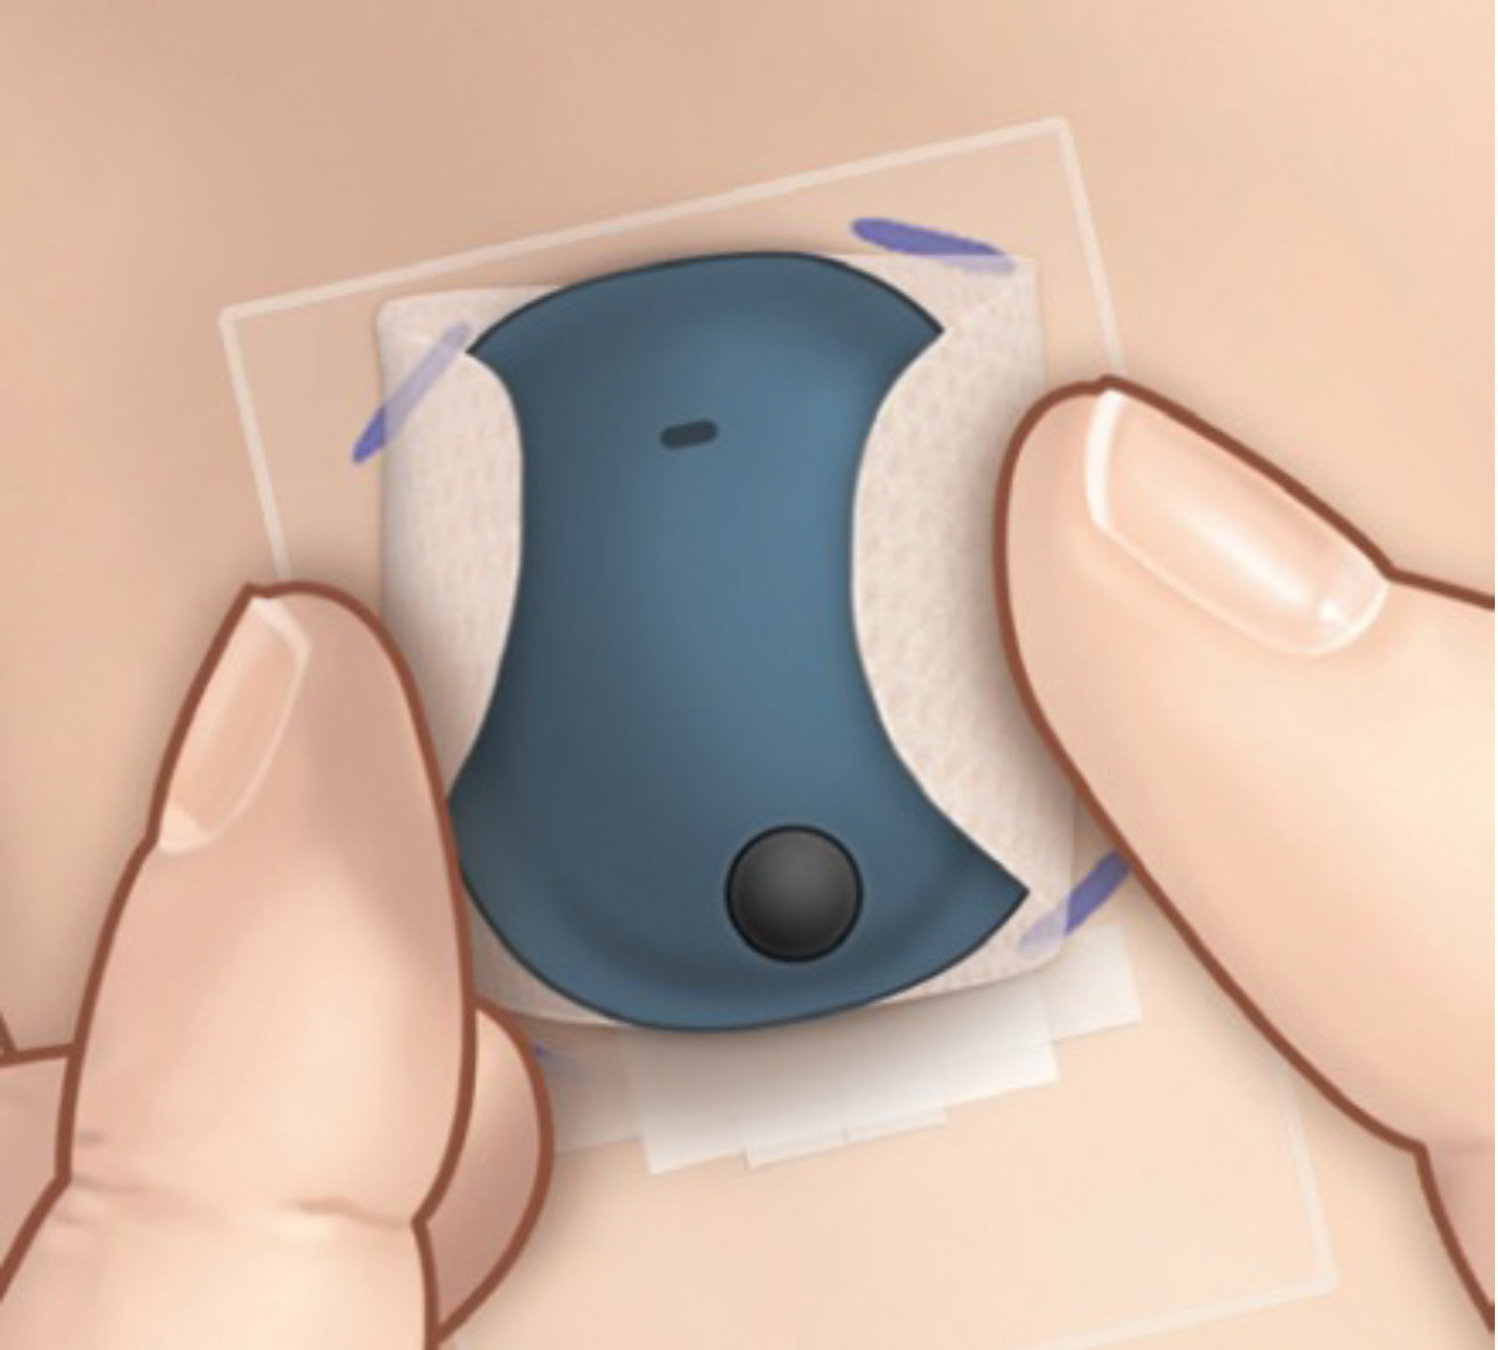
Note that the smart transmitter needs to be touching your arm.
SYSTEM INITIALIZATION
POSITION SMART TRANSMITTER OVER SENSOR
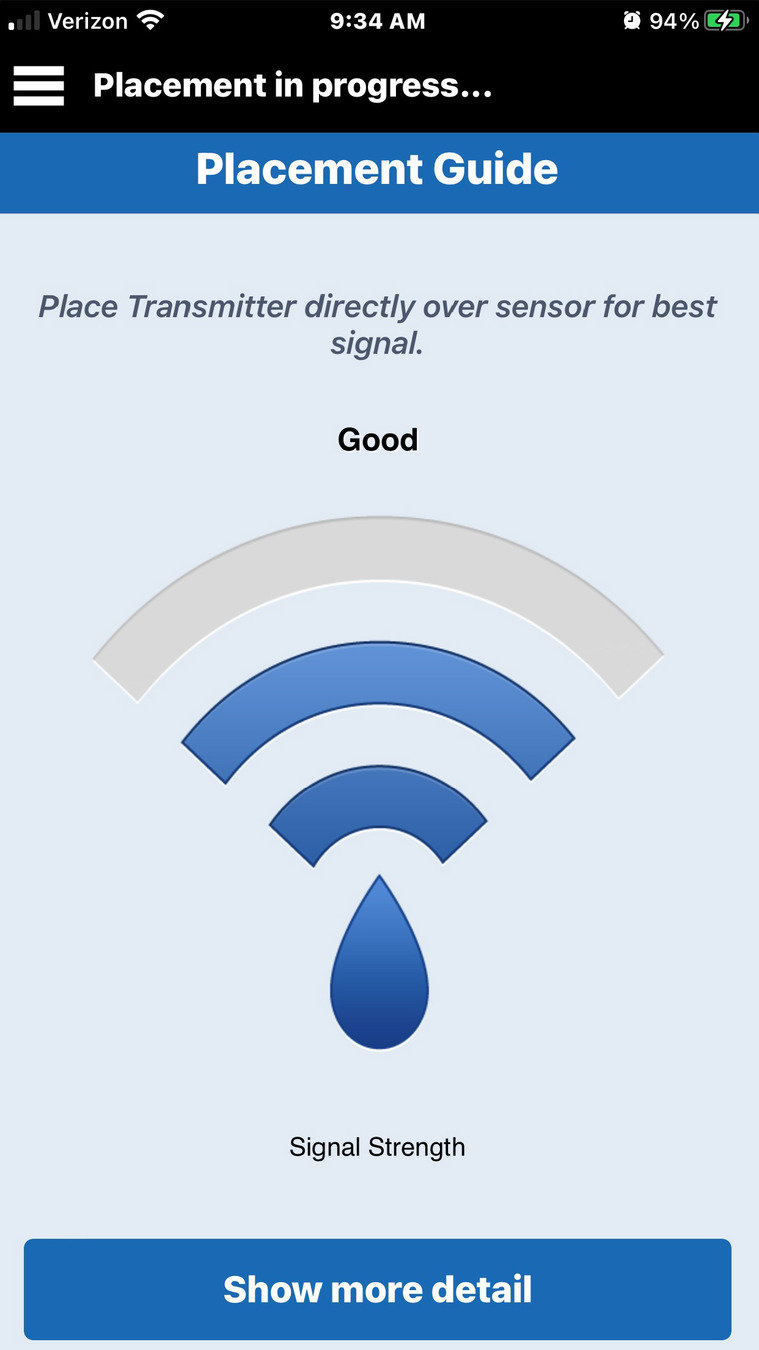
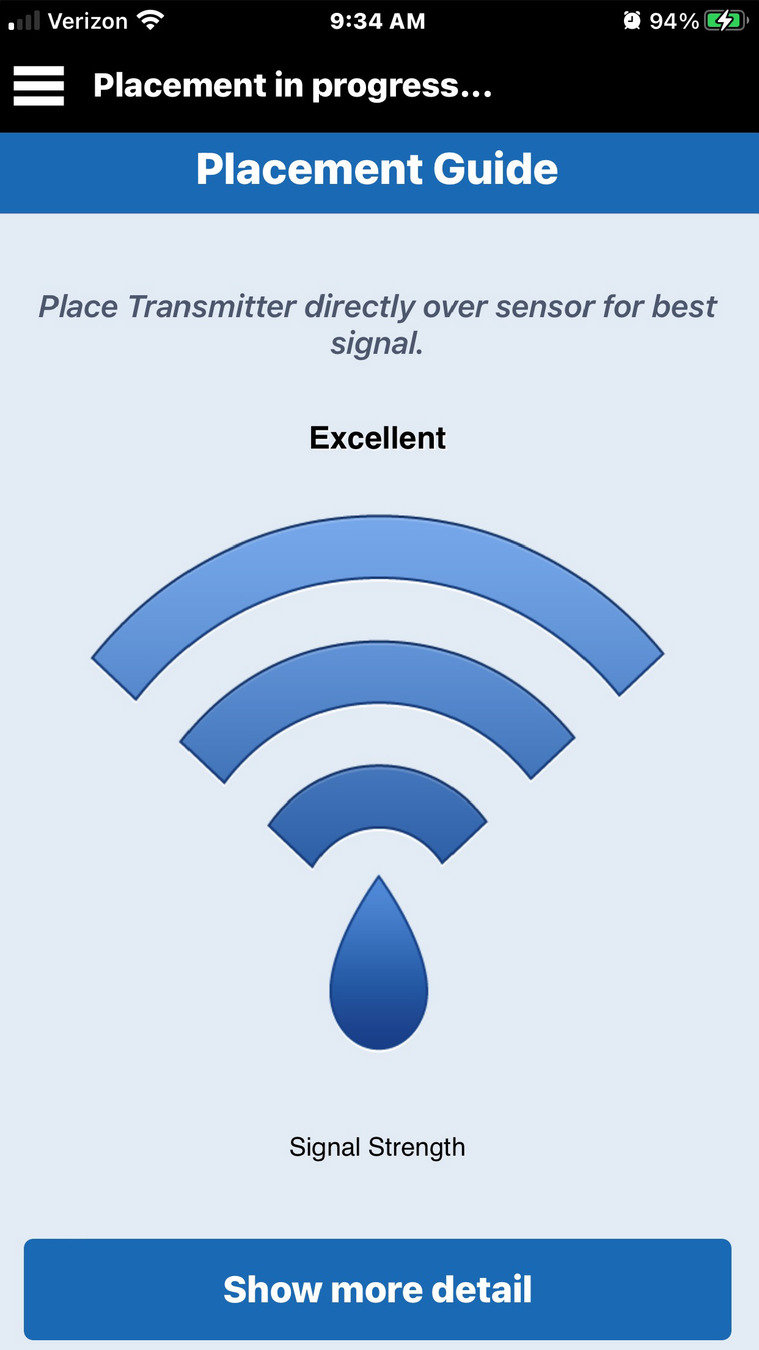
Gently lift and slightly move the smart transmitter plus adhesive to find the location with the strongest signal, somewhere between 2-3 bars or good to excellent.
Rotating the smart transmitter slightly may help.
SYSTEM INITIALIZATION
POSITION SMART TRANSMITTER OVER SENSOR
When moving the transmitter, allow a few seconds for the signal to update before moving the transmitter again.
SYSTEM INITIALIZATION
POSITION SMART TRANSMITTER OVER SENSOR
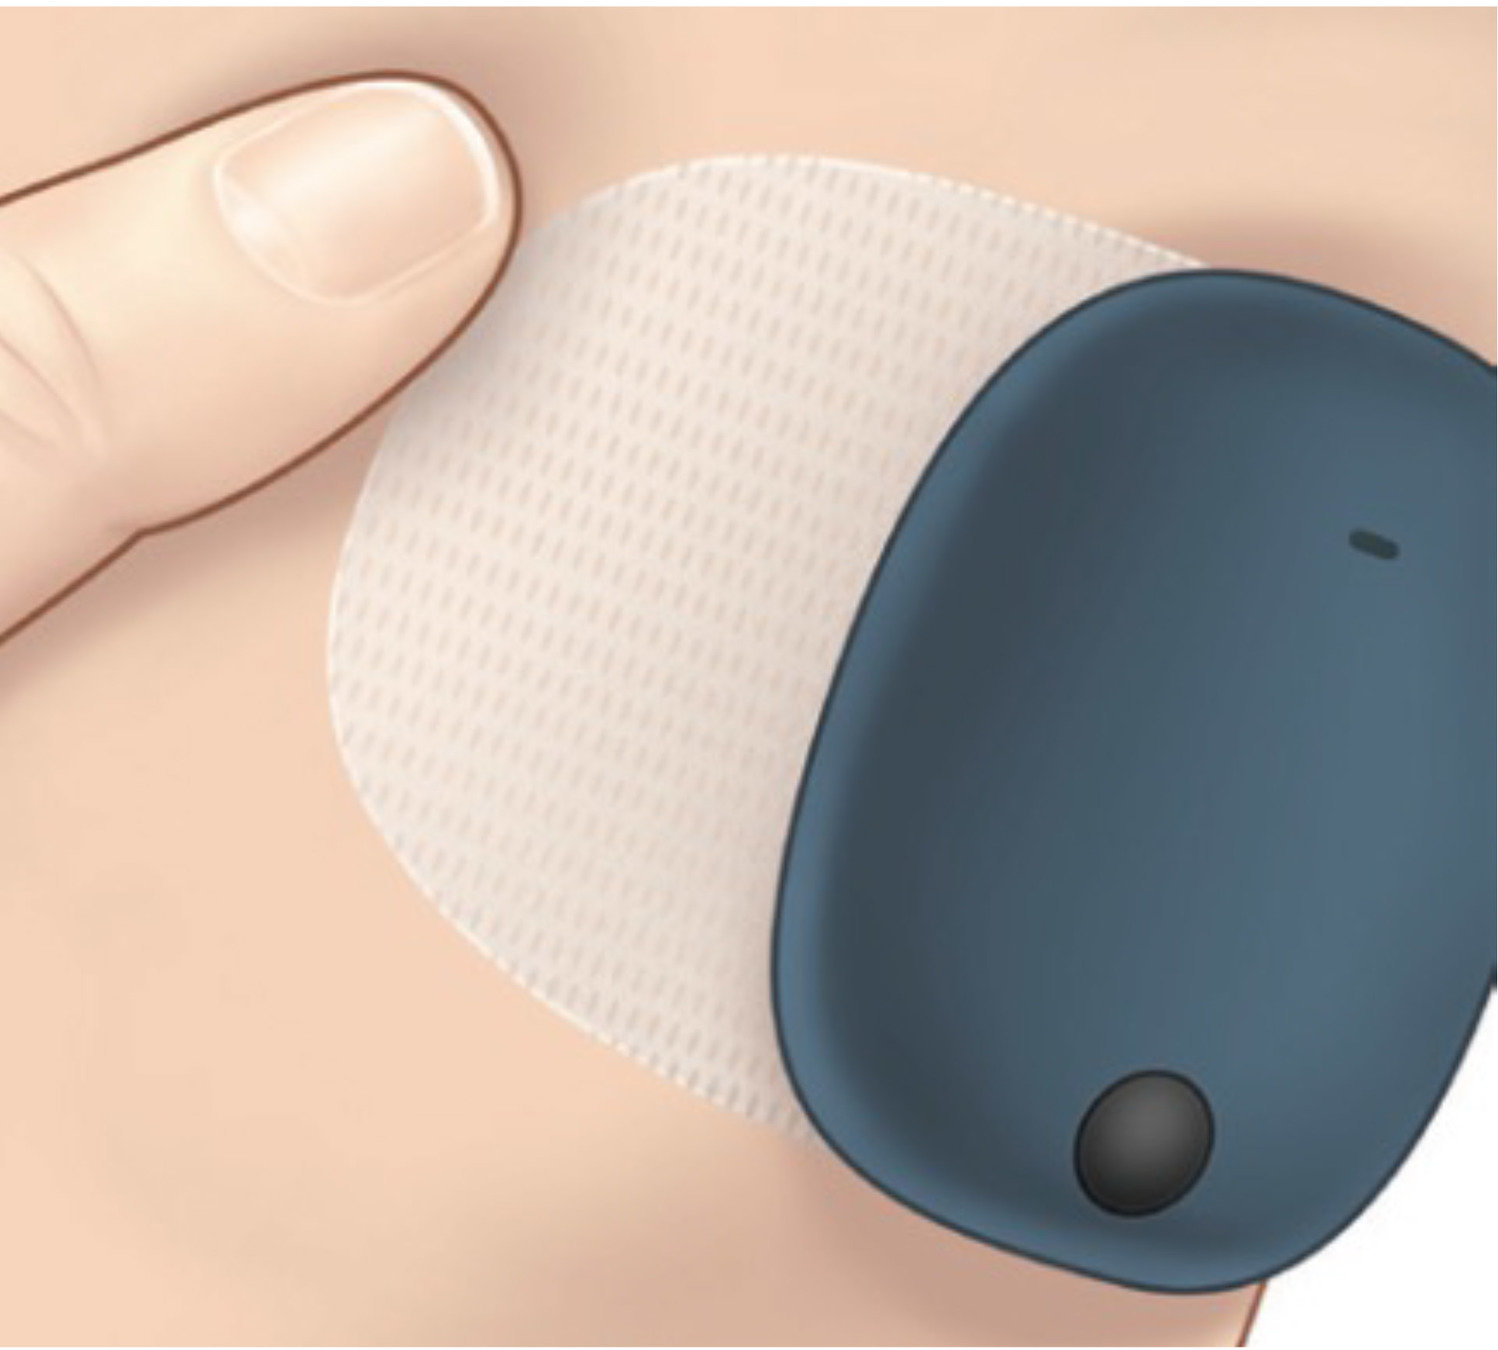
Once you have obtained a signal of two to three bars leave the smart transmitter on your arm there.
Remove the smaller remaining piece of clear backing and smooth out the adhesive patch.

SYSTEM INITIALIZATION
POSITION SMART TRANSMITTER OVER SENSOR
Close the Placement Guide by tapping the menu icon.
The adhesive patch will need to be replaced daily. With practice, you’ll quickly become an expert at positioning your smart transmitter.
SYSTEM INITIALIZATION
POSITION SMART TRANSMITTER OVER SENSOR
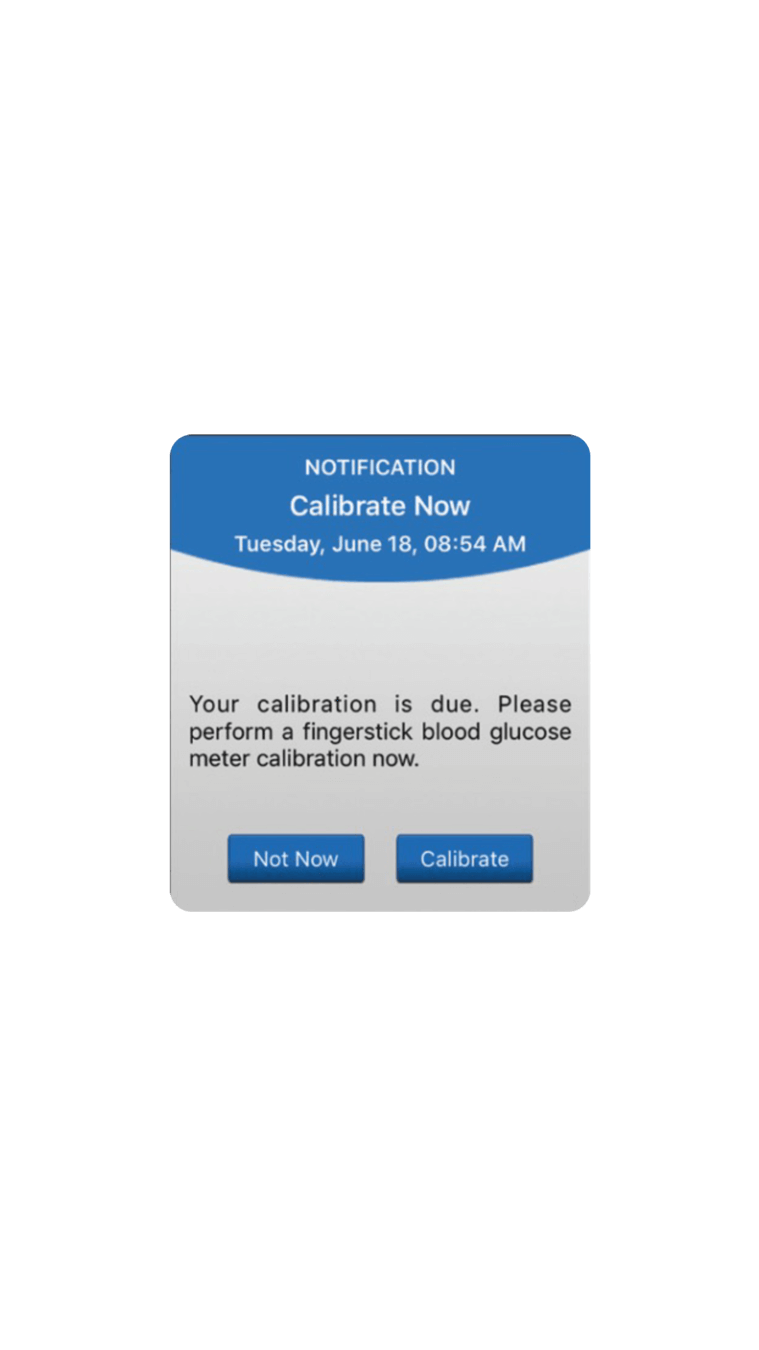
Now that you’ve successfully positioned your Eversense E3 Smart Transmitter,
you’ll see a Calibrate Now notification appear in your mobile app within a few minutes.
This means it’s time to do your first of four 4 fingerstick calibrations.
SYSTEM INITIALIZATION
4 INITIALIZATION CALIBRATIONS
The four calibrations can be completed in
as little as 6 hours,
as you can calibrate
as often as every 2 hours.
And, calibrations must be entered
no more than 12 hours apart.
But, you won’t have to remember the time for each calibration because your Eversense E3 CGM System will remind you each time with a calibrate now notification.
SYSTEM INITIALIZATION
4 INITIALIZATION CALIBRATIONS
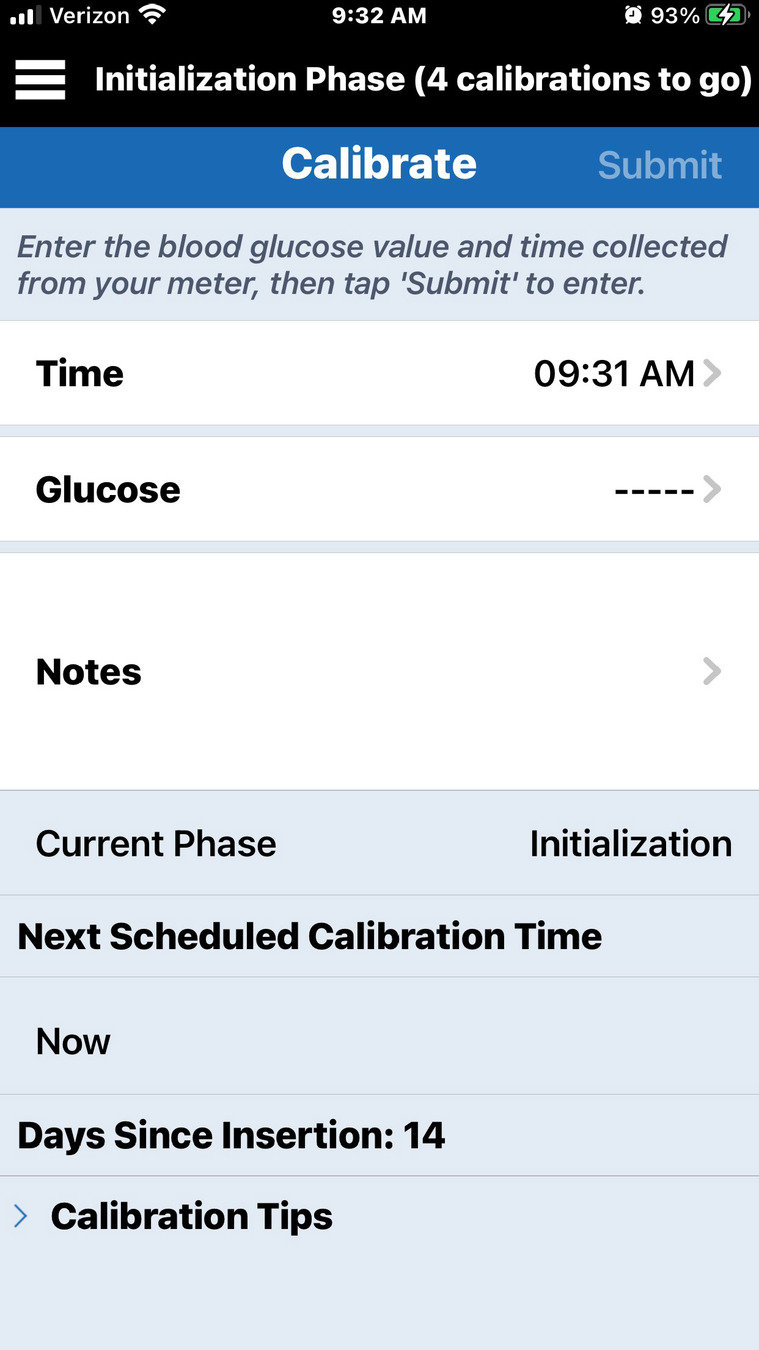
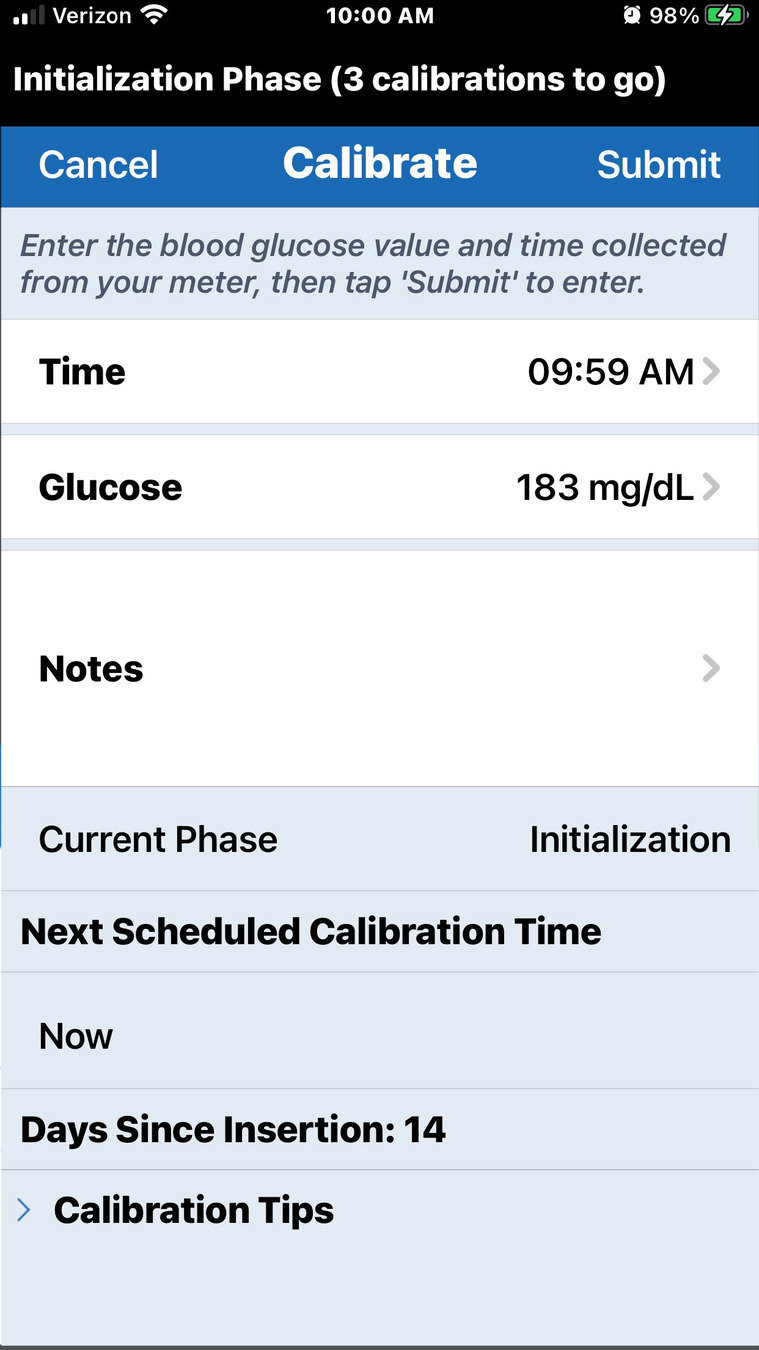
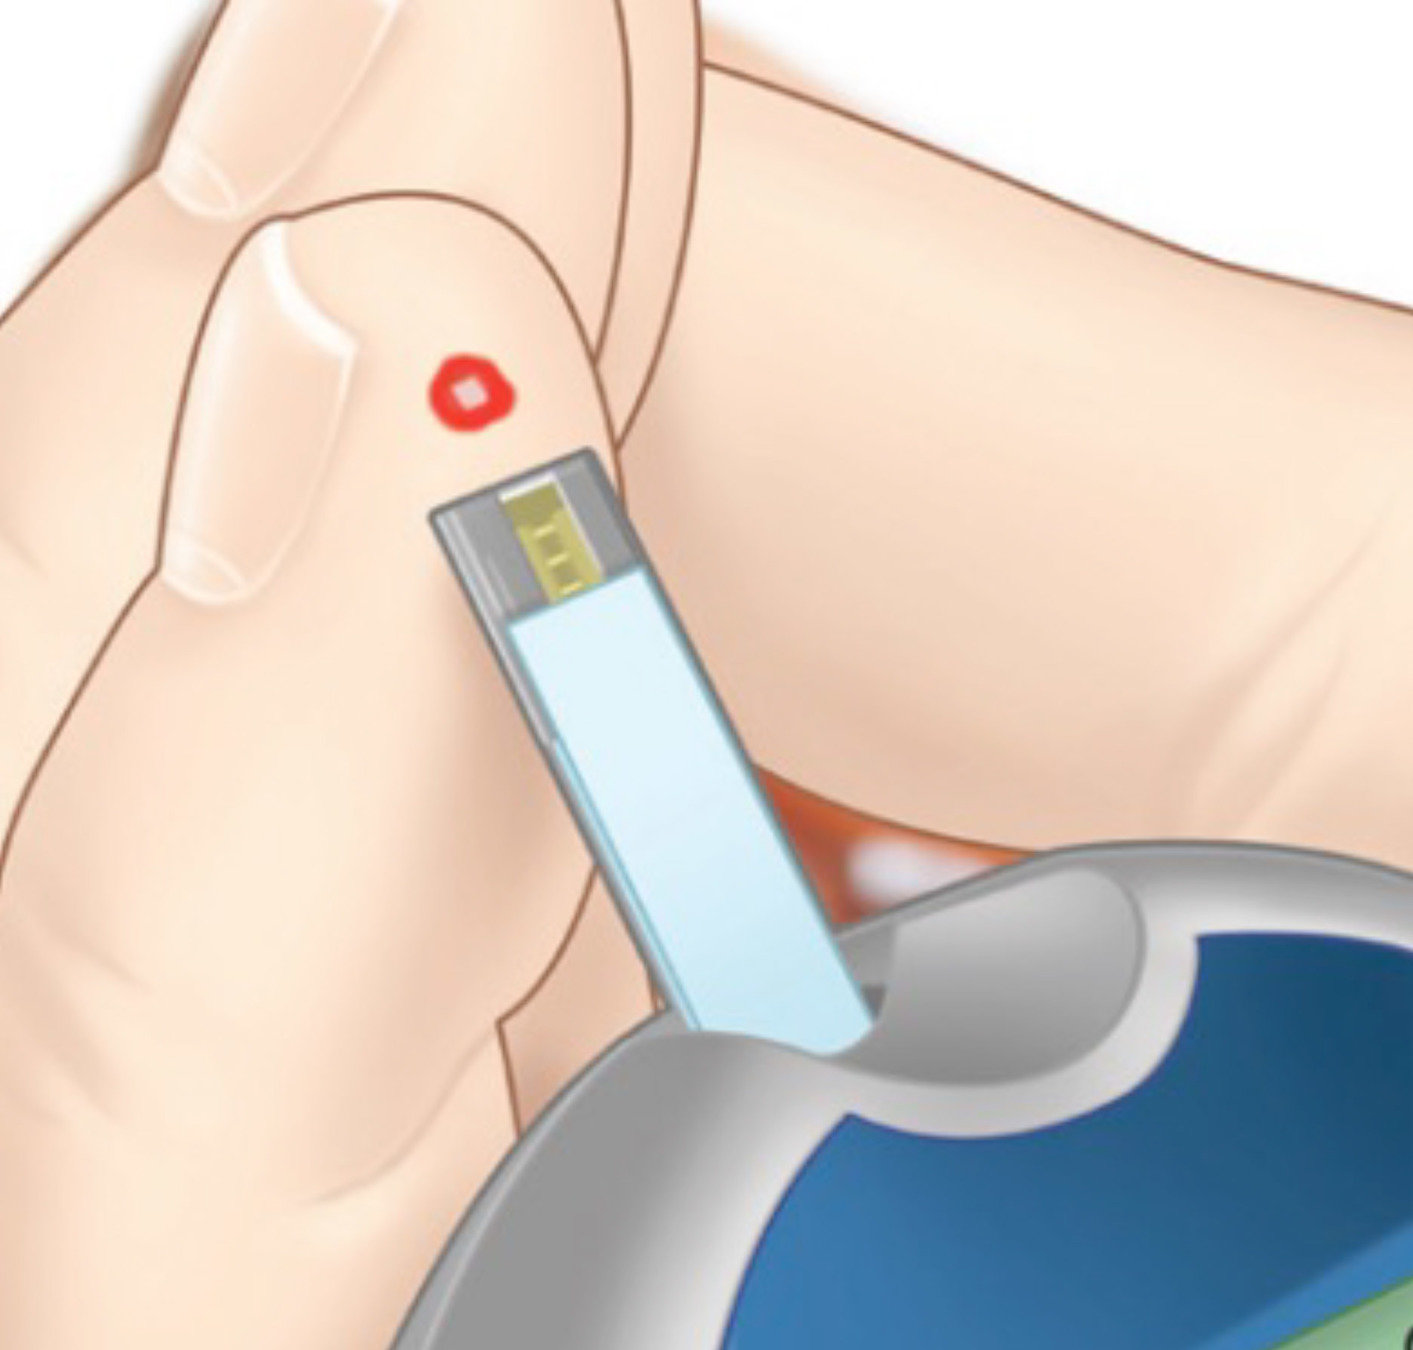
To enter a calibration, do a fingerstick blood glucose check ...
... and tap on the blue Calibrate button.

SYSTEM INITIALIZATION
ENTER A CALIBRATION
SYSTEM INITIALIZATION
ENTER A CALIBRATION
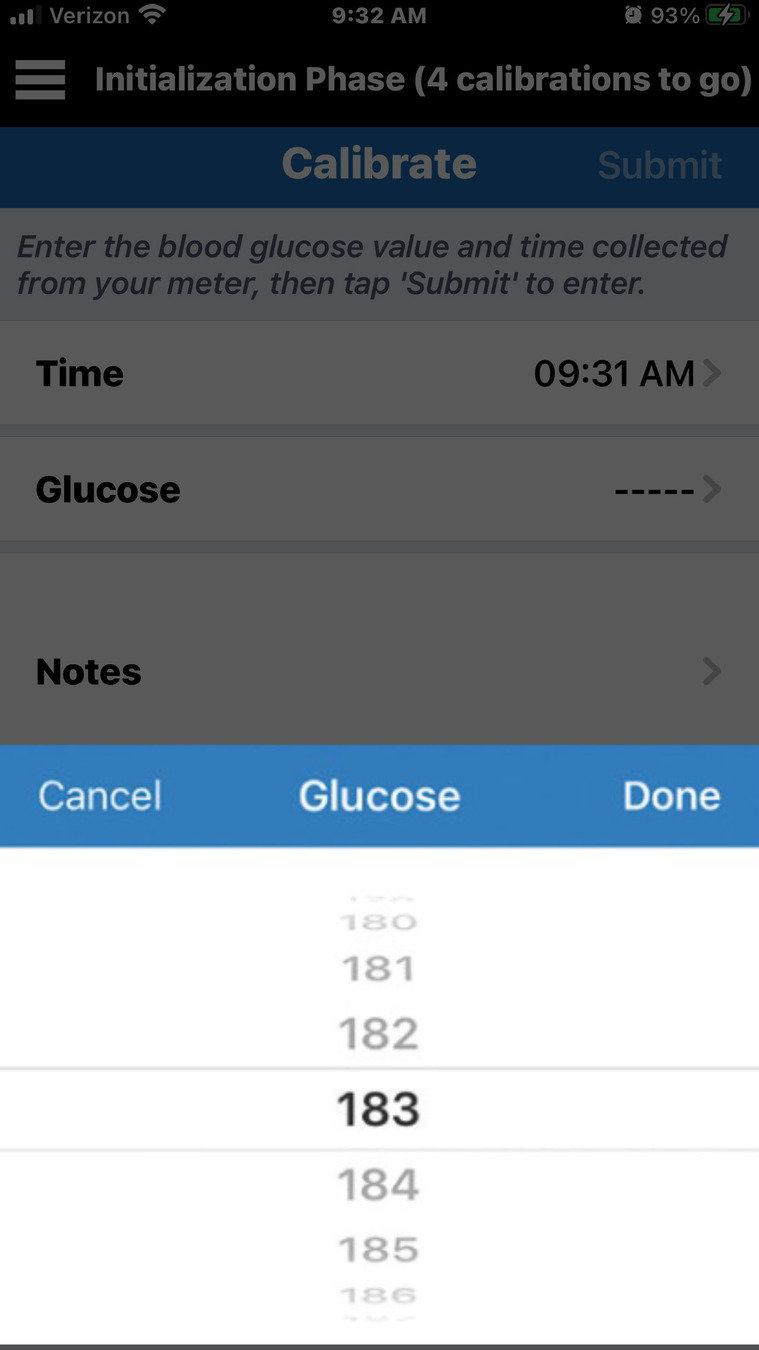
Tap on Glucose...
SYSTEM INITIALIZATION
ENTER A CALIBRATION
Tap on Glucose...
... and scroll to enter the correct blood glucose value,
then tap Done.
SYSTEM INITIALIZATION
ENTER A CALIBRATION
Tap on Glucose...
Confirm that the correct glucose values has been entered, then tap Submit.
... and scroll to enter the correct blood glucose value,
then tap Done.
Tap on Glucose...
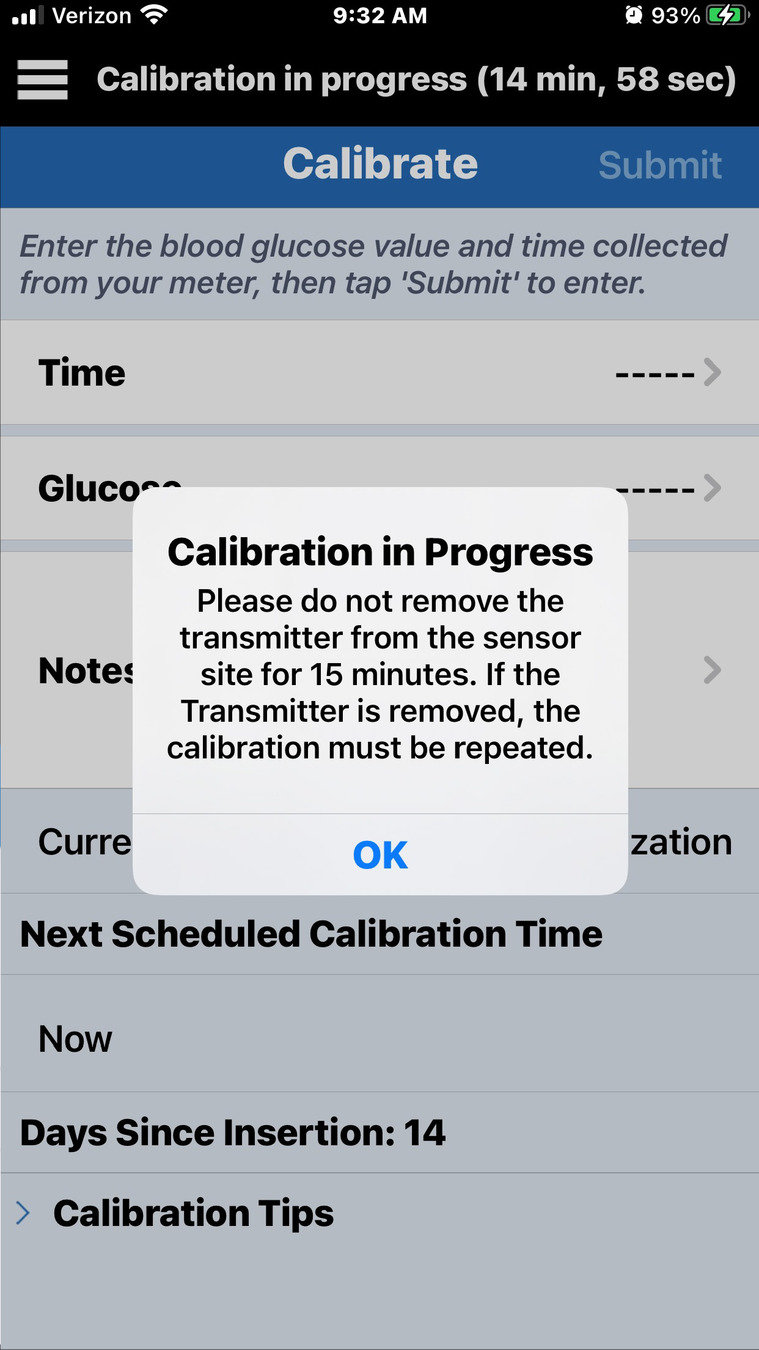
You'll receive a Calibration in Progress notification which you can clear by tapping OK.
SYSTEM INITIALIZATION
ENTER A CALIBRATION
Confirm that the correct glucose values has been entered, then tap Submit.
... and scroll to enter the correct blood glucose value,
then tap Done.
Here’s an example of how that might work:
so their warm-up phase ends
at 9:45 AM on Tuesday.
Let’s say a user linked their sensor and smart transmitter at 9:45 am on Monday,
SYSTEM INITIALIZATION
SYSTEM INITIALIZATION CALIBRATIONS


Warm up ends: 9:45AM
They then use the Placement Guide to place the smart transmitter on their arm over the sensor, and at about 10:00 AM they get their first Calibrate Now notification. They perform a fingerstick
BG check and enter that value into the mobile app.
SYSTEM INITIALIZATION
SYSTEM INITIALIZATION CALIBRATIONS
Warm up ends: 9:45AM
1st calibration: 10:00 AM
Here’s an example of how that might work:
2 hours later, the 2nd Calibrate Now notification appears, and once that 2nd blood glucose value is
entered, sensor glucose
data begins to appear
on the My Glucose
home screen.
SYSTEM INITIALIZATION
SYSTEM INITIALIZATION CALIBRATIONS
Warm up ends: 9:45AM
1st calibration: 10:00 AM
2nd calibration: 12:00 PM
Here’s an example of how that might work:
Calibration prompts #3 and #4 will follow in the same fashion.
But remember, you don’t have to calibrate right away – you have up
to 12 hours to perform the next required calibration. But it is ideal to complete all 4 before going to bed, so that you will have the benefit of continuous data that first night.
Warm up ends: 9:45AM
1st calibration: 10:00 AM
2nd calibration: 12:00 PM
3rd calibration: 2:00 PM
4th calibration: 4:00 PM
SYSTEM INITIALIZATION
SYSTEM INITIALIZATION CALIBRATIONS
Here’s an example of how that might work:
Once you have completed the 4 initialization calibrations, and are receiving continuous glucose data, you will enter the 2 Daily Calibration phase.
For the next 21-days you will need to calibrate 2 times per day. After that, you’ll be required to calibrate at least once, but no more than two times, per day.


SYSTEM INITIALIZATION
SYSTEM INITIALIZATION CALIBRATIONS
You'll learn more about Daily Calibration Phases in the presentation Day 3 and beyond: Daily Wear
Finally, good calibration technique is the best way to ensure the greatest accuracy of your Eversense E3 CGM system, so here are a few calibration tips.
SYSTEM INITIALIZATION
CALIBRATION TIPS
- Always wash your hands well, and dry them thoroughly.
- If possible, avoid calibrating when glucose levels may be changing rapidly such as after meals, after taking insulin, or during or after exercise.
- Always enter an actual blood glucose value, and enter the calibration within 10 minutes.
- And finally, keep your smart transmitter in place over the Eversense E3 sensor for at least
5 minutes before and 15 minutes after each calibration.
SYSTEM INITIALIZATION
CALIBRATION TIPS
You’ve now completed Day 2 training, and are ready to move on to the Day 3 training on Daily Wear – which will cover the features of the Eversense E3 CGM System that you’ll use every day.
Please contact your health care provider
if you have a medical question or concerns
about your diabetes treatment plan.
And contact Eversense Customer Care
if you have technical questions about
the Eversense E3 CGM System.
DAY 2 TRAINING COMPLETE
Welcome to daily life with your Eversense E3 CGM system! In this presentation you’ll learn about how your Eversense CGM system can help you manage your diabetes with more confidence.
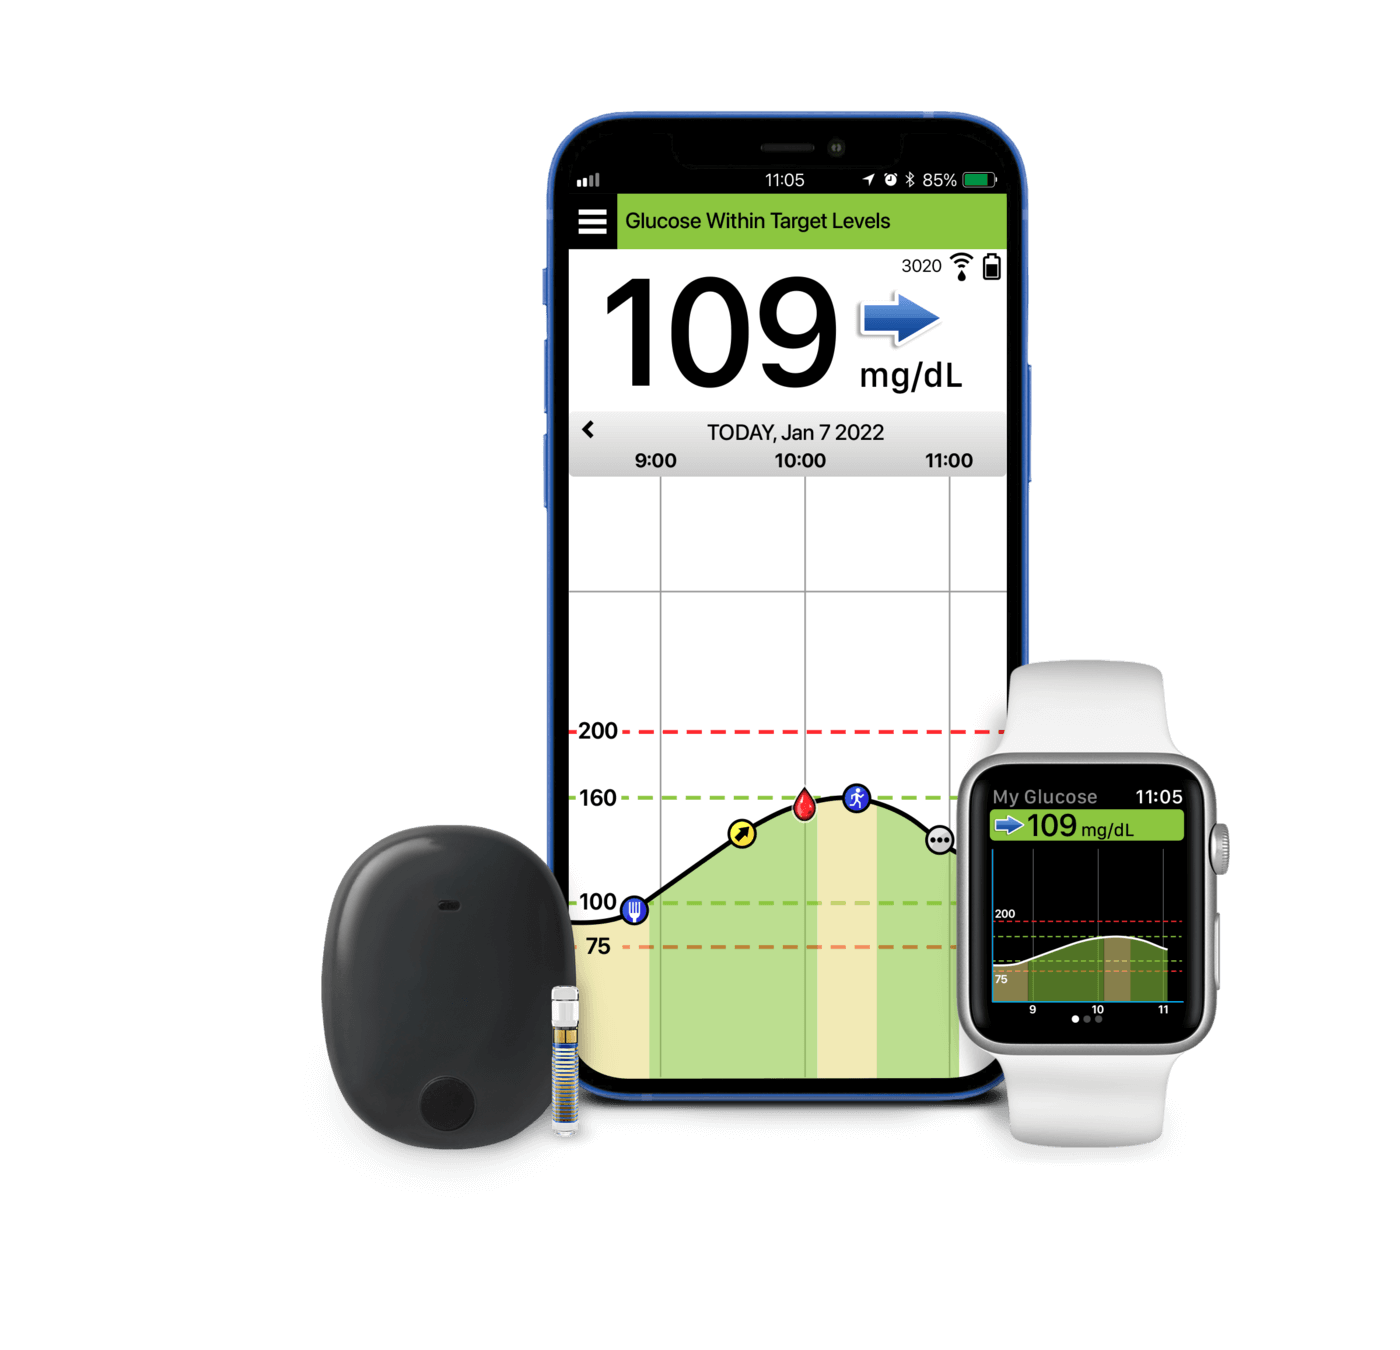
First, let’s review the My Glucose home screen in the Eversense mobile app.
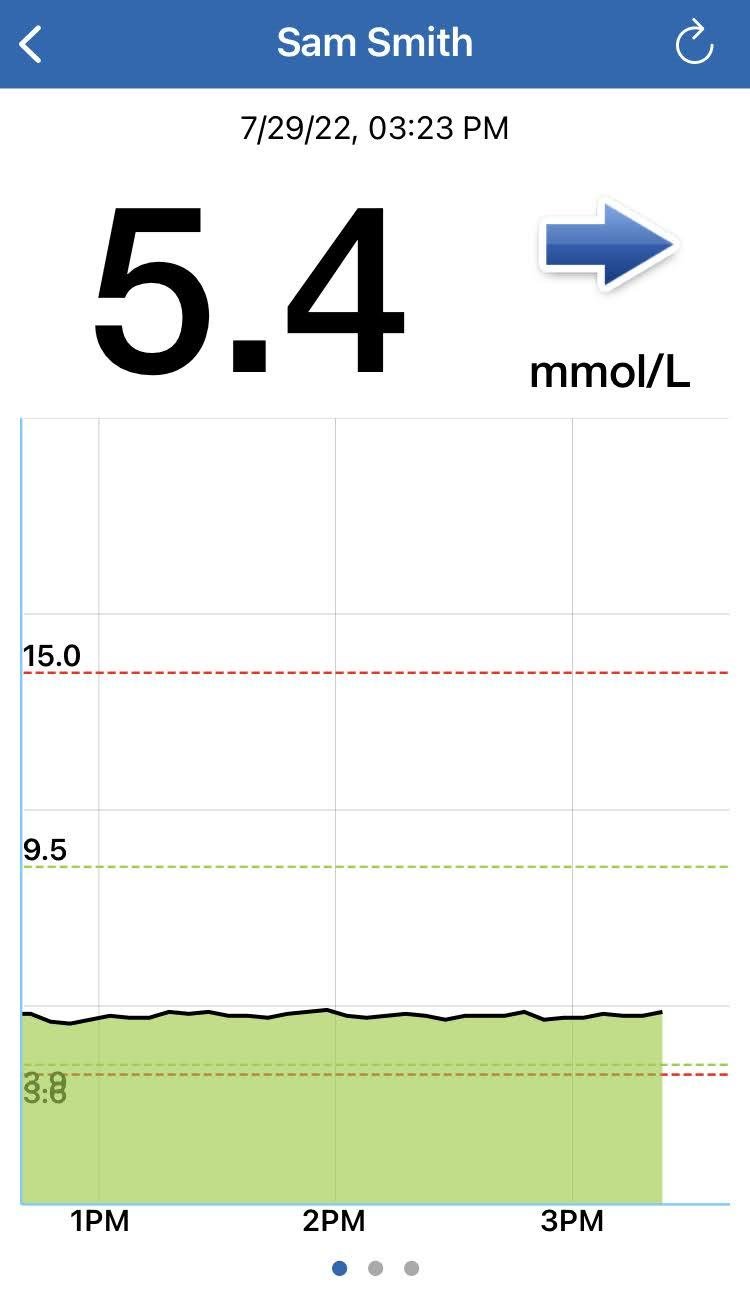
MY GLUCOSE HOME SCREEN
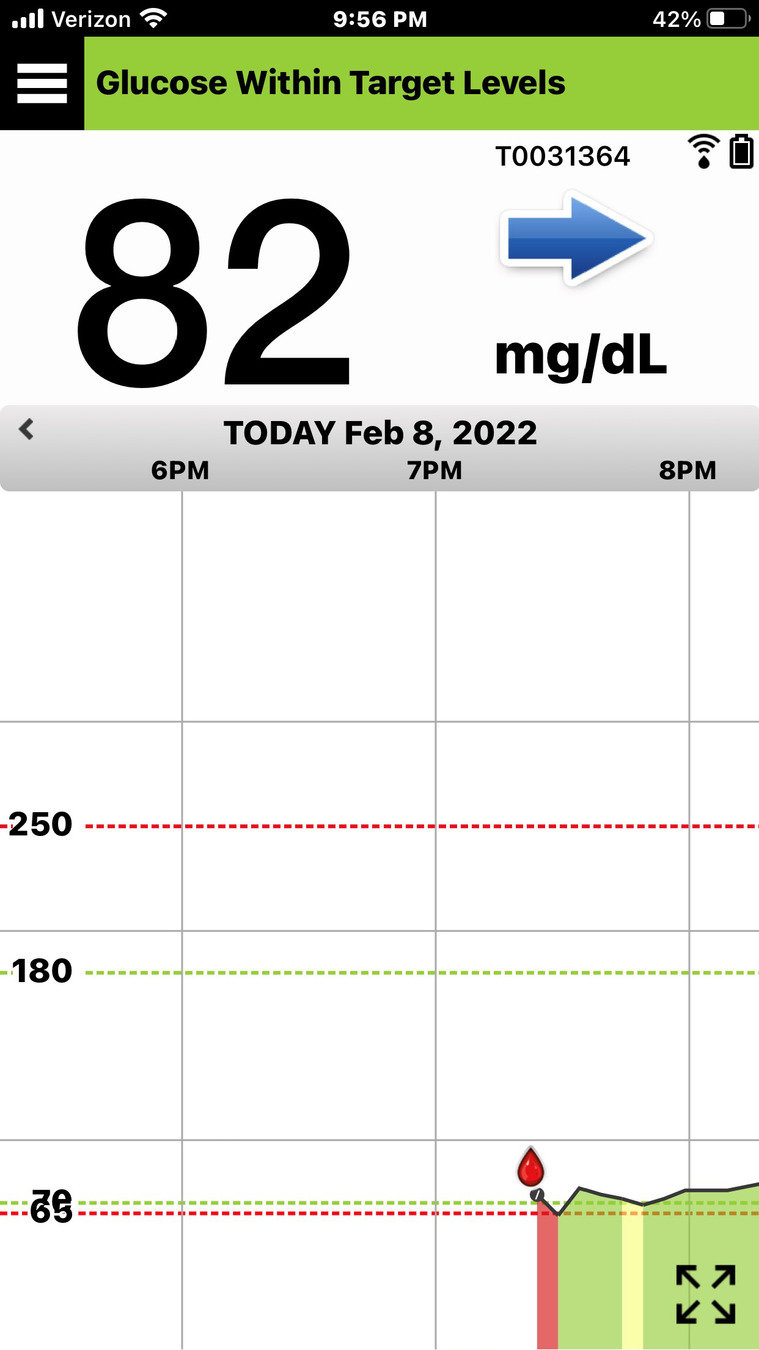
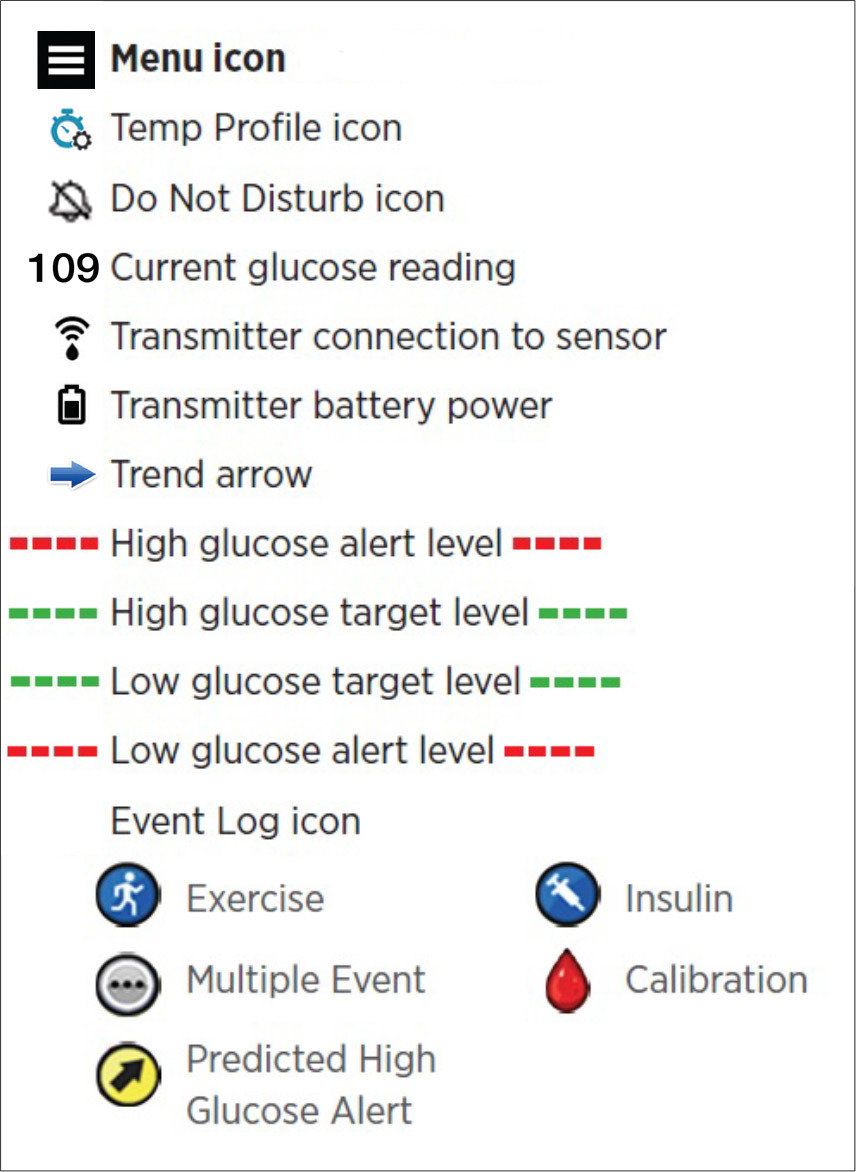
When you open your Eversense mobile app, your current glucose level and trend arrow are prominently displayed.
MY GLUCOSE HOME SCREEN
First, let’s review the My Glucose home screen in the Eversense mobile app.
At the top right, you can see the strength of the connection between your transmitter and sensor, and
the amount of battery life in your transmitter
MY GLUCOSE HOME SCREEN
When you open your Eversense mobile app, your current glucose level and trend arrow are prominently displayed.
First, let’s review the My Glucose home screen in the Eversense mobile app.
If you have activated the Do Not Disturb feature or the Temporary Profile feature, these icons appear in the top left.
MY GLUCOSE HOME SCREEN
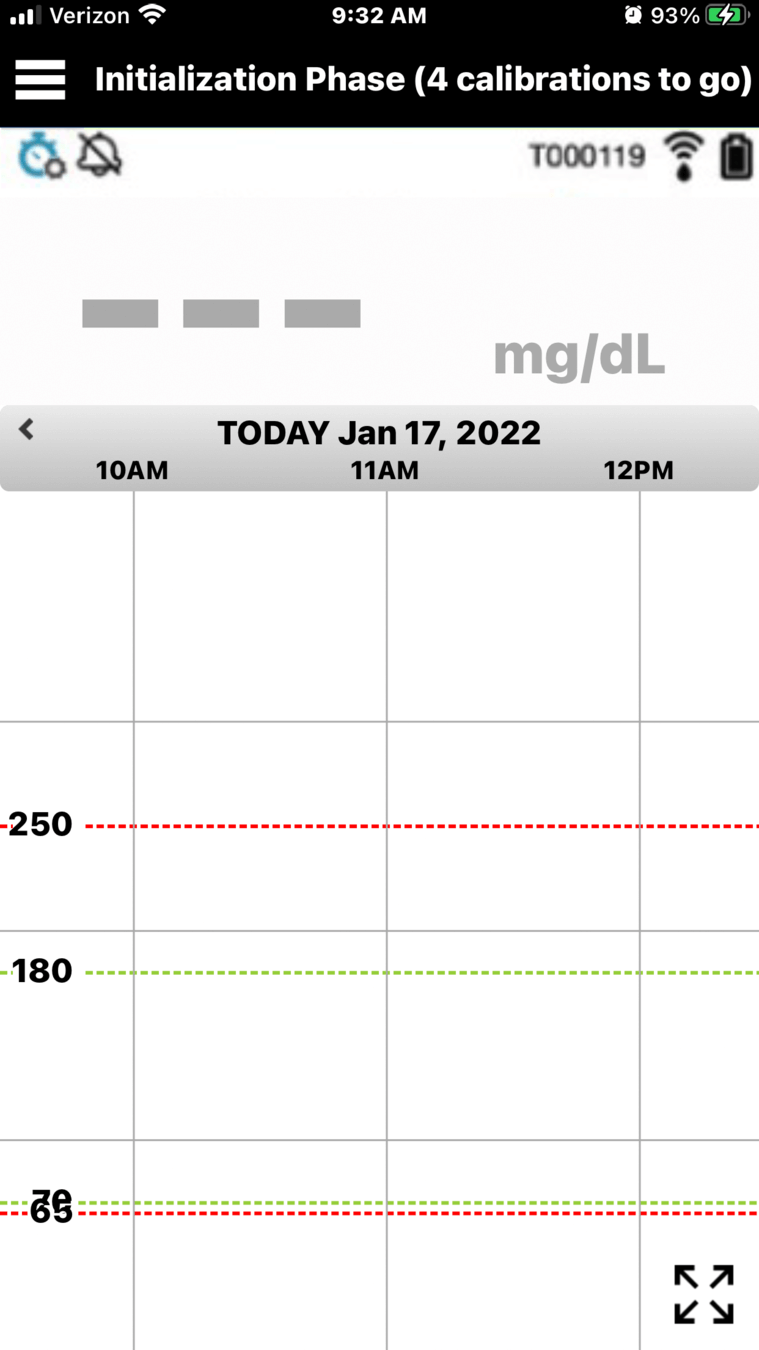
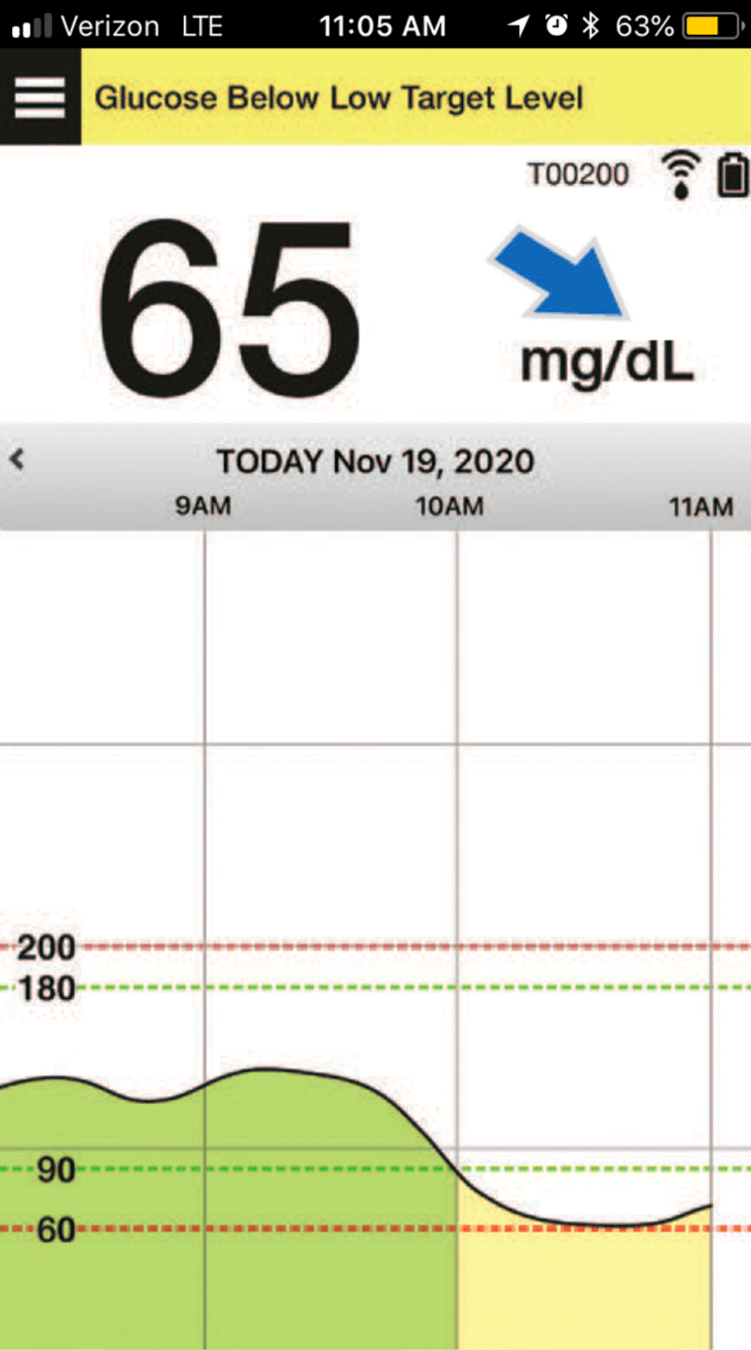
And, at the bottom is the glucose trend graph.
The red dashed lines indicate your high and low glucose alert levels, and the green dashed lines indicate your target range.
Any event that you enter into your app – such a calibration, meal, exercise or insulin – or any alerts you receive - show up on your trend graph with an icon.
MY GLUCOSE HOME SCREEN
If you have activated the Do Not Disturb feature or the Temporary Profile feature, these icons appear in the top left.
You can refer to the Using
the Mobile App section in your Eversense E3 CGM Quick Reference Guide at any time.
MY GLUCOSE HOME SCREEN
With CGM, at one glance you can see:
Glucose value
USEFUL CGM INFORMATION
- what your current glucose level is,
With CGM, at one glance you can see:
Trend arrow
USEFUL CGM INFORMATION
- what your current glucose level is,
- where it’s heading and how fast,
With CGM, at one glance you can see:
Recent trend information and alerts
USEFUL CGM INFORMATION
- what your current glucose level is,
- where it’s heading and how fast,
- and the last 3 hours of glucose data.
The trend arrow is an especially powerful benefit of CGM. It allows you to anticipate your future glucose level and proactively adjust your diabetes treatment decisions as needed.
Trend arrow
TREND ARROWS
Each arrow angle means a different rate of change as shown in the chart on the right:
- stable,
- rising moderately,
- falling moderately,
- rising very rapidly,
- and falling very rapidly.
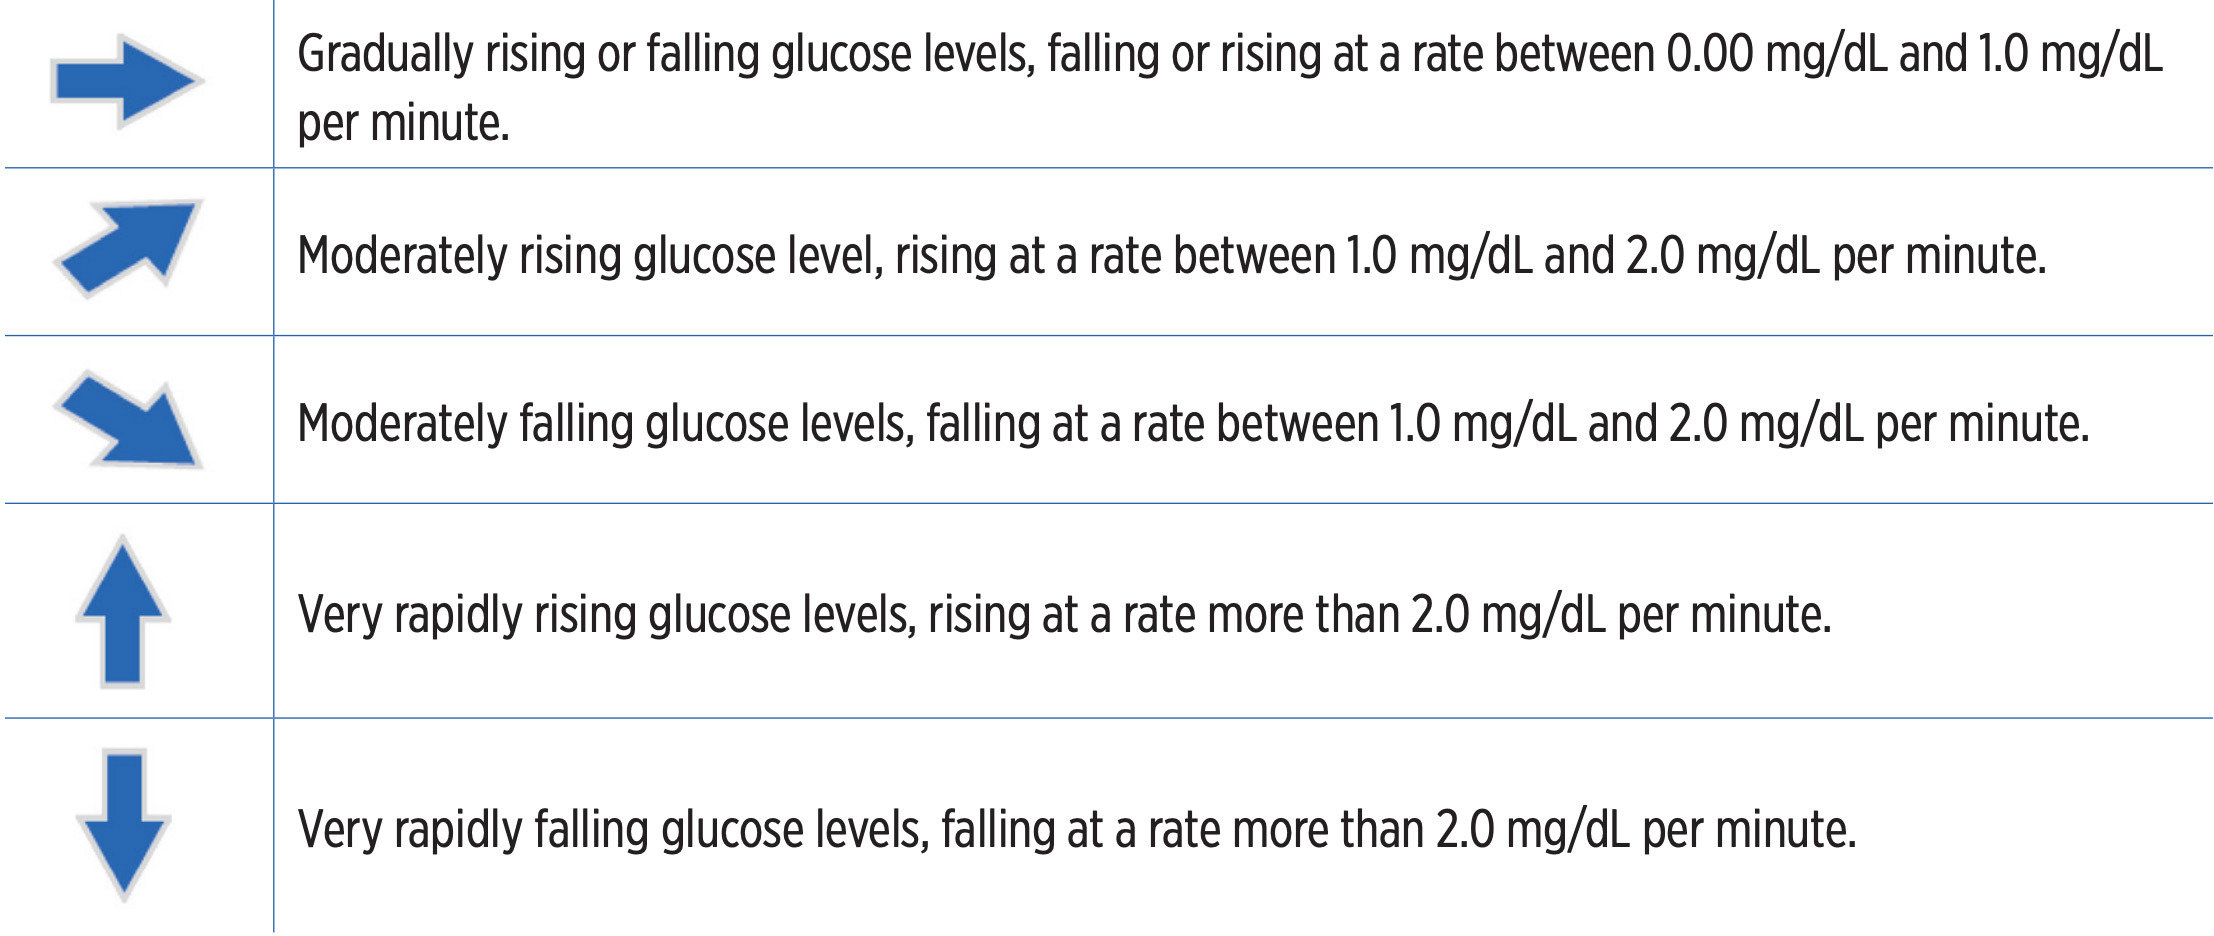
Gradually rising or falling glucose levels, falling or rising at a rate between 0.00 mg/dL and 1.0 mg/dL per minute.
Moderately rising glucose level, rising at a rate between 1.0 mg/dL and 2.0 mg/dL per minute.
Moderately falling glucose levels, falling at a rate between 1.0 mg/dL and 2.0 mg/dL per minute.
Very rapidly rising glucose levels, rising at a rate more than 2.0 mg/dL per minute.
Very rapidly falling glucose levels, falling at a rate more than 2.0 mg/dL per minute.
TREND ARROWS
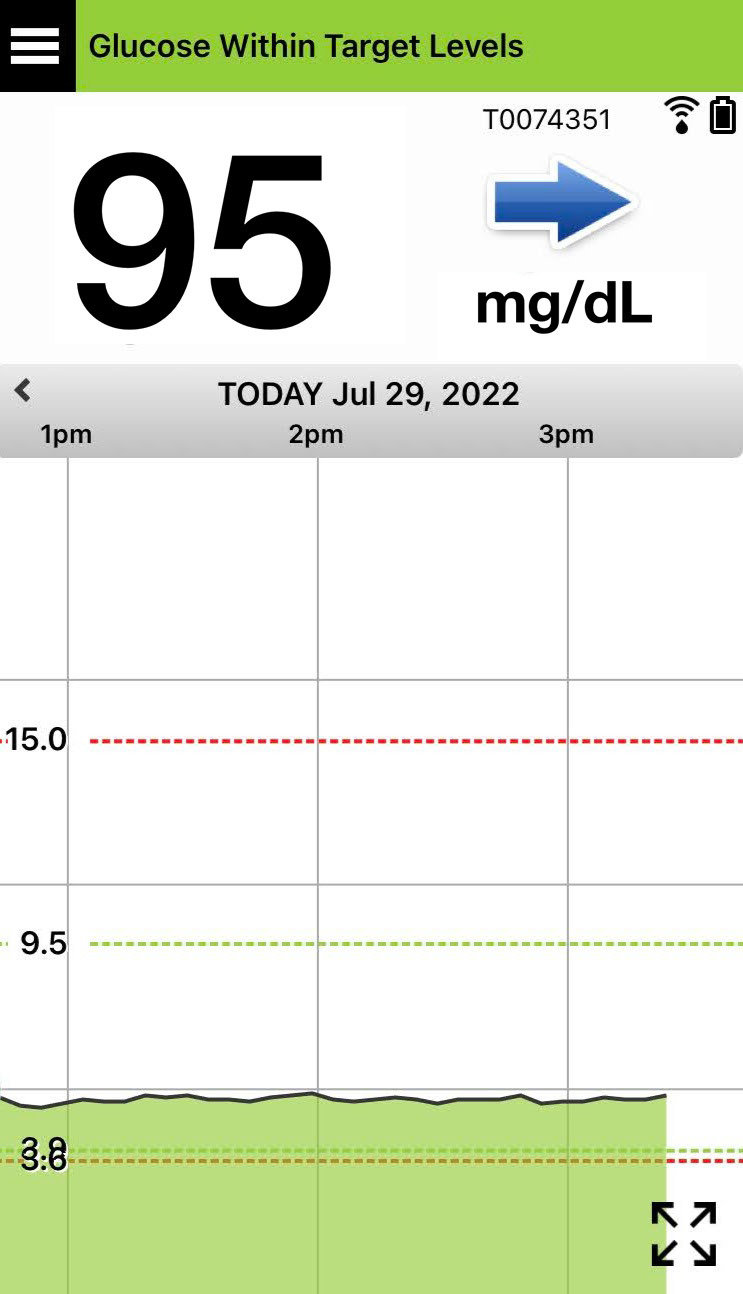
Here’s an example. Let’s say you are about to eat a meal and are considering your insulin dose. You look at your Eversense App and see that your glucose level is 95 mg/dL and the trend arrow is flat. This means your glucose level is currently stable, so it’s likely that no adjustment to your normal pre-meal insulin dose is needed.

TREND ARROWS
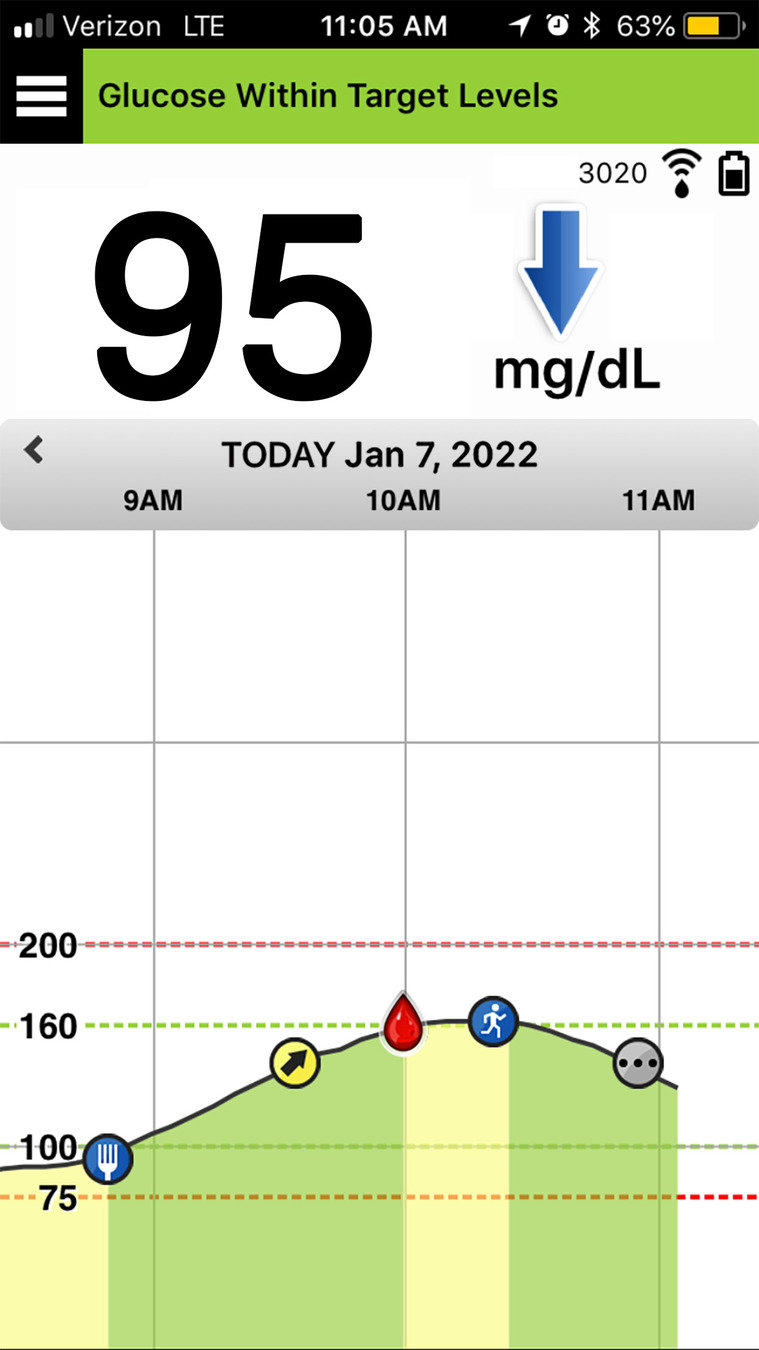
However, what if you saw
this instead?
Your glucose level is 95 mg/dL,
but with a trend arrow pointing
straight down. This means your
glucose is decreasing very rapidly - at least 2 mg/dl/min. So, your glucose level could be 60 points lower in 30 minutes. Using this information, you would likely adjust your pre-meal insulin dose to avoid a low glucose.
TREND ARROWS
Remember that everyone’s
diabetes is different. You should always discuss how to best use your trend arrows for making decisions about your diabetes management with your healthcare provider.
TREND ARROWS
As with all CGM systems, there are times when you should use a BG meter value rather than your Eversense E3 CGM for making a diabetes management or treatment decision.
WHEN TO USE YOUR BG METER

If your symptoms don’t match
the sensor glucose value
When no glucose value
or trend arrow is displayed,
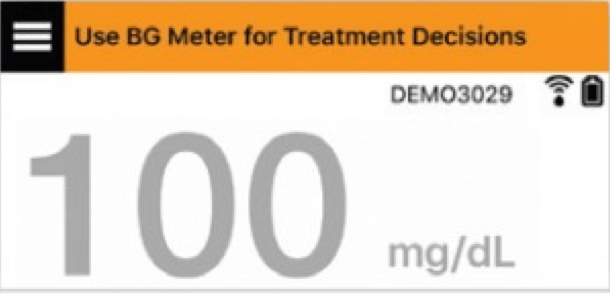
When the status bar on your Eversense app states “Use BG meter for Treatment Decisions”
If you are taking an antibiotic
of the tetracycline class,
as this class of drugs can falsely
lower sensor glucose values
WHEN TO USE YOUR BG METER
Your CGM system will send you alerts
and notifications based upon system status and your personalized glucose settings.

ALERTS AND NOTIFICATIONS
And, with the Eversense E3 CGM system, you not only see and hear your alerts and notifications from your mobile app, but you feel them too – by way of unique on-body vibrations from your Eversense E3 smart transmitter.
ALERTS AND NOTIFICATIONS
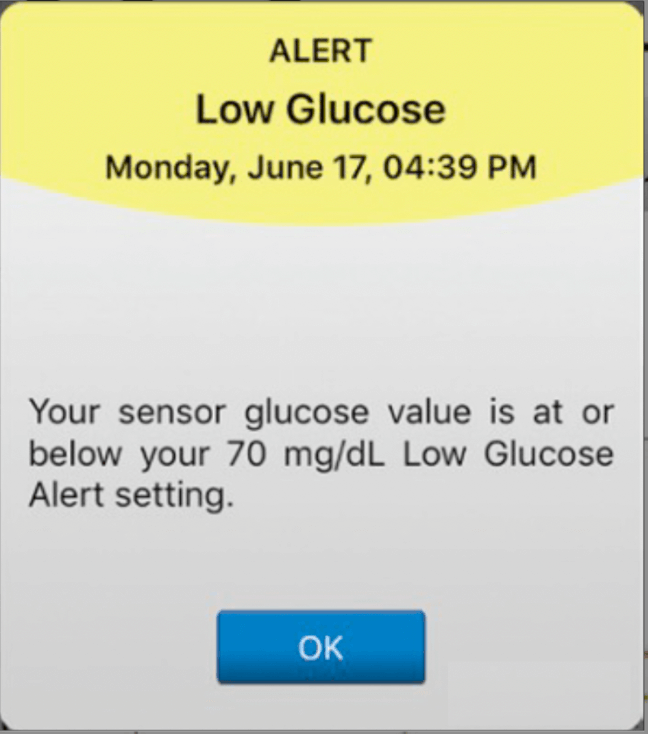
Your CGM system will send you alerts
and notifications based upon system status and your personalized glucose settings.
For example, if your glucose falls to, or below, your low glucose alert level, you’ll see the alert pop-up on your app, hear a sound from your mobile device AND feel your smart transmitter vibrate in a unique pattern.
For a complete list of the unique vibration patterns, refer to your Eversense E3 User Guide.
ALERTS AND NOTIFICATIONS
The Ambient Light alert is unique to the Eversense CGM system.

It will appear if there is too much light getting to the sensor through your skin - interfering with the sensor’s ability to do its job. This alert is not common, and is a temporary condition.
AMBIENT LIGHT ALERT
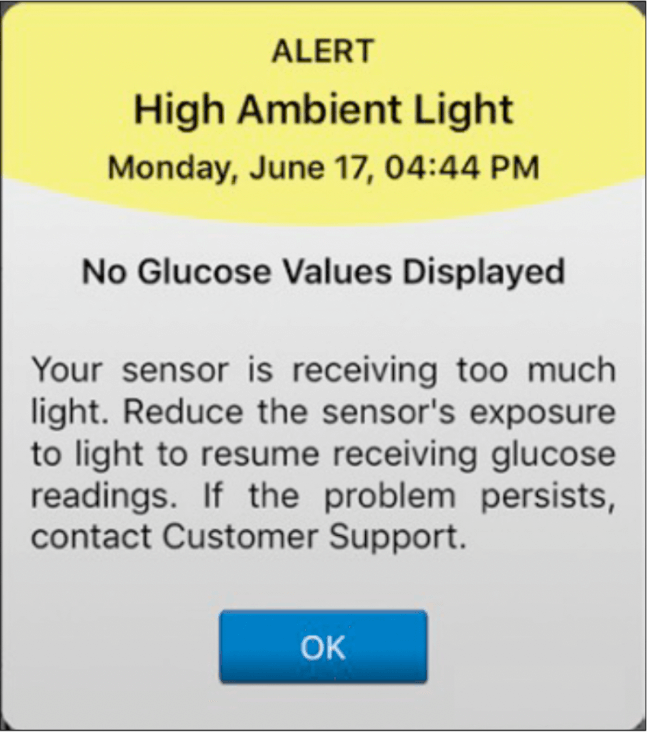
If you get this alert, the following steps might help:
- Wear something that covers the smart transmitter and the surrounding area
- Check to make sure the adhesive patch on your skin is secure and not lifting at the edges or is not folded. If it is, you will need to replace the adhesive patch.
- If using a clear adhesive patch
switch to a white adhesive patch. - Try moving out of the direct sunlight
AMBIENT LIGHT ALERT
Another alert is the Calibrate Now alert.
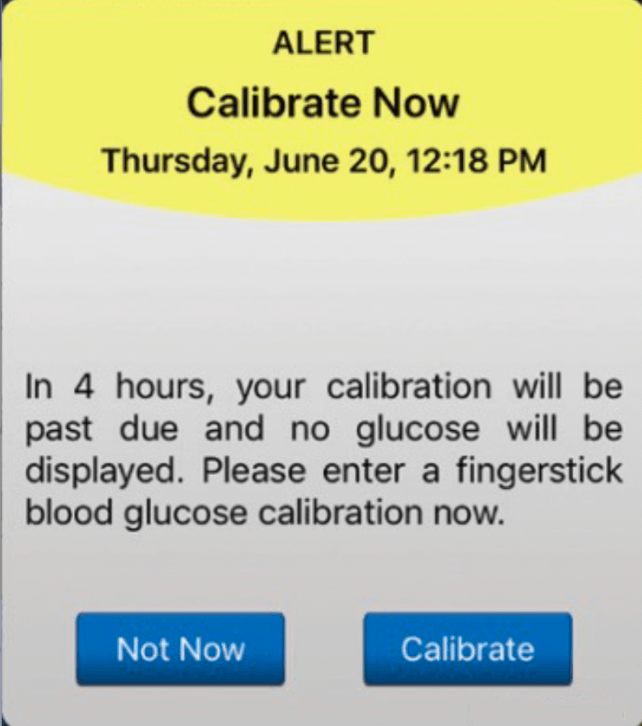
CALIBRATE NOW ALERT
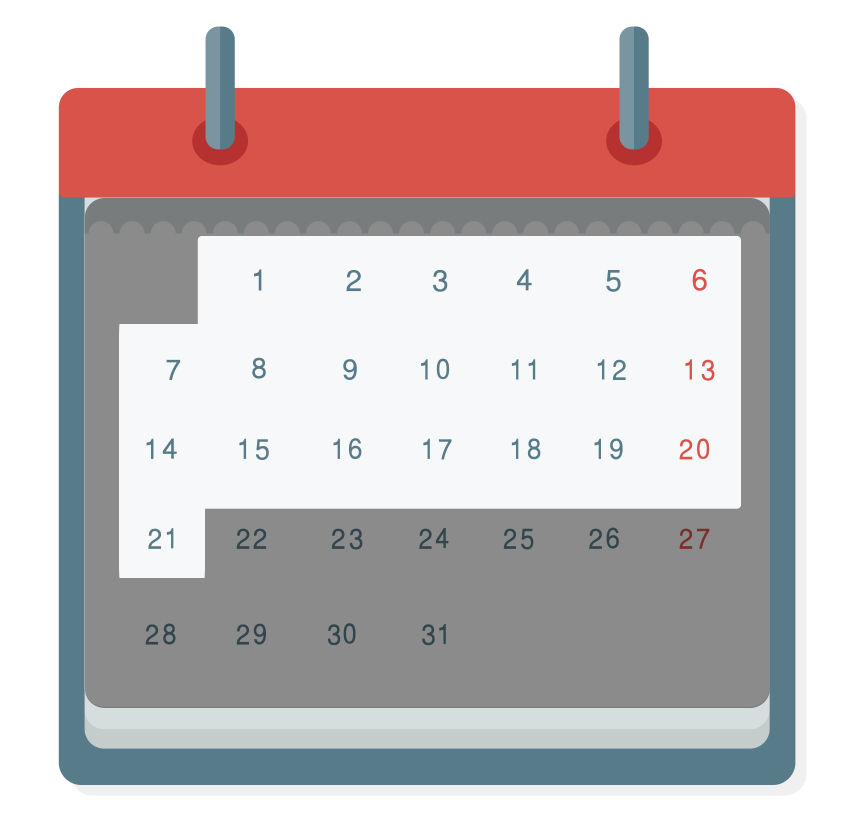
The Eversense E3 long-term CGM System maintains accuracy during the first 21 days through twice daily calibrations.
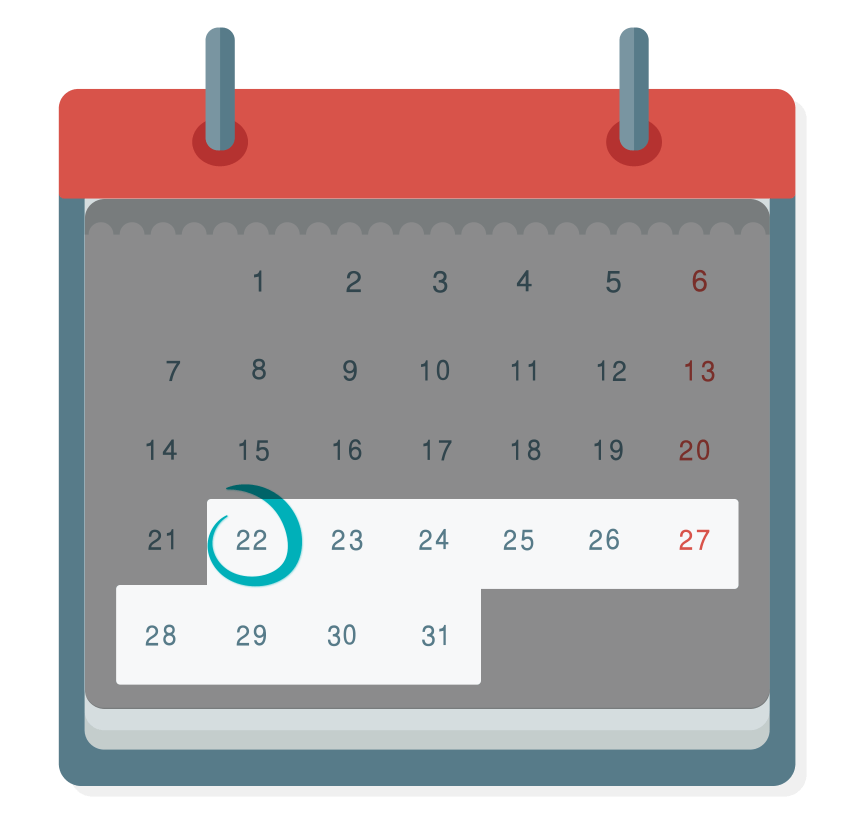
Then, starting at day 22, your
system will detect if it needs
1 or 2 calibrations per day.
It will alert you with the Calibrate Now alert when a calibration is needed.
CALIBRATE NOW ALERT
And here’s how calibration alerts
and notifications work together.
When you receive the Calibrate Now alert and respond by entering your BG fingerstick value, you will receive one of two notifications if there is an update to when your next calibration is due.
Calibration Alerts
Notifications
CALIBRATION ALERTS AND NOTIFICATIONS
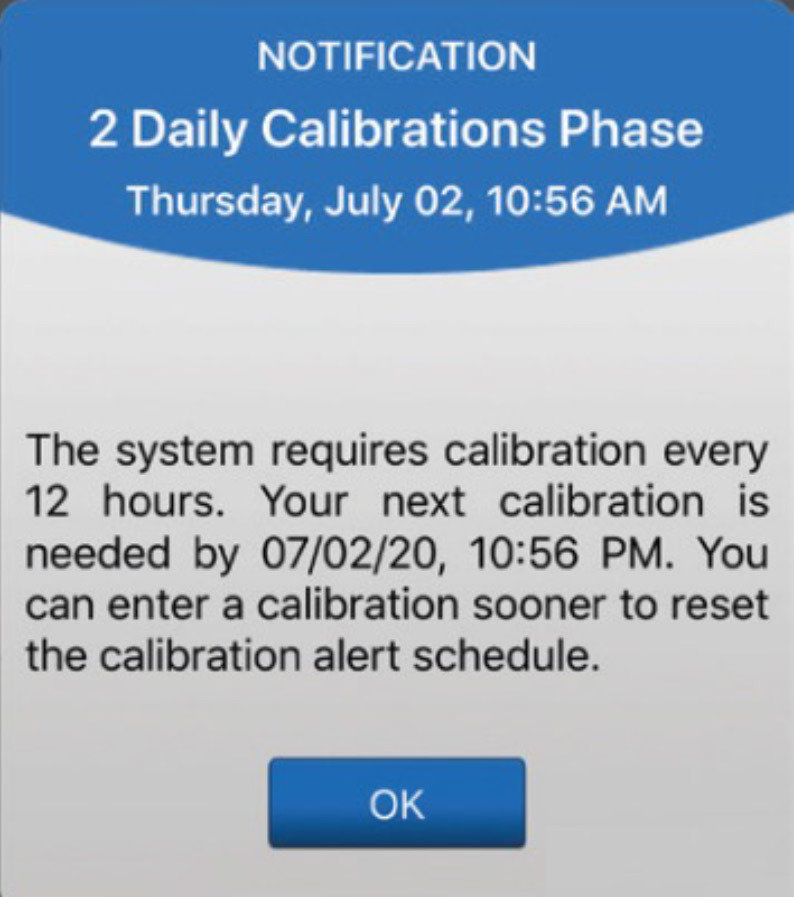
If you get the 2 Daily Calibrations Phase notification, this means 2 calibrations are required each day. And, you’ll
be reminded to calibrate approximately every 12 hours.
CALIBRATION ALERTS AND NOTIFICATIONS
Calibration Alerts
Notifications
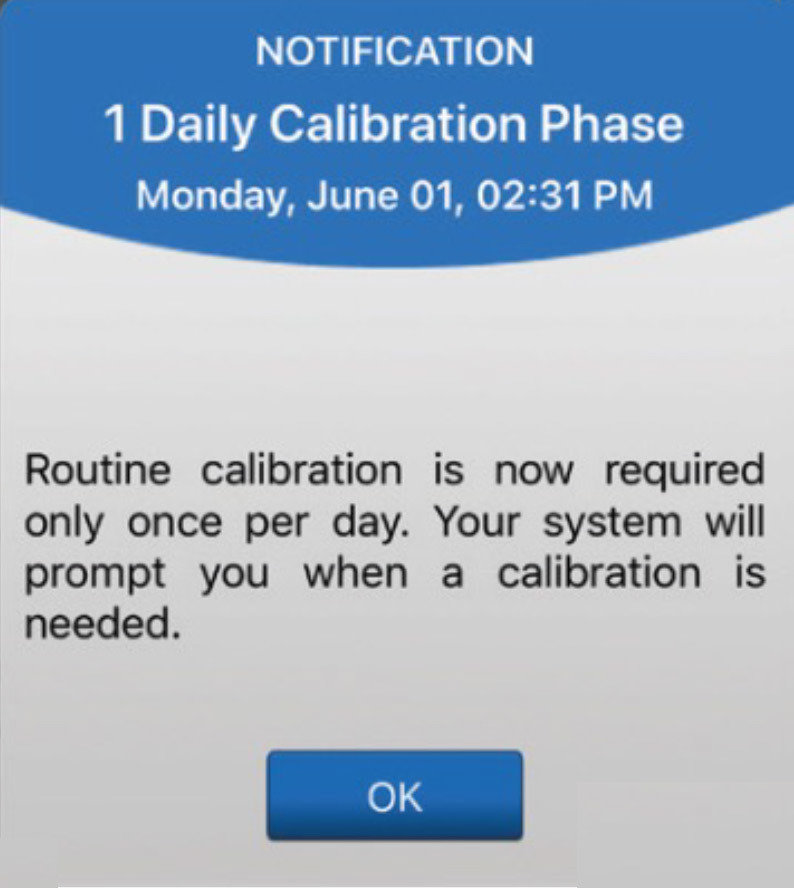
If the 1 Daily Calibration Phase notification appears, it means only
a single calibration is needed each day. So, you’ll see your Calibrate Now alerts every 24 hours.
CALIBRATION ALERTS AND NOTIFICATIONS
Calibration Alerts
Notifications
CALIBRATE SCREEN
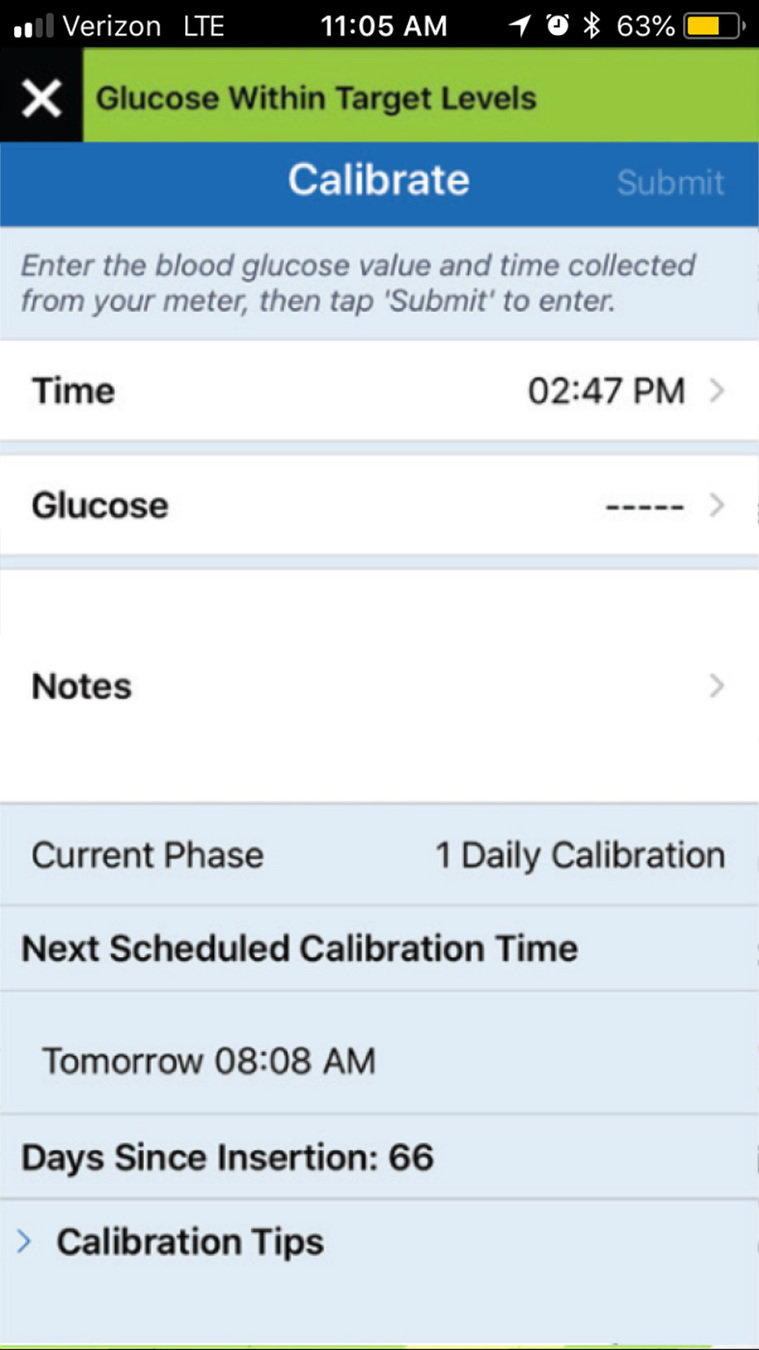
If you navigate to the Calibrate screen from the main menu,
you can check:
CALIBRATE SCREEN
If you navigate to the Calibrate screen from the main menu,
you can check:
- what daily calibration phase
you are in,
If you navigate to the Calibrate screen from the main menu,
you can check
- when your next calibration
is due.
- what daily calibration phase
you are in,
CALIBRATE SCREEN
If it’s more convenient in your day, you have the option to calibrate early – that is, before you get your alert that a calibration is due.
CALIBRATION TIMING
If you navigate to the Calibrate screen from the main menu,
you can check
- when your next calibration
is due.
- what daily calibration phase
you are in,
When you enter that calibration during 1 daily calibration phase, your next required calibration will be due in 24 hours.
In 2 daily calibration phase, your next calibration will be due in 12 hours
Let’s walk through this.
CALIBRATION TIMING
CALIBRATION TIMING
For example, if you are in
the 2 Daily Calibration Phase,
CALIBRATION TIMING
For example, if you are in
the 2 Daily Calibration Phase,
and today you choose to calibrate at 7pm
– which is earlier than you usually do –
For example, if you are in
the 2 Daily Calibration Phase,
your next required calibration time will adjust to be 7AM the following day.
and today you choose to calibrate at 7pm
– which is earlier than you usually do –
CALIBRATION TIMING
CALIBRATION TIMING
For example, if you are in
the 2 Daily Calibration Phase,
your next required calibration time will adjust to be 7AM the following day.
and today you choose to calibrate at 7pm
– which is earlier than you usually do –
You might decide that you always want to calibrate in the morning, after you shower, and after you’ve charged your Eversense E3 Smart Transmitter and changed your adhesive patch.
Then you can always do a morning calibration – even if it means calibrating early.

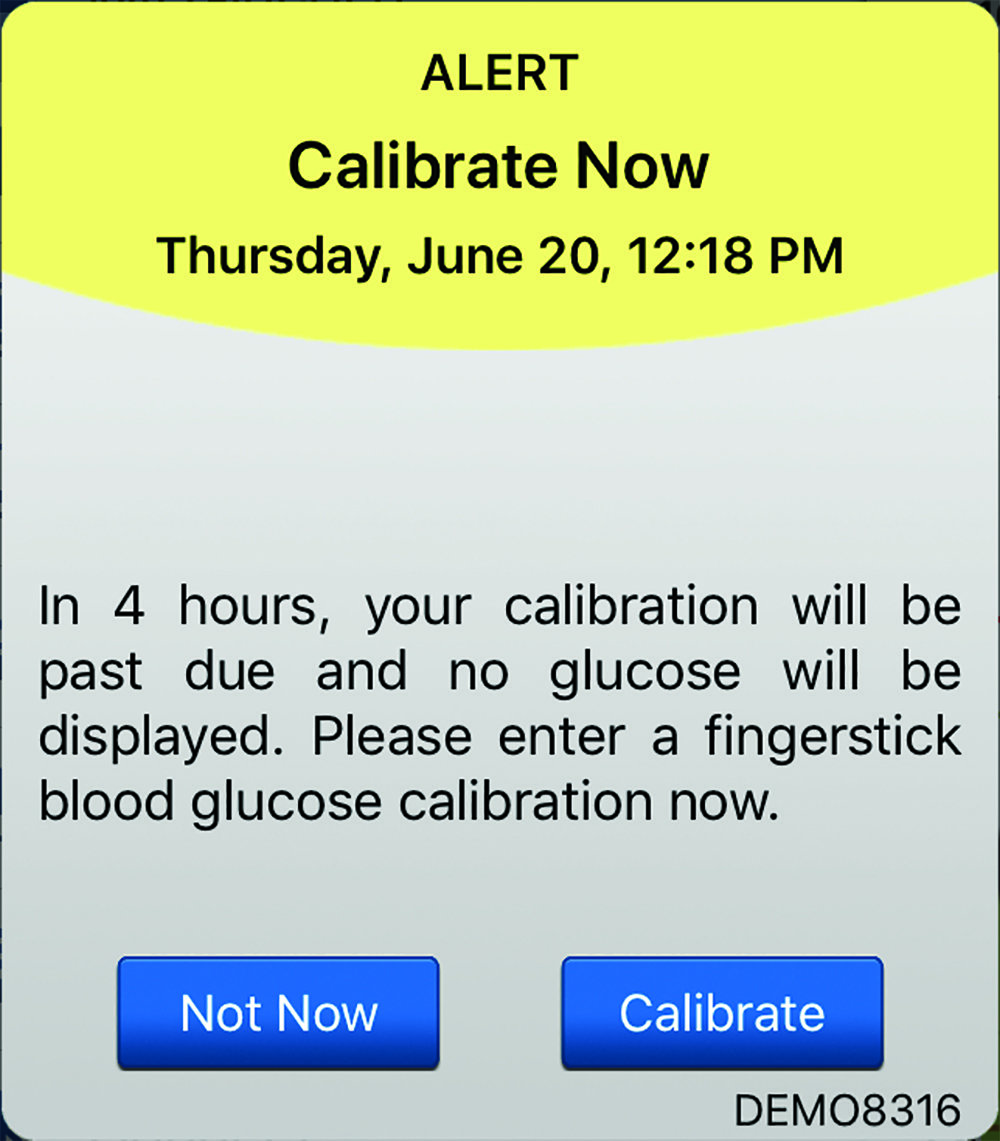
Please note that when you do receive the Calibrate Now alert,
you have a 4 hours window to complete the calibration to maintain uninterrupted access
to your CGM data.
CALIBRATION TIMING
If you ever need to look back and review any alert or notification that you have received, just go to the Main Menu
and tap Alert History.

ALERT HISTORY
You can sort by alert type using the icons at the top.
For more information, and a complete list of all system alerts and notifications, refer to your Eversense E3 User Guide.
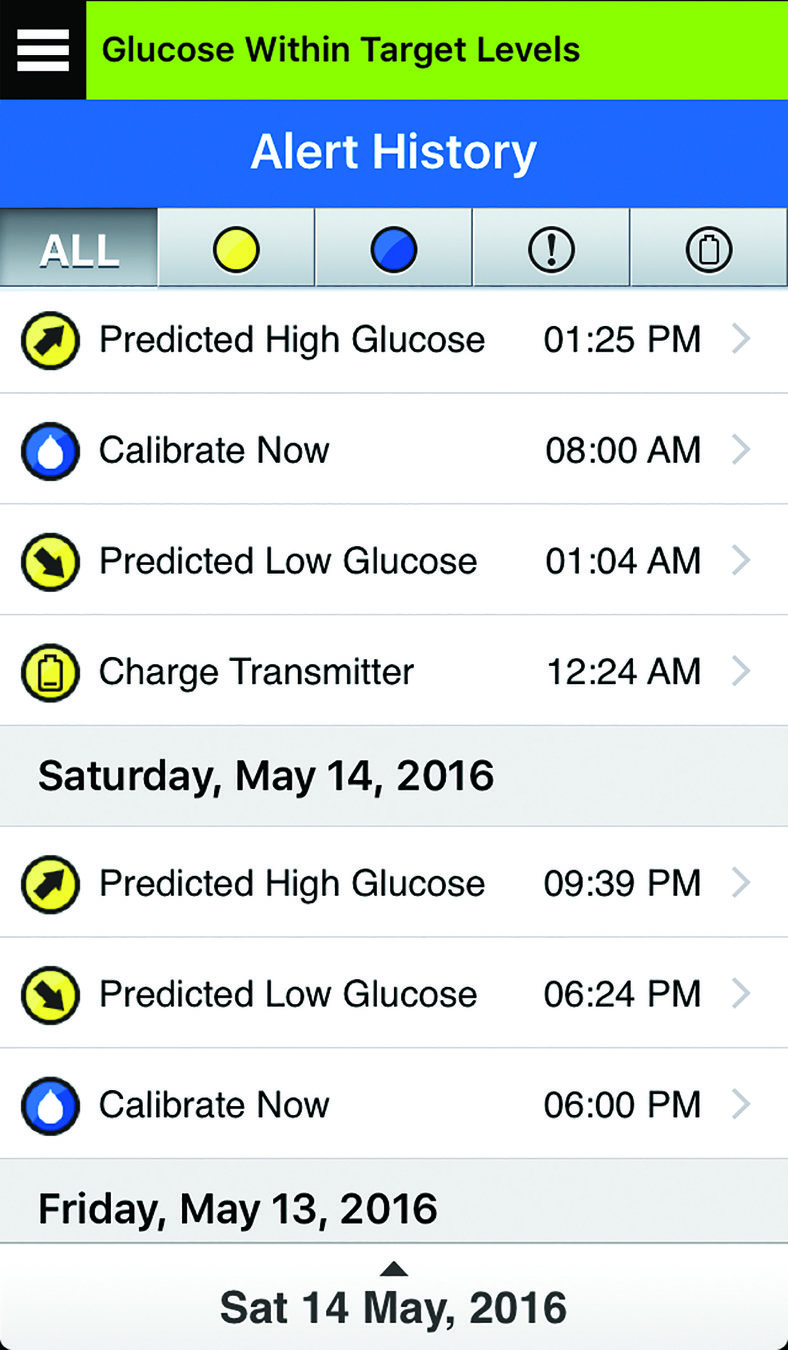
ALERT HISTORY
Here are a few tips about daily wear of the Eversense E3 CGM system from other successful Eversense users:
-
Establish a daily routine for charging your Eversense E3 Smart Transmitter,
and for changing your adhesive patch.
DAILY WEAR TIPS FOR SUCCESS
- Try both the white and clear adhesives to see which type works best for you under different circumstances.
- As mentioned, after the first 21 days of wear, you’ll be required to calibrate at least once daily. To establish a routine, it may be a good idea to do your required once daily calibration at a consistent time of the day – such as after a shower. That way, if you receive the notification that a second calibration is needed, you will know 12 hours in advance and you can plan for it.
DAILY WEAR TIPS FOR SUCCESS
- Additionally, you can set optional calibration reminders in your Eversense app by going to Main Menu →Settings→Calibration Reminders
- And when calibrating, always use your blood glucose meter and enter an actual blood glucose value obtained by fingerstick. Enter the calibration value within 10 minutes, and remember that your smart transmitter must stay on your arm for at least 5 minutes before and 15 minutes after you enter the calibration value.

DAILY WEAR TIPS FOR SUCCESS
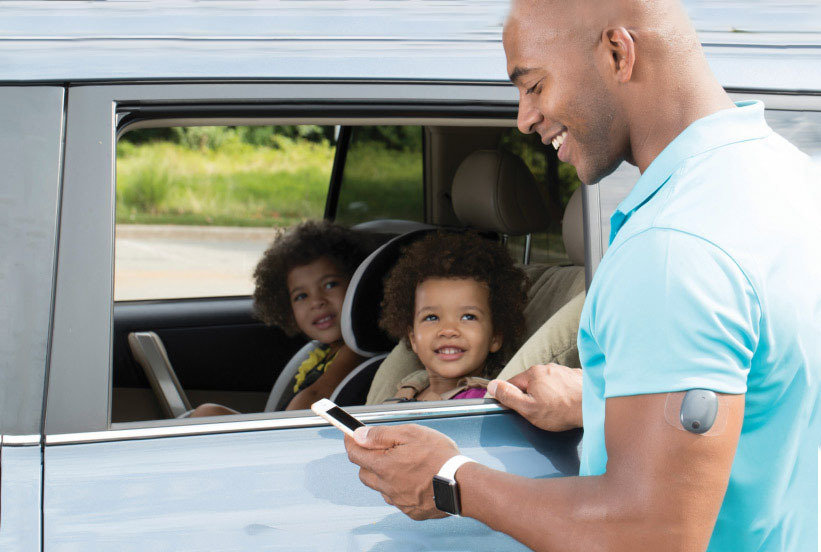
And one final note. With the Eversense E3 CGM system it’s easy to share your data with your healthcare provider, and with family and friends.
For more information checkout the tutorial video on "Sharing Your Data".
SHARING YOUR DATA
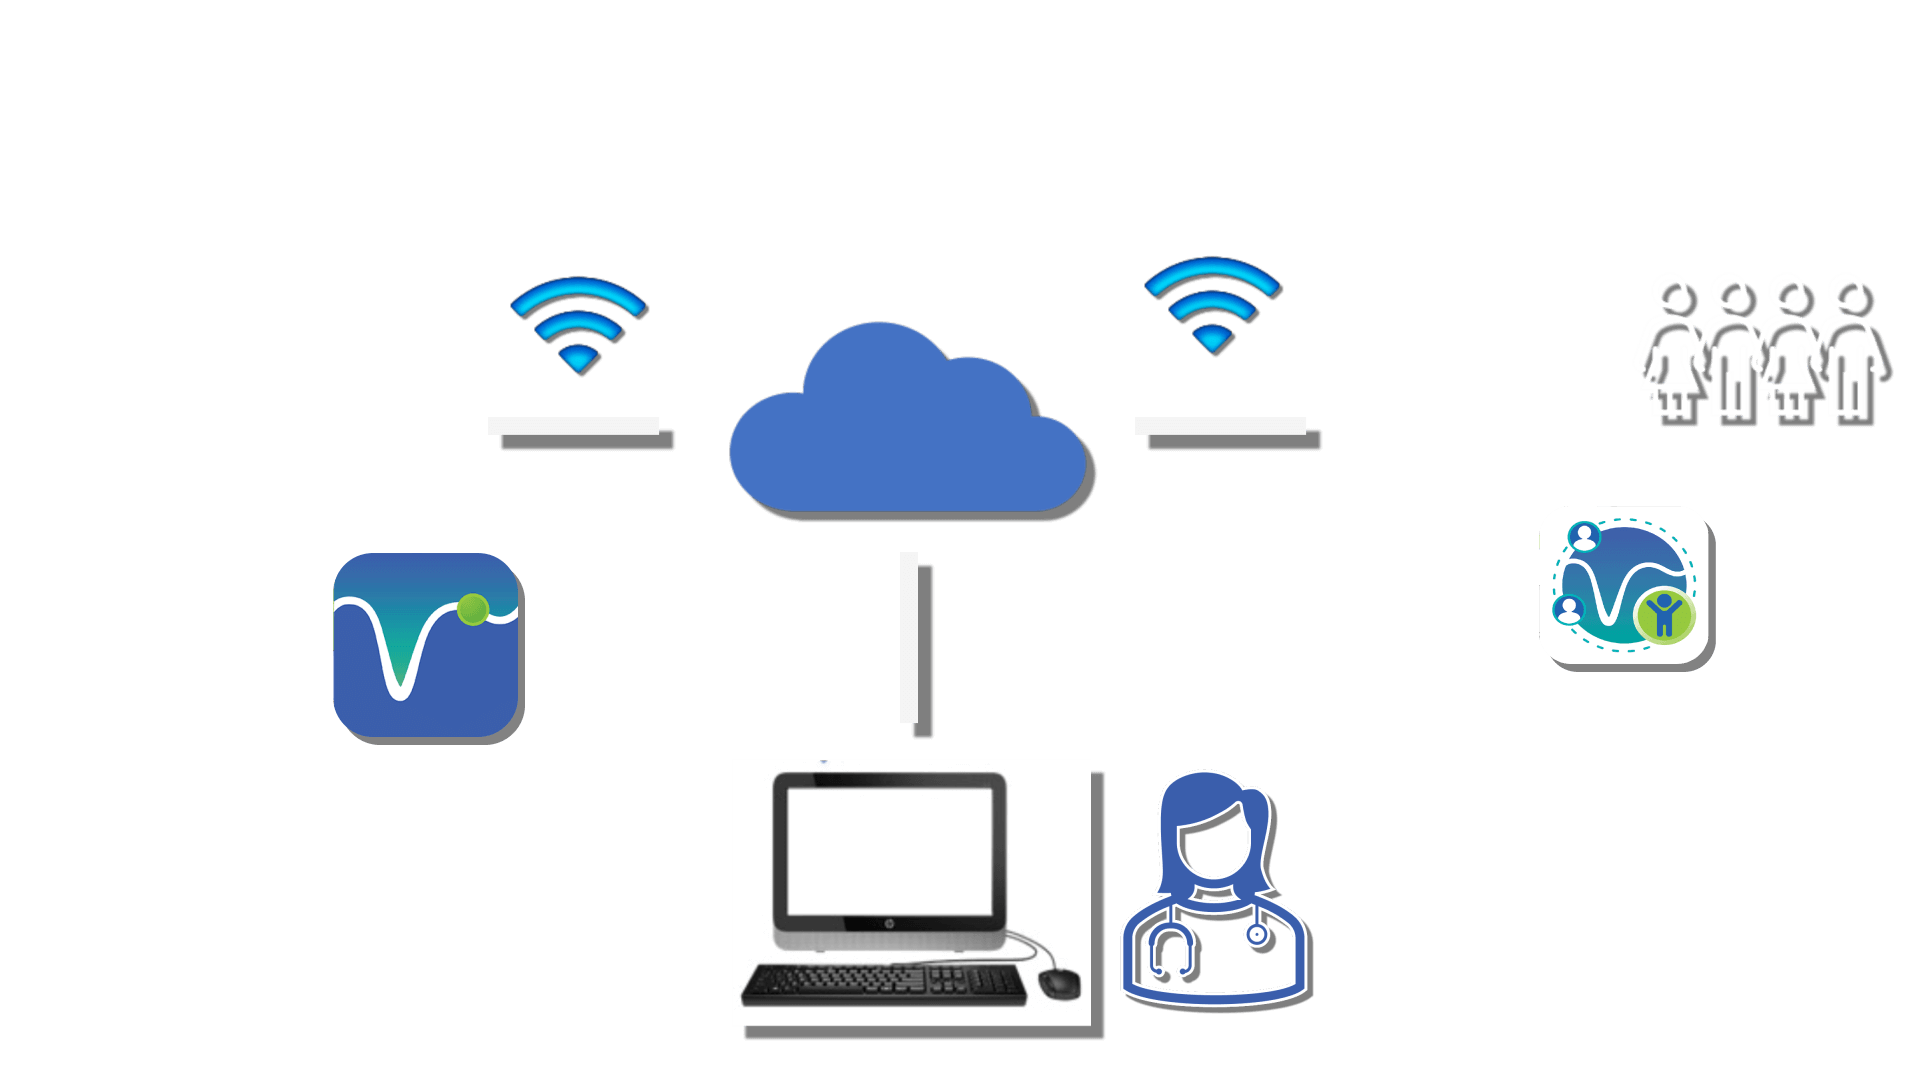
Eversense Cloud
Eversense DMS Pro
Eversense App
Eversense
NOW
Congratulations on completing the basic training on your Eversense E3 CGM!
Contact your health care provider if you have a medical question or concerns about your diabetes treatment plan.
And contact Eversense Customer Care
if you have technical questions about the Eversense E3 CGM System.
TRAINING COMPLETED